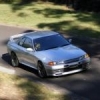
Jump to content
SAU Community

Recommended Posts

Hi everyone,

For sale is a front brake upgrade kit that will easily bolt on to your r32 gtst, gtr and R33 gsts, and will fit 18 inch rims. it can be ADR approved for your road rego.

The kit is 100% australian made in my engineering workshop located in Helensburgh nsw.

The kit includes:

Brackets machined in our state of the art CNC mill, 1030 grade steel.

Rotors are 434mm dia and the top of the line DBA 4000 series T slot that have thermo paint so you can see how hard you have pushed.

Braded stainless steel hoses have all the relivent ADR stamping for road use.

Pads were chosen for their high performance and with maximum rotor life.

Fluid is ELF racing fluid 5.1

Bolts and high tensile

Spares are available for everything when needed.

Free delivery in sydney and illawarra.

Only $1400.

Cheers

Colin

0416090676

[email protected]

post-84415-0-31587500-1388883796.jpgpost-84415-0-80352400-1388883812_thumb.jpgpost-84415-0-33216000-1388883828_thumb.jpg

Link to comment
https://www.sau.com.au/forums/topic/437149-front-brake-upgrade-r32-r33/
Share on other sites

Do you sell the R32 GTR Dog bone brakets on their own for the Nissan Sumitomo calipers?

If so how much, wondering the price diffrence with yours for 343mm to the current ones on the market for a 324mm front conversion?

Sounds like your using a 343mm front rotor from the Harrop upgraded VT to VZ HSV models which are also 32mm thick.

Quite a bit of that rotor wont see pad contact on the inside without bigger calipers.

Edited by GTRPSI
  • Like 1

thanks GTSBoy nice pick up :) i was a bit tired when i posted.

thanks GTRPSI for the interest, the rotors DBA supply me have their own order unique order number, i couldnt tell you if they are used for any other model they wouldnt tell me. im not sure of the other kit you mention, the brakets are only available as part of the full kit.

Hi gtr jet, thanks for your interest, the specs of the rotors are DBA series 4000 "T" slotted, these are hardened and ground they are 343mm dia and 32mm thick, they are arguably the best rotors made in Australia, this is why they were selected.

These DBA rotors are custom made and will only suit the offset of our dog bone brakets. spare rotors are available when needed but you would be doing well wearing these things out. I could give you the order number but you would have to find a DBA distributer and there is a minimum level you would have to order.

One of the reasons we decided to make this kit was becuase my mate bought a cheap imported kit that didnt impress us.......the problems were the supply of spare parts and the quality, we needed to buy rotors and they said we had to buy the entire kit again to get them.

So our thinking was that there was a need for a top of the line kit that was still within peoples budget with replacement parts readily available, and made proudly locally in Australia.

Thanks for the reply mate. The reason I asked is because I'm looking for that sized rotor with an offset to fit my calipers.

Would you mind giving me the dimensions of your rotors and if they fit I'll grab some off you?

no worries im more than happy to help, at the moment however im just selling the kits as a full kit, the chances of these rotors having the correct offset would next to nothing as they were made to suit our dog bone which is unique. sorry i couldnt be more help.

  • Like 1

Hi The sherrid, i have had a engineering report done on the kit, and i am working closely with an engineering company that can sign them off, i can pass on their details to you if you like.

thanks for the question

Thank for the support :) we love our track days !!!

As an added incentive im happy to have kits fitted by our licenced MTA approved mechanic in helensburgh, for everyone that contacts and buys through Skylines australia forum :)

  • 2 weeks later...
  • 2 weeks later...
  • 1 month later...
  • 5 weeks later...

Create an account or sign in to comment

You need to be a member in order to leave a comment

Create an account

Sign up for a new account in our community. It's easy!

Register a new account

Sign in

Already have an account? Sign in here.

Sign In Now


  • Similar Content

  • Latest Posts

    • Who did you have do the installation? I actually know someone who is VERY familiar with the AVS gear. The main point of contact though would be your installer.   Where are you based in NZ?
    • Look, realistically, those are some fairly chunky connectors and wires so it is a reasonably fair bet that that loom was involved in the redirection of the fuel pump and/or ECU/ignition power for the immobiliser. It's also fair to be that the new immobiliser is essentially the same thing as the old one, and so it probably needs the same stuff done to make it do what it has to do. Given that you are talking about a car that no-one else here is familiar with (I mean your exact car) and an alarm that I've never heard of before and so probably not many others are familiar with, and that some wire monkey has been messing with it out of our sight, it seems reasonable that the wire monkey should be fixing this.
    • Wheel alignment immediately. Not "when I get around to it". And further to what Duncan said - you cannot just put camber arms on and shorten them. You will introduce bump steer far in excess of what the car had with stock arms. You need adjustable tension arms and they need to be shortened also. The simplest approach is to shorten them the same % as the stock ones. This will not be correct or optimal, but it will be better than any other guess. The correct way to set the lengths of both arms is to use a properly built/set up bump steer gauge and trial and error the adjustments until you hit the camber you need and want and have minimum bump steer in the range of motion that the wheel is expected to travel. And what Duncan said about toe is also very true. And you cannot change the camber arm without also affecting toe. So when you have adjustable arms on the back of a Skyline, the car either needs to go to a talented wheel aligner (not your local tyre shop dropout), or you need to be able to do this stuff yourself at home. Guess which approach I have taken? I have built my own gear for camber, toe and bump steer measurement and I do all this on the flattest bit of concrete I have, with some shims under the tyres on one side to level the car.
    • Thought I would get some advice from others on this situation.    Relevant info: R33 GTS25t Link G4x ECU Walbro 255LPH w/ OEM FP Relay (No relay mod) Scenario: I accidentally messed up my old AVS S5 (rev.1) at the start of the year and the cars been immobilised. Also the siren BBU has completely failed; so I decided to upgrade it.  I got a newer AVS S5 (rev.2?) installed on Friday. The guy removed the old one and its immobilisers. Tried to start it; the car cranks but doesnt start.  The new one was installed and all the alarm functions seem to be working as they should; still wouldn't start Went to bed; got up on Friday morning and decided to have a look into the no start problem. Found the car completely dead.  Charged the battery; plugged it back in and found the brake lights were stuck on.  Unplugging the brake pedal switch the lights turn off. Plug it back in and theyre stuck on again. I tested the switch (continuity test and resistance); all looks good (0-1kohm).  On talking to AVS; found its because of the rubber stopper on the brake pedal; sure enough the middle of it is missing so have ordered a new one. One of those wear items; which was confusing what was going on However when I try unplugging the STOP Light fuses (under the dash and under the hood) the brake light still stays on. Should those fuses not cut the brake light circuit?  I then checked the ECU; FP Speed Error.  Testing the pump again; I can hear the relay clicking every time I switch it to ON. I unplugged the pump and put the multimeter across the plug. No continuity; im seeing 0.6V (ECU signal?) and when it switches the relay I think its like 20mA or 200mA). Not seeing 12.4V / 7-9A. As far as I know; the Fuel Pump was wired through one of the immobiliser relays on the old alarm.  He pulled some thick gauged harness out with the old alarm wiring; which looks to me like it was to bridge connections into the immobilisers? Before it got immobilised it was running just fine.  Im at a loss to why the FP is getting no voltage; I thought maybe the FP was faulty (even though I havent even done 50km on the new pump) but no voltage at the harness plug.  Questions: Could it be he didnt reconnect the fuel pump when testing it after the old alarm removal (before installing the new alarm)?  Is this a case of bridging to the brake lights instead of the fuel pump circuit? It's a bit beyond me as I dont do a lot with electrical; so have tried my best to diagnose what I think seems to make sense.  Seeking advice if theres for sure an issue with the alarm install to get him back here; or if I do infact, need an auto electrician to diagnose it. 
    • Then, shorten them by 1cm, drop the car back down and have a visual look (or even better, use a spirit level across the wheel to see if you have less camber than before. You still want something like 1.5 for road use. Alternatively, if you have adjustable rear ride height (I assume you do if you have extreme camber wear), raise the suspension back to standard height until you can get it all aligned properly. Finally, keep in mind that wear on the inside of the tyre can be for incorrect toe, not just camber
×
×
  • Create New...