Jump to content
SAU Community

Recommended Posts

I would like to know how much i should budget to rebuild my rb20.

there is nothing wrong with it apart from a few ks on it.

I just want to do a propper rebuild and need to know what to do

I guess get the block chemically cleaned and honed machining journals? how much?

have pistons balanced do i need new pistons? how much?

get the rods balanced?

rod bolts?

bearings, rings, gaskets, valves, springs

having never undertaken a rebuild i dont know how much to budget.

I want the bottom ent to cope with 210-220 rwkw so nothing to special

can anyone recommend a place in sydney that will do the lot for me? ie drop off motor pick up rebuilt later?

can you save cash doing some work yourself?

thanks

Link to comment
https://www.sau.com.au/forums/topic/54800-rb20-rebuild-budget/
Share on other sites

You carnt machine it your self but you can assemble it your self .

You need the right tention settings for rods bolts and heads bolts and other things. Just be careful putting rings on pistons beceause if they break you have to buy whole new set of pistons because you carnt get them seperate - That i know of.

I'd go forged pistons to keep your enigne stronger so it lasts in the long run.

:mad:

Jun

ceffie that motor was pretty good 12 months ago it had the head off and it was checked only had aroudn 70000 klms then and the car had 100 and something dont spend the cash till it blows if you want to run up to 200- 220 bolt in an rb 25 there are alot of good reasons for this namely the injectors will handel that much power its torquier etc.

the reason it has a little bit less power than the other cefs is the motor is from an r32 not a cefiro ceffies have bigger cams

yes I'm pretty sure it was my old black ceff

cheers

meggala

G'day fellas, I'm pretty new to this so bare with me. I wish I found this forum earlier. I recently had an ordinary experience with an engine rebuild. I had my r32 gtst for about 2 years when I blew the engine while in the gong. I live in neutral bay so I got the car towed to a workshop in brookvale that I had the car serviced at previously. They said they did rebuilds so I got a quote and they got started. It was supposed to have Arias forged pistons, metal head gasket, HKS cam gears, Tomei cams, the usual head work/machining etc.

Anyway, the basics are, I know very little about the mechanical side, I don't work on cars myself, but I had the money to have some fun with it. I handed over a Chq for half of what I intended to spend, six months later, the knob hadn't even started ordering parts for the car. I was losing it. I ended up getting the car back, engine rebuilt, yet without cams, cam gears, metal head gasket. Basically headwork and pistons. The guy is a complete rort. I'm currently compiling a court case.

Sorry about the long winded whinge, just be careful who you trust.

ceffie that motor was pretty good 12 months ago it had the head off and it was checked only had aroudn 70000 klms then and the car had 100 and something dont spend the cash till it blows if you want to run up to 200- 220 bolt in an rb 25 there are alot of good reasons for this namely  the injectors will handel that much power its torquier etc.

the reason it has a little bit less power than the other cefs is the motor is from an r32 not a cefiro ceffies have bigger cams


yes I'm pretty sure it was my old black ceff

cheers

meggala

Hi Megalla ;) yep its your old car i just didnt want to bug you too much :rofl: i didnt want to ask you every little detail of the car as its not your problem anymore.

Yeah the engine still seems fine except when i am maximum throttle and rev it to 7k then change gears and give it gas it pings just a little untill the revs get back up over 5k and then its fine.

I have had the A/F ratios checked and they are fine.

mods i have done since having the car

FMIC 600 x 300 + waterspray kit

new injectors just cleaned and flowtested

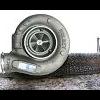
RB25 turb slightly hiflowed

turb back exhaust 3" "with cat thistime" hehe!

oil catch can

custom air intake/box

bigger fuel pump

Did u do any work on the bottom end Steve? or did you just replace the burnt valve?

Cheers mate :rant:

what r u driving now?

If you are after 200-210rwks then all things being equal the engine will handle that no prob.

If it dies and you find you werent happy with that power then just throw in an RB25, but i wouldnt go re-building the RB20 especially if its alive and running:cheers:

If you are keen to rebuild the RB20 the two thing I would do is use 81-82mm pistons to bump up the capacity a little and when slecting the pistons id try and lift compression a little to around 8.8:1. Then i would clean up the ports and combustion chambers and throw in a set of cams to try and get the head flowing a bit better. So thats 3 things, pistons, cams and headwork...without the cams and headwork the thing will be tough as nails but never really make any good numbers:(

Id stick with std rods, std crank and enjoy what would be a pretty surprising and very tough engine....sadly a std RB25 will more likely make more power easier, and you would have to be looking at over 250rwkws before the RB20 with internals could be seen as beign more reliable then a std RB25 with a high flow turbo or HKS2535 etc

Basically if you are opening up an RB20 you have to go stupid to make it worth it, otherwise just keep throwing std engines at it...my 2c

Ok my dream RB20 (its a dream engine as it makes no sense in the real world where you need bang for dollar)

- 82mm forged pistons.

- RB26 crank

- Aftermarket GTR rods, Argo etc etc

- N1 GTR water and oil pumps

- 270 - 9.2mm cams and springs

- Plenty of headwork

- Extrude honed inlet manifold with larger throttle body

- Tomei Solid lifter kit

- HPC coated valves and combustion chamber

- HKS 3037S or maybe a T04Z

- 650cc injectors

- twin palte clutch

- RB25 5-spd

The thing would rev its t1ts off, with the same stroke as an RB26 but with smaller diam (ie lighter pistons) it would easily rev as hard as a tweaked RB26 , imagine 9,000rpm and banshee sound from the wastegate.

With the 3037S it would be reasonalby responsive at 2.4L and 8.8:1 compression. Id assume it woudl make 320-350rwkws at between 1.4-1.8bar

With the T04Z it would likely make over 350rwkws.. hell i even thought how would the RB20 block go with a HKS 2.8L crank!!!! Throw somthing like the HKS T04Z on an R31 GTSR low mount manifold and ppl wouldnt expect anything from the stock looking (ok maybe not sounding:)) RB20, complete with original RB20 engine number,

going out to 82 mm bore is very oversize....that must be getting close to the water jackets ?? not such a great idea on turbo engines ????

has any taken the bore out this far ???

i just got 0.5mm oversize done with Arias Pistons so prices were as follows

Bore Block - $180

Line Hone - $240

Balance of Crank,rods and pistons - $280

Deck Block $65

(New Pistons had a range of 2 grams now an even 297.5g)

hope that helps

It will cost an extra 1k or so but I would seriously look at building up an RB25 instead.

Take one for a spin and you will soon realise why the old saying of 'There's no replacement for displacement' is so so true.

The RB25 is a simple drop it in exercise providing you go with the RB25DE NA head.

I went for the RB30 bottom end rebuild that required a few little mods like engine mounts, front pipe and turbo oil/water lines. Nothing major though. The mods all up cost an extra $150. That was $70 for the engine mounts and $80 for the dump pipe.

The other mods (slight bending of the oil/water lines) can be done by your self.

I really am so so glad I went with the larger motor and didn't waste money on rebuilding a rb20. With the turbo's wastegate disabled (wired fully open) it made 133rwkw at 5000rpm (where power started to flatten out & because it is a fairly fresh motor it wasn't rev'd any more) with an AFR of 11:1 and ignition timing of 15deg, stock turbo & stock RB20DET ECU.

Even with the wastegate wired fully open it still made 6psi of boost above 4000rpm.

Below 3500rpm there is zero boost.

Create an account or sign in to comment

You need to be a member in order to leave a comment

Create an account

Sign up for a new account in our community. It's easy!

Register a new account

Sign in

Already have an account? Sign in here.

Sign In Now


  • Similar Content

  • Latest Posts

    • From there, it is really just test and assemble. Plug the adapter cables from the unit into the back of the screen, then the other side to the car harness. Don't forget all the other plugs too! Run the cables behind the unit and screw it back into place (4 screws) and you should now have 3 cables to run from the top screen to the android unit. I ran them along the DS of the other AV units in the gap between their backets and the console, and used some corrugated tubing on the sharp edges of the bracket so the wires were safe. Plug the centre console and lower screen in temporarily and turn the car to ACC, the AV should fire up as normal. Hold the back button for 3 sec and Android should appear on the top screen. You need to set the input to Aux for audio (more on that later). I put the unit under the AC duct in the centre console, with the wifi antenna on top of the AC duct near the shifter, the bluetooth antenna on the AC duct under the centre console The GPS unit on top of the DS to AC duct; they all seem to work OK there are are out of the way. Neat cable routing is a pain. For the drive recorder I mounted it near the rear view mirror and run the cable in the headlining, across the a pillar and then down the inside of the a pillar seal to the DS lower dash. From there it goes across and to one USB input for the unit. The second USB input is attached to the ECUtec OBD dongle and the 3rd goes to the USB bulkhead connected I added in the centre console. This is how the centre console looks "tidied" up Note I didn't install the provided speaker, didn't use the 2.5mm IPod in line or the piggyback loom for the Ipod or change any DIP switches; they seem to only be required if you need to use the Ipod input rather than the AUX input. That's it, install done, I'll follow up with a separate post on how the unit works, but in summary it retains all factory functions and inputs (so I still use my phone to the car for calls), reverse still works like factory etc.
    • Place the new daughterboard in the case and mount it using the 3 small black rivets provided, and reconnect the 3 factory ribbon cables to the new board Then, use the 3 piggyback cables from the daughterboard into the factory board on top (there are stand offs in the case to keep them apart. and remember to reconnect the antenna and rear cover fan wires. 1 screw to hold the motherboard in place. Before closing the case, make a hole in the sticker covering a hole in the case and run the cable for the android unit into the plug there. The video forgot this step, so did I, so will you probably. Then redo the 4 screws on back, 2 each top and bottom, 3 each side and put the 2 brackets back on.....all ready to go and not that tricky really.      
    • Onto the android unit. You need to remove the top screen because there is a daughterboard to put inside the case. Each side vent pops out from clips; start at the bottom and carefully remove upwards (use a trim remover tool to avoid breaking anything). Then the lower screen and controls come out, 4 screws, a couple of clips (including 3 flimsy ones at the top) and 3 plugs on the rear. Then the upper screen, 4 screws and a bunch of plugs and she is out. From there, remove the mounting brackets (2 screws each), 4 screws on the rear, 2 screws top and bottom and 3 screws holding in the small plates on each side. When you remove the back cover (tight fit), watch out for the power cable for the fan, I removed it so I could put the back aside. The mainboard is held in by 1 screw in the middle, 1 aerial at the top and 3 ribbon cables. If you've ever done any laptop stuff the ribbon cables are OK to work with, just pop up the retainer and they slide out. If you are not familiar just grab a 12 year old from an iphone factory, they will know how it works The case should now look like this:
    • Switching the console was tricky. First there were 6 screws to remove, and also the little adapter loom and its screws had to come out. Also don't forget to remove the 2 screws holding the central locking receiver. Then there are 4 clips on either side....these were very tight in this case and needed careful persuading with a long flat screw driver....some force required but not enough to break them...this was probably the fiddliest part of the whole job. In my case I needed both the wiring loom and the central locking receiver module to swap across to the new one. That was it for the console, so "assembly is the reverse of disassembly"
    • But first....while I was there, I also swapped across the centre console box for the other style where the AV inputs don't intrude into the (very limited !) space.  Part# was 96926-4GA0A, 284H3-4GA0B, 284H3-4GA0A. (I've already swapped the top 12v socket for a USB bulkhead in this pic, it fit the hole without modification:) Comparison of the 2: Basically to do the console you need to remove the DS and PS side console trim (they slide up and back, held in by clips only) Then remove the back half of the console top trim with the cupholders, pops up, all clips again but be careful at the front as it is pretty flimsy. Then slide the shifter boot down, remove the spring clip, loose it forever somewhere in the car the pull the shift knob off. Remove the tiny plastic piece on DS near "P" and use something thin and long (most screwdrivers won't fit) to push down the interlock and put the shifter down in D for space. There is one screw at the front, then the shifter surround and ashtray lift up. There are 3 or 4 plugs underneath and it is off. Next is the rear cover of the centre console; you need to open the console lid, pop off the trim covering the lid hinge and undo the 2rd screw from the driver's side (the rest all need to come out later so you can do them all now and remove the lid) Then the rear cover unclips (6 clips), start at the top with a trim tool pulling backwards. Once it is off there are 2 screws facing rearwards to remove (need a short phillips for these) and you are done with the rear of the console. There are 4 plugs at the A/V box to unclip Then there are 2 screws at the front of the console, and 2 clips (pull up and back) and the console will come out.
×
×
  • Create New...