


lwells
-
Posts
3,532 -
Joined
-
Last visited
-
Feedback
100%
Content Type
Profiles
Forums
Events
Gallery
Media Demo
Store
Everything posted by lwells
-
It shouldn't be too difficult without the additional 1cm in height but as I said, I was concerned the sensors might be slightly different and I have no desire to rip things out yet again. Perhaps you ordered the R33 or R34 version of the pipes, hence no adaptor? Regardless, you'll need that bag as it has the stainless steel studs and nuts; as I said above the studs are slightly shorter so you can just fit a nut on. I'll be interested to hear if you also have a problem with fitting one of the nuts on (ie. it physically will not fit no matter what). Although the pipes are beautifully made, I'm not all that impressed with Trust selling an item that has a number of fundamental problems when you actually come to install them (atleast on a R32 GT-R; I can confirm I had the appropriate version too as the box clearly states R32). One thing I have noticed is that the sound of wastegate gasses dumping is much louder than previously. Objectively its not hugely loud compared to some of the aftermarket bovs, but its noticeable.
-
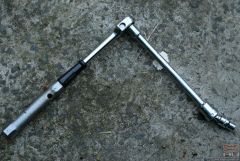
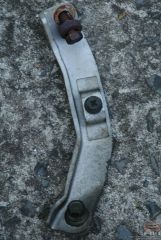
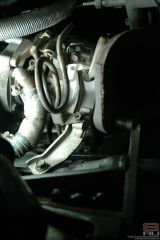
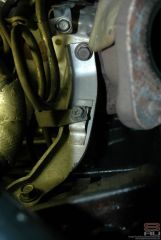
Well, I can't let the fans down 1) Aircon Discharge Pipe: I removed the pipe and cut the rubber just after it makes its 90 degree turn down towards the ground (ie. almost all the bit pointing down). I then got some copper pipe and bent it in to the same basic shape. Using a ring clamp, I applied some silicon around the top of the copper pipe, slid it in to the remainder of the original rubber piping (ie. the very top bit that plugs in to the firewall), did the clamp up very tight, then used some more silicon around the edge where the rubber and copper were joined. I then removed the plastic clip that holds the bottom of the discharge pipe in place. I went and bought a metal "banana clip" (from Auto1) which had a sort of groove/holder that was perfectly shaped/sized for running a small ring clamp through (~20mm variety). So I simply put the ring clamp in the groove and used some pliers to push the sides of the groove together to hold the clamp. It fitted the hole the original clip was in perfectly; slide the clamp over the end of the copper pipe, did it up, and fanny's your aunt. I should grab some photos as it makes a lot more sense in pictures 2) Rear dump + O2 sensor: I fitted the O2 sensors before installing the dumps because I remembered how hard it was to try and install them later. Richard: the pipes are designed to take the R33/34 GT-R sensors, but Trust includes a little adapter that screws in to the hole and reduces the size so you can fit the R32 variety (R31Nismoid: this is included with the front pipes in the bag of nuts/studs/etc). However -- and this is what wrxhoon is asking about -- the ~1cm increase in height caused by the adaptor makes the top of the rear O2 sensor hit the coolant/vacuum lines that run around from the back of the block. Unfortunately the SAU gallery is down, but there are two lines that emerge from behind the engine and are held in place by a bracket towards the back on the right hand side of the engine. With a fsck load of fiddling I managed to get the lines back on the bracket, and the bracket screwed on to the head/block. The lines are pushing against the top of the O2 sensor, but apart from taking drastic action by attacking the top of the sensor or the bracket there doesn't seem a better way. It may well have bent my O2 sensor.. who knows? With R33/34 sensors this should be a lot easier but I was a little concerned after reading the oxygen sensor thread in general maintainence that there might be some slight differences in composition of the O2 sensors and thus cause issues with the ECU getting correct readings. 3) Support bars: The Trust pipes do not have anyway to attach them to the bell-house support bars. I had a quick chat to Gary (SydneyKid) about the viability of running without the supports and it was his opinion that it would be a mistake as any weight would be taken by the gearbox mounting (where the cat attaches) which is rubber and obviously moves, hence is useless. I had a decent think about this and came up with the idea of welding on a nut to the dump pipes so I could attach the support bar. So what I did was test fit each of the turbo + dump + manifold assemblies (individually as it was easier). I then played around with the support bars until I could find an angle so that they were attached to the bell housing but would also be at about the right angle / on the right plan so it could be attached to the dump pipe once a nut was welded. I then marked the approximate positions as best I could on the dump pipes, grabbed some nuts, and had an exhaust shop weld them on in the designated spots. On a tangent, f**k me dead if the welder didn't just hold the nut with bare fingers and no eye protection whilst he tacked it in place (and then grabbed some protection when building up the weld). They be real men in Oak Flats (oh and thanks to 2rismo for the recommendation of Oak Flats Muffler Men). I also had to modify the support bars. The rear bar needs a small chunk taken out otherwise it hits a rib on the side of the block. It also needs to be bent in to shape. The front bar requires much more drastic modification; I basically had to chop a good third off, remove the middle mounting point for the coolant (or is it oil?) line, redrill a slot for a screw, bend it in to the right shape, etc. Much to my suprise when I did a final test fit (urgh... took two test fits for each turbo before the final proper fit..... got sick and tired pulling the turbo/dump/manifokds in/out really quickly) everything was almost exactly spot on. I tiny bit more bending and everything was peachy. I also fabricated a small piece of aluminium so I could attach the rear coolant (or is it oil) line to the middle hole on the rear support bar. I just cut of the little bracket on the front coolant (oil?) line as there is no way I can connect it to the modified front support bar. I am extremely pleased with how this turned out given the extreme time pressure we (my dad and I) were under on that day and how it all could have been way too hard. 4) Installing the dump pipes on to the turbos: You will need to use the included studs in the turbo as the piping of the dumps is angled such that longer studs will mean you can't actually screw it down. There is also a design fault in that it was simply impossible to install one of the nuts; it would not fit. I had to file down the pipes and flange a little and take off the top of one of the nuts with a bench grinder before I could actually get the nut to fit without hitting the piping (sorry, can't remember exactly which dump it was). Trust also laughably includes locking nuts (ie. the thread inside tapers), but there is no way to do them up enough so that they actually start to lock. Also, the turbo-->dump gaskets they include are that will shaped so in certain (inner) areas of the gasket are very close to the edges of the flange. Be careful when placing them 5) Installation into the car: The rear turbo was very hard to get in place because of the length of the dump pipe; it hits the side of the gearbox or part of the chassis directly opposite and takes a lot of twisting and turning. If I recall correctly (IIRC), the best method was to try and place it in as it would sit and then rotate it counter clockwise (ie. towards the engine), slide it further down, then rotate it back. Again, IIRC I also had to place the manifold on at the same time because it wouldn't fit once the turbo/dump were sitting in the engine bay. The front was much easier although again having to put it in with the manifold at the same time is a PITA. The good news is that actually doing up the nuts that hold the manifolds on to the head was much much easier; I was able to get the torque wrench on every nut (unlike the OEM setup where I could only get access to about 1/2 the nuts with a wrench and the rest only with spanners). Likewise you can torque 3 of the four turbo-->manifold bolts on each turbo with a wrench; you'll need a spanner for one on each (the bastard one that sits under a manifold runner). Hope that covers most questions.
-
I just (as in a week ago) installed a set of GT-SS turbos with those trick Greddy/Trust Front Extension pipes (you know, the ones with the long wastegate split). I can't comment much on how they feel as I have been driving extremely cautiously because I am uncertain what the fuel mixture is like (at a rough guess extremely rich, but better safe than sorry until its tuned). I have noticed that, running off the stock soleniod with the boost restrictor in place, boost builds almost exactly at the same time as the OEM turbos, so you get the benefits of decent spool plus they can breath heavier than the OEMs. I went down the path of the Garret vs HKS thing. The HKS's have ever so slightly different specs (although how much of that is due to rounding to a different decimal place I'm not sure) and also has the benefit of being a bolt-on kit; the Garrets went up in price just before I made my purchase and since they are simply turbo + actuator, there is still a couple of hundred in parts (gaskets/studs/nuts/cooper washers/etc) to get so the price differential is not as great as it looked at first blush. Keep in mind, however, that the HKS kit skimps in certain places: it does not include manifold-to-turbo or turbo-to-dump pipe gaskets or replacement locking tabs for the turbo-to-manifold nuts The turbos are very easy to install -- as Ash said they have an install sheet, but its all in Japanese and when I contacted HKS Europe they said its exactly the same as the workshop manual -- although the same can't be said for the Greddy/Trust dumps which are absolute mongrels to install. Hope that helps some. Any questions, fire away...
-
I had a bit of a look in FAST last night. There are quite a few bits in the window mechanism and they are given helpful descriptions like "grommet" with no other explaination. If anyone has taken their door apart and has some photos of what is casuing the scratches I could try and match it up with the FAST diagrams (I'll post them up tomorrow).
-
Negatives include the potential to blow one or both of the exhaust wheels of the stock turbos. If you're really unlucky, you could also get reversion of ceramic dust and munch your engine. Another possibility is that your air/fuel ratios will be out of whack with the potential to run lean.
-

Rb26 & R32 Gtr Parts For Sale
lwells replied to danh's topic in For Sale (Private Car Parts and Accessories)
Whilst I would prefer both, I really need the center vent more than the others, so that would work -
Tutorial: R32 Gt-r Radiator Removal And Coolant Flush
lwells replied to lwells's topic in Tutorials / DIY / FAQ
Fixed the photos. Will try and fix some of the remaining broken links and reformat a bit when time permits -
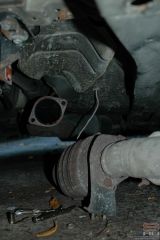
From the album: lwells's Gallery
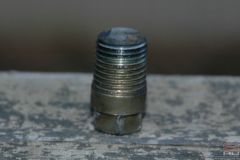
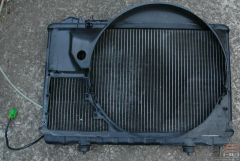
coolant and radiator flush -
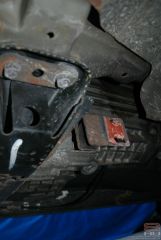
From the album: lwells's Gallery
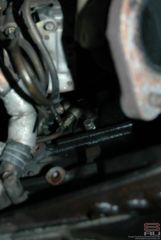
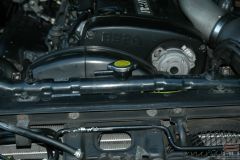
coolant and radiator flush -
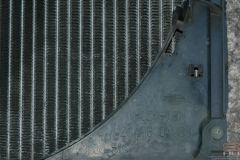
From the album: lwells's Gallery
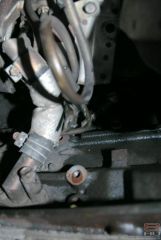
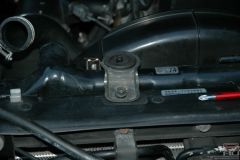
coolant and radiator flush -
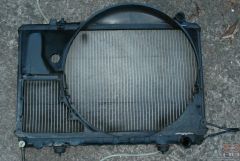
From the album: lwells's Gallery
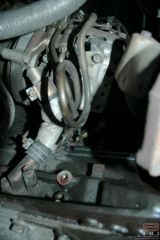
coolant and radiator flush -
From the album: lwells's Gallery
coolant and radiator flush -
From the album: lwells's Gallery
coolant and radiator flush -

From the album: lwells's Gallery
coolant and radiator flush -
From the album: lwells's Gallery
coolant and radiator flush -
From the album: lwells's Gallery
coolant and radiator flush -
From the album: lwells's Gallery
coolant and radiator flush -
From the album: lwells's Gallery
coolant and radiator flush -

From the album: lwells's Gallery
coolant and radiator flush -

From the album: lwells's Gallery
coolant and radiator flush -
From the album: lwells's Gallery
coolant and radiator flush -
From the album: lwells's Gallery
coolant and radiator flush -
From the album: lwells's Gallery
coolant and radiator flush -
From the album: lwells's Gallery
coolant and radiator flush -
From the album: lwells's Gallery
coolant and radiator flush


