Jump to content
SAU Community

Recommended Posts

I've been searching the net for all info on 5 star shine and this is what I come up with. There are people who love it (They actually used it before), people who say it's a scam (they never used it or seen it.. they never really looked at the product for what it is), and a couple of people who don't like it (because they didn't know how to use it).

$70 a kit

1) It doesn't last 5 years worth of washings.. most say it lasts a little over a year.

2) It's very slick and shiny but it's still not better than high end carnauba waxes or other less expensive waxes that give that deep show quality shine.

3) It IS the best protectant out there. Even some that don't like this product say that it protects your paint better than anything else out there... just not for 5 years.

4) It is a long process.. but you only do it once as opposed to doing it every few weeks.

Basically the experienced detailing professionals were saying that the 5SS kit isn't meant for everyone even though they advertise it so. If you erase all that marketing jabber and take a look at the product for what it actually is, it isn't half bad. People who live in more tollerable environments would probably not use this because they can get away with using cheaper proctecting products and waxes and could easily maintain it. People who live in rougher environments would probabaly use this stuff because its protection is top quality. People who don't really care about that true show quality shine but want a good shine would probably buy this product.. it's lower maintenance than your top producing waxes.

It just all boils down to preference, maintenance, environment and sacrifice. I want that show quality shine but I don't want to be out waxing my daily driver every other week or third week. I can sacrifice a lot of shine quality for maintenance if I go 5SS. I live in S.korea.. we have monsoons that lasts months, our winters are snowy sandy and miserablely cold, our summers are hot and extremely humid and can easily reach temps over 40 degrees C. I work long hours, I don't have a garage at home or any type of overhead parking so my car is parked in the elements everyday. I participate in no shows or events because they're aren't any here in Korea that I can participate in. I have a Japanese sports car in S.Korea (you history buffs would remember that most koreans and japanese secretly hate eachothers guts) so I've seen spit, ciggarette butts, ash, boogies and god knows what layin on my car sometimes. So the 5SS would be a better choice for me... but since I'm stubborn.. I'm still going for the high maintenace better shine! At least until I can't take the abuse any longer.. then I'll consider the 5SS protectant.

Don't pay attention to all the marketing hype and all the people who hate it or love it. Do your research, a lot of people have actually bought this stuff and it works best for their purpose. If your a detailing freak then don't buy the 5SS, there's obviously better products for shine. If you just want a decent shine that maintains itself and the best protectant, then you should consider looking in to the 5SS or other shine products that protect real well.

A lot of people make assumptions without actually taking a look when there's marketing hype so they remain bias on the whole situation.

Edited by chak8080

chak8080 one thing to keep in mind though is that the final result is 99% prep. The wax will not do everything on it's own... you need to wash, clay, wash, polish, wash, paint cleanse (preferably if using a high-end wax, but 5SS has some sort of cleansing stage) THEN wax. It's the prep before hand which will give you the results you're looking for.

Given the environment you're talking about, you're best off with a sealant, then layer a wax on top. If you're keen, give 5SS a go and then layer a carnauba ontop, best of both worlds :D

SS8 Gohan, thanks for the tips. But the 5SS says that their product won't work with wax. I don't want to apply the 5SS and get stuck with it.. know what I mean? What do you suggest for a car that's been resprayed black. I remember you said carnauba is probably the best after a respray but what else?

really?? that's funny because the threads i found on other forums, autopia i think, had a 5SS rep saying it can be layered with any wax?? Maybe you're getting confused with the fact you can't layer 5SS itself?

What i was referring to before about resprays and carnauba's is that a fresh respray needs to cure/breathe. A carnauba can do this, a sealant (like 5SS) can't. BUT ~2-3 months after the fresh paint, feel free to do whatever.

You can go just straight sealant, or sealant and wax, or just wax.

Depends how fussy you are with swirls/scratches, but some products contain fillers of sorts. Whilst not really desirable as they mute the metallic a bit, products like Zaino's Z5 can help with light swirls/scratches, whilst giving you shine and protection.

Best bet would be get it professional done once off, so they'll clay, polish, etc. If you're going to do 5SS, either ask them to do it, or just ask them to detail the car, but not use any LSP (last step product). That way, they give the car back to you, and you can try the 5SS steps.

You environment sounds pretty harsh, so for a black car that seems to be getting some harsh treatment from the locals, definitely go with a sealant first. Give 5SS a shot, and then i reckon layer a shit load of something on top. I'd still go OCW for it's ease of use and cheapness. So after applying 5SS, you can then after every wash after, layer some OCW ontop and get maybe a good 4-5 layers going. Should be ample protection for you car.

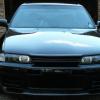
i just put a second layer of OCW on the car last night, and it's sunny here so i'll take some pics for ya. My car is GV1 or whatever the nissan paint code is for 'Black Pearl'

How long ago was the car resprayed? Got any pics??

I didn't get a respray yet. It's comming up next month when I get the East Bear front bar, EB aero bonnet and Do-Luck GTR aero fenders (or just regualr GTT vented fenders). I just want to be prepared before it all goes down. I really want to see that black pearl! Thats the same color I want.

  • 3 weeks later...

I use Glare polishes and sealers I have found them to be the best in what I have used. I have used McGuires, Turtle Mothers Autoglym and numerous others and they just dont hold a shine long enough, anyway here is a link to were I get mine and it has a bit of a speel to what it actualy is and how it works. I used it on both my skyline & Commo. The link below is to only one company that sell it, but have found them to be the Cheapest. This is a piant treatment and is suposed to last 5 years Also my cras have been flat blocked which also helps to give a good shine. The stuff is also a little expensive but the results speak for themself.

Infinity Car polish

Skyline

new9.jpg

nowing.jpg

Dunnydore

pshoot5.jpg

vx4.jpg

Edited by R31Heaven
  • 2 months later...

I am anal about my cars so yeah it is still shiny because I polish it every month with Mothers California Gold Wax to keep it like this, so using the Glare as the base and paint protection, an just keeping the show car shine with the mothers. people say I dont need to do it, but I do. LOL

DSC_0288.jpg

Create an account or sign in to comment

You need to be a member in order to leave a comment

Create an account

Sign up for a new account in our community. It's easy!

Register a new account

Sign in

Already have an account? Sign in here.

Sign In Now


  • Similar Content

  • Latest Posts

    • Did this end up working? Did you take some pictures?
    • And finally, the front lower mount. It was doubly weird. Firstly, the lower mount is held in with a bracket that has 3 bolts (it also acts as the steering lock stop), and then a nut on the shock lower mount itself. So, remove the 3x 14mm head bolts , then the 17mm nut that holds the shock in. From there, you can't actually remove the shock from the lower mount bolt (took me a while to work that out....) Sadly I don't have a pic of the other side, but the swaybar mounts to the same bolt that holds the shock in. You need to push that swaybar mount/bolt back so the shock can be pulled out past the lower control arm.  In this pic you can see the bolt partly pushed back, but it had to go further than that to release the shock. Once the shock is out, putting the new one in is "reverse of disassembly". Put the top of the shock through at least one hole and put a nut on loosely to hold it in place. Put the lower end in place and push the swaybar mount / shock bolt back in place, then loosely attach the other 2 top nuts. Bolt the bracket back in place with the 14mm head bolts and finally put the nut onto the lower bolt. Done....you have new suspension on your v37!
    • And now to the front.  No pics of the 3 nuts holding the front struts on, they are easy to spot. Undo 2 and leave the closest one on loosely. Underneath we have to deal with the wiring again, but this time its worse because the plug is behind the guard liner. You'll have to decide how much of the guard liner to remove, I undid the lower liner's top, inside and lower clips, but didn't pull it full off the guard. Same issue undoing the plug as at the rear, you need to firmly push the release clip from below while equally firmly gripping the plug body and pulling it out of  the socket. I used my fancy electrical disconnect pliers to get in there There is also one clip for the wiring, unlike at the rear I could not get behind it so just had to lever it up and out.....not in great condition to re-use in future.
    • Onto the rear lower shock mount. It's worth starting with a decent degrease to remove 10+ years of road grime, and perhaps also spray a penetrating oil on the shock lower nut. Don't forget to include the shock wiring and plug in the clean.... Deal with the wiring first; you need to release 2 clips where the wiring goes into the bracket (use long nose pliers behind the bracket to compress the clip so you can reuse it), and the rubber mount slides out, then release the plug.  I found it very hard to unplug, from underneath you can compress the tab with a screwdriver or similar, and gently but firmly pull the plug out of the socket (regular pliers may help but don't put too much pressure on the plastic. The lower mount is straightforward, 17mm nut and you can pull the shock out. As I wasn't putting a standard shock back in, I gave the car side wiring socket a generous gob of dialectric grease to keep crap out in the future. Putting the new shock in is straightforward, feed it into at least 1 of the bolt holes at the top and reach around to put a nut on it to hold it up. Then put on the other 2 top nuts loosely and put the shock onto the lower mounting bolt (you may need to lift the hub a little if the new shock is shorter). Tighten the lower nut and 3 upper nuts and you are done. In my case the BC Racing shocks came assembled for the fronts, but the rears needed to re-use the factory strut tops. For that you need spring compressors to take the pressure off the top nut (they are compressed enough when the spring can move between the top and bottom spring seats. Then a 17mm ring spanner to undo the nut while using an 8mm open spanner to stop the shaft turning (or, if you are really lucky you might get it off with a rattle gun).
    • You will now be able to lift the parcel shelf trim enough to get to the shock cover bolts; if you need to full remove the parcel shelf trim for some reason you also remove the escutcheons around the rear seat release and you will have to unplug the high stop light wiring from the boot. Next up is removal of the bracket; 6 nuts and a bolt Good news, you've finally got to the strut top! Remove the dust cover and the 3 shock mount nuts (perhaps leave 1 on lightly for now....) Same on the other side, but easier now you've done it all before
×
×
  • Create New...