Jump to content
SAU Community

Recommended Posts

i could be wrong but from talking with him last time he mentioned he was using 100 octane fuel and more timing then most would. Hence the awesome numbers.

Cubes: i dont know if i can help you as im going by what the turbo was like on my rb20.. not a 30. However that said tis not totally undriveable and makes great power at 4500 rpm onwards... hopwever on the dyno it makes 80 rwkw at 4000 rpm and in the space of 1000 rpm gains another 80 rwkw. so ti comes on hard thats for sure.

my problem is that my car is used for drift... and there are a few corners which require high speed entrys and then backing off and feathering the throttle is required to negotiate the course... the prob is i seem to drop off the power zone too much and have to resort to clutching it a lot just to get it going again..

  • Replies 231
  • Created
  • Last Reply

Top Posters In This Topic

My current tune was done on BP ultimate 98 octane. the first tune was done on 100ron purely because that ws what was in the tank and was in a hurry to get a safe tune hapening.

the tune is 12:1 and running 21deg timing once peak torque is reached. I have since wound the boost down to 1bar for daily driving as 240kw is pointless without traction. i just bought an lsd and some decent tyres. I am thinking a dual stage boost controller would be nice. or atleast a single stage with a scramble button.

Edited by CEF11E
  • 2 weeks later...

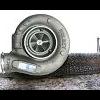
Simon replaced his max oversize RB25 with a standard hi-flow spec.

He got it bolted up last night, then we quickly threw it on the dyno this afternoon for a very quick check of the tune.

Only had time for 3 runs on the dyno but it did make 223rwkw on 16psi with conservative timing and afr's.

It is absolutely maxing out the std injectors so we "modified" the fpr to get a bit higher rail pressure. Needs bigger injectors to go any further.

Simon took it drifting tonight and reports that it fries tyres.

I'm sure he will fill in more details later.

What is the spec difference? Just trim size change, or a downsize in impeller O/D.

Good to see a sensible step backwards in size (whatever it was) to improve actual vehicle performance. Any dyno chart from the runs? Torque with boost overlay if possible please.

I have been a bit slack getting a dyno sheet up. i forgot to get a printout done last time i had it tuned. I will swing by the dyno place and get a copy to post it here :huh:

I have 2 tunes running on the car at the moment. both on the same chip in the stock ECU. there is a switch set up on the dashboard and you switch between tunes

1. is tuned for daily driving and makes 241rwkw at 19psi. (usually wind boost down for practical purposes)

2. makes around 215rwkw at 16psi and is a bit richer and has less timing . it is just a more conservative tune and is used at track days and drifting.

it feels like 2 different cars to drive on the different tunes.

I was going to get a cam gear installed when the new timing belt goes on next week but i am not sure it will make a big difference. it dosen't really need more power but if it made a reasonable difference in midrange or response it would be worthwile.

who has an exhaust cam gear on a RB20 with decent size turbo? and what were the results?

Thanks

What is the spec difference? Just trim size change, or a downsize in impeller O/D.

Good to see a sensible step backwards in size (whatever it was) to improve actual vehicle performance. Any dyno chart from the runs? Torque with boost overlay if possible please.

Agreed, it's refreshing to see someone downsize a turbo in search of more response.

I'm not 100% sure on specs but i do believe it is simply a smaller exhaust wheel.

I will get a printout of boost and torque on monday.

I have been a bit slack getting a dyno sheet up. i forgot to get a printout done last time i had it tuned. I will swing by the dyno place and get a copy to post it here :huh:

I have 2 tunes running on the car at the moment. both on the same chip in the stock ECU. there is a switch set up on the dashboard and you switch between tunes

1. is tuned for daily driving and makes 241rwkw at 19psi. (usually wind boost down for practical purposes)

2. makes around 215rwkw at 16psi and is a bit richer and has less timing . it is just a more conservative tune and is used at track days and drifting.

it feels like 2 different cars to drive on the different tunes.

I was going to get a cam gear installed when the new timing belt goes on next week but i am not sure it will make a big difference. it dosen't really need more power but if it made a reasonable difference in midrange or response it would be worthwile.

who has an exhaust cam gear on a RB20 with decent size turbo? and what were the results?

Thanks

Sounds awesome dude. Simons tune was real conservative - 15deg and 11:1 afr @ pk tq - 18deg and 11.5:1 afr @ peak power. Still needs some work i think.

Regarding the exhaust cam gear, well that is the same thing i suggested to simon. You can in fact move the peak torque up or down the rpm band. You are getting to the point where a bigger set of timing sticks will work wonders too.

Agreed, it's refreshing to see someone downsize a turbo in search of more response.

I'm not 100% sure on specs but i do believe it is simply a smaller exhaust wheel.

I will get a printout of boost and torque on monday.

Sounds awesome dude. Simons tune was real conservative - 15deg and 11:1 afr @ pk tq - 18deg and 11.5:1 afr @ peak power. Still needs some work i think.

Regarding the exhaust cam gear, well that is the same thing i suggested to simon. You can in fact move the peak torque up or down the rpm band. You are getting to the point where a bigger set of timing sticks will work wonders too.

yep. the old cams always come in once you are pushing relative high psi into a small capacity motor. I don't really want to spent any more money on the setup other than regular servicing.

wow you really are making some good numbers with such low timing. I am running quite a lot more. there are no knock issues at all even with 22deg.

Thanks Jeff i made a thread HERE about the recent upgrade.

I'd like to thank Jeff from TSL and Aaron from Sliding Performance for both helping out with the recent upgrade. The new turbo now has a smaller wheel, Biago shaft and smaller housing designed at increasing responce and spool up times.

Jeff and i have learnt that there is only so much you can do with the midrange of an RB20... the downside of having a short stroke and small pistons being that you need a few rpm on board.

Took it out to Mallala last niight for drift prac and i was hitting turn 1 at 170 kph in 4th gear dropping back to limiter of 3rd for the transition (for those familiar with the track) thats a half main straight entry and no one else was getting close to it. Love it!

Downside is 4000 rpm is still the dead zone... either i change the exhaust cam timing as suggested or the gearing.. will look into it soon!

Fry tyres it does.. had a pair of 18X10 Works on the back with 235/40/18's on it... 80 % tread and they smoked up so hard... more then Robbie Bolgers Monaro lol.

Further proof of Jeff's tuning and RB20's strength is in the fact that i Exited a corner and went to upchange into 3rd gear and accidentally went to 1st... tacho went way way past 9000 RPM redline.... but.. it lives :mellow:

240kW out of an rb20 really is impressive, especially with a journal bearing turbo when so many people have nothing but bad things to say about them.

Bearings make little relevance to peak power output at ... BB might make it spool up quicker over bush bearing but thats about all.

the difference is ESP noticeable when your talking large turbos where the rotating mass is a lot more.

There are some impressive numbers here.

I'm going to be in the market for one of these turbo's, I can already smell the hole burning in my pocket..

What kind of cash is required for one of these turbo's? Do I source my own and have work done or do I straight up buy it fully machined?

Also someone mentioned that their fuel economy was 250km on a full tank with a heavy right foot, and about 400km on a lighter foot... everyone else concur with these numbers? This is on a 60lt tank?

Either way, this thread = the win. :mellow:

Edited by screwball

Contact Slide for turbo's but you either buy outright or supply your turbo as an exchange and get a discount.

I recently did a trip to mildura for xmas and i was getting 8.9 L per 100Kms on the open road with the maximum oversixed highflow and Jeff form TSL tune. I was very happy with that.

And yes... when the boot is in it... any car will use shit loads of fuel.

But... FWIW last night i went to drift prac at mallala and i live 100 kms from the track.. drove the car there on a full tank.. thrashed around all night.. and drove home all on the same tank.. all up it was 300 kms... prety happy with that.,

Heh, I suppose it's just a shocking comparison compared to my old car lol

I have gone from a 2005 Hyundai Getz which does 500km to a 40L tank even when the boot is in (you cant tell when that happens anyway) to an R32 skyline which does 400k on 20L more lol

I suppose you just have to pay for power.

i have a vg30 turbo on mine hopefully be pushing around 220rwkw soonish, just wondering what a highflow would do for the same boost say 17-18psi... im gettin over this lagg shit, althought it see's 15psi by bout 3200-3500 still laggy to me.i would love a 25/30 turbo however i dont think the bank will like it..

Edited by dead32

Create an account or sign in to comment

You need to be a member in order to leave a comment

Create an account

Sign up for a new account in our community. It's easy!

Register a new account

Sign in

Already have an account? Sign in here.

Sign In Now


  • Similar Content

  • Latest Posts

    • Place the new daughterboard in the case and mount it using the 3 small black rivets provided, and reconnect the 3 factory ribbon cables to the new board Then, use the 3 piggyback cables from the daughterboard into the factory board on top (there are stand offs in the case to keep them apart. and remember to reconnect the antenna and rear cover fan wires. 1 screw to hold the motherboard in place. Before closing the case, make a hole in the sticker covering a hole in the case and run the cable for the android unit into the plug there. The video forgot this step, so did I, so will you probably. Then redo the 4 screws on back, 2 each top and bottom, 3 each side and put the 2 brackets back on.....all ready to go and not that tricky really.      
    • Onto the android unit. You need to remove the top screen because there is a daughterboard to put inside the case. Each side vent pops out from clips; start at the bottom and carefully remove upwards (use a trim remover tool to avoid breaking anything). Then the lower screen and controls come out, 4 screws, a couple of clips (including 3 flimsy ones at the top) and 3 plugs on the rear. Then the upper screen, 4 screws and a bunch of plugs and she is out. From there, remove the mounting brackets (2 screws each), 4 screws on the rear, 2 screws top and bottom and 3 screws holding in the small plates on each side. When you remove the back cover (tight fit), watch out for the power cable for the fan, I removed it so I could put the back aside. The mainboard is held in by 1 screw in the middle, 1 aerial at the top and 3 ribbon cables. If you've ever done any laptop stuff the ribbon cables are OK to work with, just pop up the retainer and they slide out. If you are not familiar just grab a 12 year old from an iphone factory, they will know how it works The case should now look like this:
    • Switching the console was tricky. First there were 6 screws to remove, and also the little adapter loom and its screws had to come out. Also don't forget to remove the 2 screws holding the central locking receiver. Then there are 4 clips on either side....these were very tight in this case and needed careful persuading with a long flat screw driver....some force required but not enough to break them...this was probably the fiddliest part of the whole job. In my case I needed both the wiring loom and the central locking receiver module to swap across to the new one. That was it for the console, so "assembly is the reverse of disassembly"
    • But first....while I was there, I also swapped across the centre console box for the other style where the AV inputs don't intrude into the (very limited !) space.  Part# was 96926-4GA0A, 284H3-4GA0B, 284H3-4GA0A. (I've already swapped the top 12v socket for a USB bulkhead in this pic, it fit the hole without modification:) Comparison of the 2: Basically to do the console you need to remove the DS and PS side console trim (they slide up and back, held in by clips only) Then remove the back half of the console top trim with the cupholders, pops up, all clips again but be careful at the front as it is pretty flimsy. Then slide the shifter boot down, remove the spring clip, loose it forever somewhere in the car the pull the shift knob off. Remove the tiny plastic piece on DS near "P" and use something thin and long (most screwdrivers won't fit) to push down the interlock and put the shifter down in D for space. There is one screw at the front, then the shifter surround and ashtray lift up. There are 3 or 4 plugs underneath and it is off. Next is the rear cover of the centre console; you need to open the console lid, pop off the trim covering the lid hinge and undo the 2rd screw from the driver's side (the rest all need to come out later so you can do them all now and remove the lid) Then the rear cover unclips (6 clips), start at the top with a trim tool pulling backwards. Once it is off there are 2 screws facing rearwards to remove (need a short phillips for these) and you are done with the rear of the console. There are 4 plugs at the A/V box to unclip Then there are 2 screws at the front of the console, and 2 clips (pull up and back) and the console will come out.
    • So, a bit of a side trip, but one that might be interesting for people with JDM cars and japanese head units. I know @Pac previously posted about a carplay/android auto adapter he installed which used the AUX input, and @V35_Paul put in one of the Tesla style units that replace both screens. The option I went with was a Lsait LLT-YF-VER5.87_2 (https://www.alibaba.com/product-detail/Lsailt-8GB-Android-Multimedia-Interface-for_1601187633672.html). Price was $1,150 for a single unit although they are much cheaper if you are willing to buy 2....$857ea. Make you you get the version 2 not version 1, it is faster and has a better UI - this is the manufacturer listing: http://www.lsailt.com/product/348.html. BTW if you've never bought from Alibaba before, don't be concerned....these guys can't stay in business unless they are responsive, ship fast etc, they were excellent (probably faster shipping than most local places) So, this was my task for a lazy Sat afternoon....looks complex but was all done in a few hours (it probably helps that I had some of it apart before so it was a bit familiar). I also decided to add a HD USB drive recorded at the same time and the unit also supports an aftermarket reverse cam (if you don't want to retain factory) and also AV in and HDMI out It looks much worse than it is, in fact in was genuinely all plug and play (no custom wiring at all). This video was pretty good (skipped a few steps), unfortunately they are an Aussie seller but no longer sell this unit (I guess Carplay/AA adapters are easier to install and much cheaper) https://www.youtube.com/watch?v=T5hJfYOB8Dg
×
×
  • Create New...