REdgtst Posted August 10, 2007 Share Posted August 10, 2007 (edited) Due to right off of my car i have some parts for sale (and some old parts lying around). Photos available on request Chris 0432923851 Located in Adelaide. no shipping Stock series 1 bumper $50 Rear strut brace $100 HKS EVC3 boost controller (computer + solenoid) $200 firm HKS Turbo Timer $30 Stock S1 CPU $30 Apexi Power FC and Hand Controller $850 firm Circular 8" and 9" Rims (some dish no rash no tyres) $1200 Stock blowoff valve $20 Stock Cat, Dump and front pipe $20 Stock Suspension $70 HKS Boost Guage (+ all fittings) and Pillar mount holder $100 2 Monza sports bucket seats and rails $400 I only had these in the car for a month. K &N Pod filter and stock air sensor attachment (will also throw in stock air box and filter) $30 A couple of stock interior switches $2 each Chris 0432923851 Edited September 3, 2007 by REdgtst Link to comment https://www.sau.com.au/forums/topic/180355-r33-s1-parts-for-sale/ Share on other sites More sharing options...
mesmerized Posted August 10, 2007 Share Posted August 10, 2007 pm sent Link to comment https://www.sau.com.au/forums/topic/180355-r33-s1-parts-for-sale/#findComment-3280785 Share on other sites More sharing options...
izmir Posted August 10, 2007 Share Posted August 10, 2007 pm sent Link to comment https://www.sau.com.au/forums/topic/180355-r33-s1-parts-for-sale/#findComment-3281005 Share on other sites More sharing options...
retox Posted August 11, 2007 Share Posted August 11, 2007 pm deployed Link to comment https://www.sau.com.au/forums/topic/180355-r33-s1-parts-for-sale/#findComment-3281122 Share on other sites More sharing options...
ABuSD Posted August 11, 2007 Share Posted August 11, 2007 Lemme know if u change your mind on shipping, theres a few things im keen on!! Cheers Link to comment https://www.sau.com.au/forums/topic/180355-r33-s1-parts-for-sale/#findComment-3281197 Share on other sites More sharing options...
REdgtst Posted September 3, 2007 Author Share Posted September 3, 2007 will take 850 firm pick up for power fc and hand controller. Give me an offer, all parts still for sale. Pick up only, and ring rather than pm, because i can not be bothered reading them (dial up too slow). Link to comment https://www.sau.com.au/forums/topic/180355-r33-s1-parts-for-sale/#findComment-3325660 Share on other sites More sharing options...
abu Posted September 3, 2007 Share Posted September 3, 2007 PM sent. Link to comment https://www.sau.com.au/forums/topic/180355-r33-s1-parts-for-sale/#findComment-3325666 Share on other sites More sharing options...
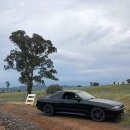
OO Skyline OO Posted September 4, 2007 Share Posted September 4, 2007 What colour is the front bar? any pics? cheers Link to comment https://www.sau.com.au/forums/topic/180355-r33-s1-parts-for-sale/#findComment-3327861 Share on other sites More sharing options...
madaz R33 Posted September 5, 2007 Share Posted September 5, 2007 pm box is full so i'll ask here: hi, is the s1 ecu to suit a manual? also i see u are not prepared to post, so where abouts in adelaide do you live? i have a brother that lives there he might pick up for me, cheers Damo Link to comment https://www.sau.com.au/forums/topic/180355-r33-s1-parts-for-sale/#findComment-3328456 Share on other sites More sharing options...
Guest carasky Posted September 5, 2007 Share Posted September 5, 2007 hi mate wil that rear strut brace fit a r33 series 2??? Link to comment https://www.sau.com.au/forums/topic/180355-r33-s1-parts-for-sale/#findComment-3328583 Share on other sites More sharing options...
Hotwire Posted October 12, 2007 Share Posted October 12, 2007 Hi All, I spoke to Chris on the phone tonight, and he no longer has internet access but still has some parts for sale. These are the parts: Stock series 1 bumper $50 Rear strut brace $100 HKS EVC3 boost controller (computer + solenoid) $200 firm HKS Turbo Timer $30 Stock S1 CPU $30 Circular 8" and 9" Rims (some dish no rash no tyres) $1200 Stock blowoff valve $20 Stock Cat, Dump and front pipe $20 Stock Suspension $70 2 Monza sports bucket seats and rails $400 I only had these in the car for a month. A couple of stock interior switches $2 each Chris does not have internet anymore Phone Call ONLY on 0432923851 Located in Adelaide. Link to comment https://www.sau.com.au/forums/topic/180355-r33-s1-parts-for-sale/#findComment-3408716 Share on other sites More sharing options...
Hotwire Posted November 1, 2007 Share Posted November 1, 2007 And up one more time to help him out Link to comment https://www.sau.com.au/forums/topic/180355-r33-s1-parts-for-sale/#findComment-3448768 Share on other sites More sharing options...
Squishy Posted November 5, 2007 Share Posted November 5, 2007 (edited) dammit i want that power fc Edited November 5, 2007 by RB_turbo_bitch Link to comment https://www.sau.com.au/forums/topic/180355-r33-s1-parts-for-sale/#findComment-3457026 Share on other sites More sharing options...


Recommended Posts
Create an account or sign in to comment
You need to be a member in order to leave a comment
Create an account
Sign up for a new account in our community. It's easy!
Register a new accountSign in
Already have an account? Sign in here.
Sign In Now