Jump to content
SAU Community

Recommended Posts

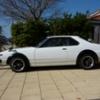
Sand blasted the front gaurds at work yesterday, glassed, bogged and etch primed today. Tomorrow it's the sills. Someones already done a poxy bog job on them in the past so i"ll have to grind it out, rust treat it and more glassing. Got given a GTR XU1 boot air dam and guess what? it fits quite nicely strangely enough. The curve is so similar to the 210s boots curve that it won't take much to have it sit nicely. I'll put up a pic at the end of the day. Not sure what colour to paint it, the car will be white and the cooktop light assembley will be changed from grey to white also. Should i paint the dam white or black?

Link to comment
https://www.sau.com.au/forums/topic/233773-210-body-restoration-under-way/
Share on other sites

post-44326-1220182136_thumb.jpgpost-44326-1220181906_thumb.jpg

Sometimes the rust has just gottta go. Thankfully I work with some very generous sheetmetal workers.

This area had been badly bogged, thus the rust had a field day. Now it's been rust treated and sprayed with zinc it. The new sill will be welded in with a bit of glass and putty on the sides.

The sill in, Wish i had more room. Having to stack doors (bloody heavy too) on the boot, they must weigh about 40kg each. shame you have to have them,love to replace them with fibreglass and hope never to get hit side on.post-44326-1220689133_thumb.jpgpost-44326-1220689133_thumb.jpg post-44326-1220688909_thumb.jpg

  • 2 weeks later...

post-44326-1222083122_thumb.jpgpost-44326-1222083297_thumb.jpgpost-13170-1124441726.jpg

Started the main priming stage today. Did the bonnet,boot,and guards in etch primer and put a coat of filler primer on this avo. Typing this with red raw fingers,bloody sanding aahhhh

post-44326-1222083416_thumb.jpg

Looking good man, nothing worse then sanding back a car, then priming, then sanding, then painting, then repeating :)

Dreading repainting mine, but liking some of the pearls on ebay at the moment :)

Cheers Dan

post-44326-1222164678_thumb.jpg

Primer filler on, my wife has the worst headache ever from fuming. :) Guess you gotta take the good with the bad. My mates compressor worked itself so hard it hemoraged oil. I think a bigger compressor for the top coat will be required

Without cutting anything a 205/55/r15 will go under there with no worries.

I remember that V8 skyline man ran 17's on his C210, but I don't know how much work it took to make them fit.

Yeah VSPEC32, that's exactly what I'm after. I don 't like my chances of finding them here in Aus. The guy who gave me the air dam also has some A9x bolt on guards and I'm going to check out how they fit and look on my 210. Has anyone seen these overriders for sale anywhere? Ricky.

Have you considered buying from Yahoo Japan Auctions?

I've previously purchased off of there via Slidewize Imports who provide a service whereby you specify the maximum bid on an item, and they provide a calculation on getting it to your door. They then bid on the item for you, have it shipped to their depot in Japan, repackage if required and ship to your door in Australia. I did this with a tail light cluster for a 200ZR Fairlady and that landed within 10 days at a cheaper rate than buying from Victoria. Also used them to buy an R34 GT-R drivers seat for my Silvia.

http://www.slidewizeimports.com/

It mentions in that article that he uses S30 ZG Overfenders (possibly modified to suit), so based on that this search would certainly be of some assistance:

http://search.auctions.yahoo.co.jp/search/...0Z&auccat=0

Hope that helps.

Cheers

Brendan

post-44326-1223018097_thumb.jpgpost-44326-1223018242_thumb.jpg

VSPEC thanks for the info, I'll try the A9X over riders first and if no joy there I'll try slidewize.If any W.A members no of a decent rear bumper, I'd like to know otherwise I'll rip the chrome of and paint it white.

post-44326-1223018431_thumb.jpg

Create an account or sign in to comment

You need to be a member in order to leave a comment

Create an account

Sign up for a new account in our community. It's easy!

Register a new account

Sign in

Already have an account? Sign in here.

Sign In Now


  • Similar Content

  • Latest Posts

    • Yeah well per the video it took 15s for the stock unit to start up....even if I give it a few seconds discount for starting that is at least 12 sec before you get a reverse camera if you are trying to leave a park.  The android unit is way faster, but 2016 for the stock unit is a long time ago in consumer electronics
    • Yea that’s why I said ima test them with multimeter and see the reads.
    • Only at idle. Isn’t a problem when rev it seems.
    • @Haggerty This seems silly to ask, but are you confident in your ability to tune the Haltech?  
    • Next on the to-do list was an oil and filter change. Nothing exciting to add here except the oil filter is in a really stupid place (facing the engine mount/subframe/steering rack). GReddy do a relocation kit which puts it towards the gearbox, I would have preferred towards the front but there's obviously a lot more stuff there. Something I'll have to look at for the next service perhaps. First time using Valvoline oil, although I can't see it being any different to most other brands Nice... The oil filter location... At least the subframe wont rust any time soon I picked up a genuine fuel filter, this is part of the fuel pump assembly inside the fuel tank. Access can be found underneath the rear seat, you'll see this triangular cover Remove the 3x plastic 10mm nuts and lift the cover up, pushing the rubber grommet through The yellow fuel line clips push out in opposite directions, remove these completely. The two moulded fuel lines can now pull upwards to disconnect, along with the wire electrical plug. There's 8x 8mm bolts that secure the black retaining ring. The fuel pump assembly is now ready to lift out. Be mindful of the fuel hose on the side, the hose clamp on mine was catching the hose preventing it from lifting up The fuel pump/filter has an upper and lower section held on by 4 pressure clips. These did take a little bit of force, it sounded like the plastic tabs were going to break but they didn't (don't worry!) The lower section helps mount the fuel pump, there's a circular rubber gasket/grommet/seal thing on the bottom where the sock is. Undo the hose clip on the short fuel hose on the side to disconnect it from the 3 way distribution pipe to be able to lift the upper half away. Don't forget to unplug the fuel pump too! There's a few rubber O rings that will need transferring to the new filter housing, I show these in the video at the bottom of this write up. Reassembly is the reverse Here's a photo of the new filter installed, you'll be able to see where the tabs are more clearing against the yellow OEM plastic Once the assembly is re-installed, I turned the engine over a few times to help build up fuel pressure. I did panic when the car stopped turning over but I could hear the fuel pump making a noise. It eventually started and has been fine since. Found my 'lucky' coin underneath the rear seat too The Youtube video can be seen here: https://www.youtube.com/watch?v=uLJ65pmQt44&t=6s
×
×
  • Create New...