Jump to content
SAU Community

Recommended Posts

  • Replies 98
  • Created
  • Last Reply

Top Posters In This Topic

Top Posters In This Topic

Posted Images

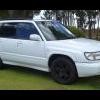
This picture shits me, i took a few of them, but none made me happy with the result...

how do i make it look better,,?? like crisper and sharper.... should i be using photoshop or doing it before pressing the button..

any tips would be great guys

post-21307-1238678045_thumb.jpg

Try increasing your f-stop a couple of steps and give it another shot. Also, shoot in RAW mode, then convert in Photoshop with CameraRAW later, will be much more crisp.

Here's one from the SAU display at the F1 on the weekend:

famnnt.jpg

This picture shits me, i took a few of them, but none made me happy with the result...

how do i make it look better,,?? like crisper and sharper.... should i be using photoshop or doing it before pressing the button..

any tips would be great guys

The image looks alright to me tho..

Isolate the subject. You got distracting items in the back. Your main focus is on that glass right? Or did you want the other glasses to be seen too?

Make yourself a small light box ;)

This one took me 2mins to make:

Put your glass in there.. shine some lights from both sides of the box.. Choose whatever background you want and have some fun.. Its like a mini studio :P

oh the image below is just zoomed out to show how the box looks like etc..

5-4.jpg

What camera you use?

If its just a digi cam then step back a tad and perhaps use that macro function.

If you do have a slr you will have a lot more flexibility in terms of taking the image and processing it after on the computer.

Also remember when you resize an image the sharpness decreases.

Edited by siddr20
The image looks alright to me tho..

Isolate the subject. You got distracting items in the back. Your main focus is on that glass right? Or did you want the other glasses to be seen too?

Make yourself a small light box :)

This one took me 2mins to make:

Put your glass in there.. shine some lights from both sides of the box.. Choose whatever background you want and have some fun.. Its like a mini studio :(

oh the image below is just zoomed out to show how the box looks like etc..

What camera you use?

If its just a digi cam then step back a tad and perhaps use that macro function.

If you do have a slr you will have a lot more flexibility in terms of taking the image and processing it after on the computer.

Also remember when you resize an image the sharpness decreases.

It's a point and shoot.

Agree with siddr20, find a better backdrop and it will look much better. Picture quality is pretty good though.

Thats a weird one uh.. Maybe a bit of flare?? Dirty lens?

Definately not flare, and I thought it maybe a dirty lens but I cleaned it and it was still there, put on a diff lens and its gone.

I did noticed that when I took it off and then put it back on the green spots moved.. I'm puzzled

Create an account or sign in to comment

You need to be a member in order to leave a comment

Create an account

Sign up for a new account in our community. It's easy!

Register a new account

Sign in

Already have an account? Sign in here.

Sign In Now


  • Similar Content

  • Latest Posts

    • I feel I should re-iterate. The above picture is the only option available in the software and the blurb from HP Tuners I quoted earlier is the only way to add data to it and that's the description they offer as to how to figure it out. The only fields available is the blank box after (Input/ ) and the box right before = Output. Those are the only numbers that can be entered.
    • No, your formula is arse backwards. Mine is totally different to yours, and is the one I said was bang on at 50 and 150. I'll put your data into Excel (actually it already is, chart it and fit a linear fit to it, aiming to make it evenly wrong across the whole span. But not now. Other things to do first.
    • God damnit. The only option I actually have in the software is the one that is screenshotted. I am glad that I at least got it right... for those two points. Would it actually change anything if I chose/used 80C and 120C as the two points instead? My brain wants to imagine the formula put into HPtuners would be the same equation, otherwise none of this makes sense to me, unless: 1) The formula you put into VCM Scanner/HPTuners is always linear 2) The two points/input pairs are only arbitrary to choose (as the documentation implies) IF the actual scaling of the sensor is linear. then 3) If the scaling is not linear, the two points you choose matter a great deal, because the formula will draw a line between those two points only.
    • Nah, that is hella wrong. If I do a simple linear between 150°C (0.407v) and 50°C (2.98v) I get the formula Temperature = -38.8651*voltage + 165.8181 It is perfectly correct at 50 and 150, but it is as much as 20° out in the region of 110°C, because the actual data is significantly non-linear there. It is no more than 4° out down at the lowest temperatures, but is is seriously shit almost everywhere. I cannot believe that the instruction is to do a 2 point linear fit. I would say the method I used previously would have to be better.
×
×
  • Create New...