Jump to content
SAU Community

Recommended Posts

Lithium, I also was hoping for full boost earlier, It may be the stock manifold holding it back or the lack of timing coming onto boost. its a fairly conservative tune. and if a 3582 is a 3540 with a .82 rear housing then you'd be very close.

I think with a better manifold design and some more tuning time you would get it coming on quicker.

I am still happy with it!

Oh yeah not knocking it, its a good result and I can imagine is a monster on the street. I have been keeping an eye out for Holsets results as many people claims for them seem almost too good to be true - I only said that to get your feeling on it. It is pretty much what I would expect a good and reasonable sized plain bearing turbo to do, which means its not magic but it represents good value for money which is how I have suspected Holsets really are.

A "GT3582R" is a "GT3540R", Garrett changed their naming convention a few years ago. The 82 bit refers to the mm size of the compressor exducer, not turbine a/r :) My car is running a .82a/r GT3076R on a stock RB25 with a stock log manifold and I had a few dyno runs this weekend to sort out boost control and had it hit 19psi by 3700rpm in one run where the "gain" was set higher than needed!

Edited by Lithium
Oh yeah not knocking it, its a good result and I can imagine is a monster on the street. I have been keeping an eye out for Holsets results as many people claims for them seem almost too good to be true - I only said that to get your feeling on it. It is pretty much what I would expect a good and reasonable sized plain bearing turbo to do, which means its not magic but it represents good value for money which is how I have suspected Holsets really are.

A "GT3582R" is a "GT3540R", Garrett changed their naming convention a few years ago. The 82 bit refers to the mm size of the compressor exducer, not turbine a/r :) My car is running a .82a/r GT3076R on a stock RB25 with a stock log manifold and I had a few dyno runs this weekend to sort out boost control and had it hit 19psi by 3700rpm in one run where the "gain" was set higher than needed!

yep I remember reading you were going to get one and low mount it ages ago :) what sort of power is the 3076r making on your 25 at 19 psi?

I am not running 19psi, that was just a booboo while refining my boost control - I have made posts in the past on my dramas trying to get the boost control sorted out. It made 284rwkw this weekend with boost varying between 15-17psi :)

When it spiked to 19.9psi it hit 180rwkw by 3700rpm!!!!!

man i cant wait to put mine on. Had mine for over a year just waiting on money for the supporting mods...I would put money on it that the 20mm spacer,stock manifold, and turbo wont fit on my left hand drive 180sx

cheers

hey Demetrius,

do some googling, there are a few 240sx's in the us running holsets on ka24's and rb20's they should be able to help with mounting advice.

I think I have worked out how to bring spool on a LOT faster

more updates soon

Well I decided I would put it on the dyno this afternoon for a quick check to see if it would be ok to drive it like it is untill I get it properly tuned with the bigger injectors and afm...

1st run - 10psi all good, very rich (9.8:1)and pulled a lazy 246rwkw

2nd run - 15 psi I was a bit nervous and did not mean to up the boost that much! 288rwkw WTF!!! jeebus! this was my power goal

3rd run - 17 psi too lean (12.7:1) just after peak torque and it spiked sharply so boost control needs to be sorted out but it pulled 311rwkw

no wonder it felt fast...

You should have seen heard the amount of exhaust gas flow on the 3rd run it sounded like a big dirty jet!!

boost comes on progressive and hits 17 psi at 3400 rpm but it feels like its on full boost from about 3000.

I suspect even more boost will nett no more gain due to the stock manifold. and i don't want any more power than this. I drove it down the road just after the last run on the same boost and it was to brutal... absolutely brutal...

so I will swap in the bigger injectors and tidy up the tune as the current fuel curve looks like a stock market chart. also there is a fairly big hole in the midrange due to the timing map needing to be totally redone but the turbo has prooved itself...

I suspect the turbo I have needs the oil seals done, either that or the oil drain is not big enough for the turbo as its smoky on start up and occasionally when you back off after full boost. but a turbo repair kit for one of these is only $100 :)

the dyno sheet was BUTT UGLY due to the afr's and timing map so i didn't bother with it but the numbers are great! the dyno operator was fkn impressed, he looked under the bonnet and shook his head and said " looks like stock, goes like a velvet sledgehammer"

I had a laugh and decided I would call it just that

"the velvet sledgehammer" Wooo Hooo!!!

Did you have any boost controller when you ran it with the internal wastegate? i was thinking of porting the internal wastegate and use an electronic boost controller hoping that i wont see much boost creep. im planning to run 15-20ish psi, what ever our crappy california 91 octane can handle. let me know what you think.

on the internal gate I was using a turbotech boost controller and it would hold boost fine in low gears and low load. as soon as you accellerated hard in 4th up a hill boost would keep climbing and i did not want to find out when it would stop.

if you ported the buggery out of the internal flap and used a decent ebc you "might" be able to get away with it, it depends on the amount of gas your engine will produce. i would have less chance with the 3ltr that someone with the rb20 would.

this turbo is really designed to run high boost so if all you are aming for is 15psi you might be better suited to another turbo.

were you using the holset wastegate actuator? how did you get your boost to go that low? i thought hx wastegates were set at 20+ psi?

i have no issue running it in the 20+psi because i have all the supporting mods i just wanted to start in a lower pressure for tuning purposes, i didnt want to start tuning at 20+psi.

  • 2 weeks later...

just a heads up for anyone looking for one of these...

THIS IS THE EXACT same turbo as the one making over 300rwkw on my car for sale on ebay.

good cheap turbo capable of 350rwkw!

  • 5 months later...

hey guys im just doing a hx35w swap on my rb25det. i just need to know how you guys are running the oil return lines what kinds of hoses and fitting and placement. im running a 4an steelbraided line for the feed and local shops in alberta are saying they can make me a line for the return.

Also what is the simplest / cheapest way to make the dump pipe for for the turbo. Thanks

  • 7 months later...
  • 11 years later...

Curious as to whether Cef's car is still alive and running this setup? Anyone else bolted an HX35 on an RB20 with similar results? I always thought the factory manifold is a twin scroll by design so pairing it with a twin scroll turbo is a no-brainer.

On 2/14/2022 at 4:06 AM, Neostead2000 said:

Curious as to whether Cef's car is still alive and running this setup? Anyone else bolted an HX35 on an RB20 with similar results? I always thought the factory manifold is a twin scroll by design so pairing it with a twin scroll turbo is a no-brainer.

Do you really want to wait until 6500 rpm for boost? Big turbo, small engine, no fun.

On 2/14/2022 at 3:06 AM, Neostead2000 said:

Curious as to whether Cef's car is still alive and running this setup? Anyone else bolted an HX35 on an RB20 with similar results? I always thought the factory manifold is a twin scroll by design so pairing it with a twin scroll turbo is a no-brainer.

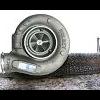
On my rb20 sohc (so worse flowing than dohc heads), I had HX35 with smaller 50mm 7 blade compressor inducer and 0.82 a/r t3 twin scroll Garrett turbine housing on a twin scroll single wastegate exhaust manifold with proper divider wall up to the wastegate. On 95 octane gas at 4th gear it started spooling around 3500 rpm and reach 15 psi around 4200 rpm. Change only the hot side to smaller hx30 52 mm turbine with t3 twin scroll 12cm housing, also on 95 octane gas at 4th gear it starts spooling around 2800 rpm and reach 15 psi around 3500 rpm with good transient response, still on my car after 5 years. HX35 with the usual 54mm 7 blade compressor inducer which compressor map flows around 55 lb/min and  should spool about 300 rpm slower.

Yes, i agree that rb20det/rb25det factory manifold modified to twin scroll with 25-30mm spacer plate to pair it with a t3 twin scroll turbo is a simple, cheap and effective set up if target hp is within flow limit of factory manifold. You can weld the wastegate pipe to the manifold or mill waste gate ports to the spacer plate then weld the wastegate pipe to the ports on the spacer plate.

Spacer wastegated.jfif

  • Like 1
On 2/14/2022 at 3:31 PM, CefiroA31 said:

On my rb20 sohc (so worse flowing than dohc heads), I had HX35 with smaller 50mm 7 blade compressor inducer and 0.82 a/r t3 twin scroll Garrett turbine housing on a twin scroll single wastegate exhaust manifold with proper divider wall up to the wastegate. On 95 octane gas at 4th gear it started spooling around 3500 rpm and reach 15 psi around 4200 rpm. Change only the hot side to smaller hx30 52 mm turbine with t3 twin scroll 12cm housing, also on 95 octane gas at 4th gear it starts spooling around 2800 rpm and reach 15 psi around 3500 rpm with good transient response, still on my car after 5 years. HX35 with the usual 54mm 7 blade compressor inducer which compressor map flows around 55 lb/min and  should spool about 300 rpm slower.

Yes, i agree that rb20det/rb25det factory manifold modified to twin scroll with 25-30mm spacer plate to pair it with a t3 twin scroll turbo is a simple, cheap and effective set up if target hp is within flow limit of factory manifold. You can weld the wastegate pipe to the manifold or mill waste gate ports to the spacer plate then weld the wastegate pipe to the ports on the spacer plate.

Spacer wastegated.jfif 10.03 kB · 0 downloads

Perfect response! This is exactly what I was looking for; actual real world experience and data. I'm going to be keeping the Torque valve as well as swirl valves on my DE Neo as well as variable intake, so that would no doubt help with spool up immensely. I am already set on the HX twin scroll series turbo, but if I can get my hands on both a 30 and 35 to make a hybrid like you did, I might do that. Power is not really my goal as much as just making this 20 feel on par if not slightly peppier than a stock 25DET.


I looked at that gated spacer and honestly I've never seen one like that but it looks genius. However I'm worried about potential boost creep? Those ports are not only small but they exit at 90 degrees to the exhaust flow, which is usually not optimal. Also what about the little slot in the stock manifold opening at the divider? Did you weld that up then grind flush or did you leave it be? I'm unsure why Nissan left it slotted like that but I would imagine it's to account for thermal expansion and to help with channeling the gasses downwards?

On 2/15/2022 at 3:25 AM, Neostead2000 said:

Did you weld that up then grind flush or did you leave it be?

Leave it. Anything you weld there is going to be so dinky that it has a better chance of falling off at some point and killing the turbine than being useful.

On 2/15/2022 at 3:25 AM, Neostead2000 said:

I'm unsure why Nissan left it slotted like that but I would imagine it's to account for thermal expansion and to help with channeling the gasses downwards?

Because Nissan were using open turbine housings. There wasn't a lot of point in trying to have a perfect divider.

Create an account or sign in to comment

You need to be a member in order to leave a comment

Create an account

Sign up for a new account in our community. It's easy!

Register a new account

Sign in

Already have an account? Sign in here.

Sign In Now


  • Latest Posts

    • Hi, is the HKS  Tower Bar still available ? negotiable ? 🤔
    • From there, it is really just test and assemble. Plug the adapter cables from the unit into the back of the screen, then the other side to the car harness. Don't forget all the other plugs too! Run the cables behind the unit and screw it back into place (4 screws) and you should now have 3 cables to run from the top screen to the android unit. I ran them along the DS of the other AV units in the gap between their backets and the console, and used some corrugated tubing on the sharp edges of the bracket so the wires were safe. Plug the centre console and lower screen in temporarily and turn the car to ACC, the AV should fire up as normal. Hold the back button for 3 sec and Android should appear on the top screen. You need to set the input to Aux for audio (more on that later). I put the unit under the AC duct in the centre console, with the wifi antenna on top of the AC duct near the shifter, the bluetooth antenna on the AC duct under the centre console The GPS unit on top of the DS to AC duct; they all seem to work OK there are are out of the way. Neat cable routing is a pain. For the drive recorder I mounted it near the rear view mirror and run the cable in the headlining, across the a pillar and then down the inside of the a pillar seal to the DS lower dash. From there it goes across and to one USB input for the unit. The second USB input is attached to the ECUtec OBD dongle and the 3rd goes to the USB bulkhead connected I added in the centre console. This is how the centre console looks "tidied" up Note I didn't install the provided speaker, didn't use the 2.5mm IPod in line or the piggyback loom for the Ipod or change any DIP switches; they seem to only be required if you need to use the Ipod input rather than the AUX input. That's it, install done, I'll follow up with a separate post on how the unit works, but in summary it retains all factory functions and inputs (so I still use my phone to the car for calls), reverse still works like factory etc.
    • Place the new daughterboard in the case and mount it using the 3 small black rivets provided, and reconnect the 3 factory ribbon cables to the new board Then, use the 3 piggyback cables from the daughterboard into the factory board on top (there are stand offs in the case to keep them apart. and remember to reconnect the antenna and rear cover fan wires. 1 screw to hold the motherboard in place. Before closing the case, make a hole in the sticker covering a hole in the case and run the cable for the android unit into the plug there. The video forgot this step, so did I, so will you probably. Then redo the 4 screws on back, 2 each top and bottom, 3 each side and put the 2 brackets back on.....all ready to go and not that tricky really.      
    • Onto the android unit. You need to remove the top screen because there is a daughterboard to put inside the case. Each side vent pops out from clips; start at the bottom and carefully remove upwards (use a trim remover tool to avoid breaking anything). Then the lower screen and controls come out, 4 screws, a couple of clips (including 3 flimsy ones at the top) and 3 plugs on the rear. Then the upper screen, 4 screws and a bunch of plugs and she is out. From there, remove the mounting brackets (2 screws each), 4 screws on the rear, 2 screws top and bottom and 3 screws holding in the small plates on each side. When you remove the back cover (tight fit), watch out for the power cable for the fan, I removed it so I could put the back aside. The mainboard is held in by 1 screw in the middle, 1 aerial at the top and 3 ribbon cables. If you've ever done any laptop stuff the ribbon cables are OK to work with, just pop up the retainer and they slide out. If you are not familiar just grab a 12 year old from an iphone factory, they will know how it works The case should now look like this:
    • Switching the console was tricky. First there were 6 screws to remove, and also the little adapter loom and its screws had to come out. Also don't forget to remove the 2 screws holding the central locking receiver. Then there are 4 clips on either side....these were very tight in this case and needed careful persuading with a long flat screw driver....some force required but not enough to break them...this was probably the fiddliest part of the whole job. In my case I needed both the wiring loom and the central locking receiver module to swap across to the new one. That was it for the console, so "assembly is the reverse of disassembly"
×
×
  • Create New...