
Anyone Ran A 15-20mm Spacer On The Front?

Announcements
-
Similar Content
-
-
Latest Posts
-
 I seem to the be only person that is using a Haltech 2500 on an NA motor, I've installed a Bosch DBW throttle body to the OEM intake manifold and am having problems maintaining AFR even with the wideband o2. It will run extremely rich at idle and up to redline, but under load it will go extremely lean in the 20s and i'm essentially having to rev it over 4k and feather the clutch to get it up to speed. I've read a few other threads of about the butterfly, it seems removing the vacuum to it is supposed to have it remain open, i've noticed no difference under 4k with the vacuum line to it plugged. I'm hoping someone here has had luck using the NA manifold with Haltech, and if they happen to have a tune for it.
 -
 I don't know any details, but I really wouldn't be surprised if they do it as a LHD only version, at least initially.
 -
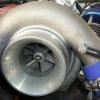 Thanks for the replies everyone. Definitely a coolant push. Oil catch can is empty and always has been. As the engine is out now I'll be having a good look over things. I do have some detonation on the piston tops from a trigger issue back about 5 years ago. I felt it and shut off then bought a new ecu and changed the trigger. Never been an issue since. It never hurt the power, its made almost 80hp more since that incident but I will pull the bearing caps to take a look. If the bearings are damaged I will do a bottom end refresh. Head is being re conditioned at the moment and the block will be cleaned and checked to ensure it's flat. I'll go with a kameari gasket and see how it ends up. The other thing I'm not super keen on is the cylinder colours. I suspect this is from the inlet manifold. The plan will be to put it back together, retune and then stick a plazmaman billet inlet on it and retune. I'm happy with the power, if it makes a little more, then great, but I would rather just make everything more efficient at this stage.
 -
 Maybe they'll look to do a bunch of presales to help inject some cash fast for their financial issues...
 -
Does it also misfire equally when revving? Josh is very correct in what you should do. The coilpack harness wiring loom itself is a known problem due to its age and the number of heat cycles it has gone through. Throwing parts at a vehicle to diagnose the issue isn't a smart or good way to do it. Secondly, you may have a bad coil pack, you pop replacements in, they fix that issue, but messing with the harness breaks it, so the issue persists. So now you think "well it wasn't the coil packs" and have to continue chasing your tail, potentially swapping back in your shit coil packs and returning the good ones (yes, I've seen people do this because 'it wasn't the problem' and they want to save money). And suddenly, you've got two issues with the same symptoms... Diagnose, don't use the spare parts shotgun.
-
1.thumb.png.36afd656b26d55f5d425fc76e21561f2.png)


Recommended Posts
Create an account or sign in to comment
You need to be a member in order to leave a comment
Create an account
Sign up for a new account in our community. It's easy!
Register a new accountSign in
Already have an account? Sign in here.
Sign In Now