Jump to content
SAU Community

Recommended Posts

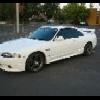
some DAMN STUPID UNAPPRECIATIVE SMALL MINDED F&%#WIT of a person........KEYED my car yesterday whilst parked in the front carpark of TAFE (gordon, east geelong), it's about a foot long an down to bare metal along the r/h/r 1/4 panel.....STUPID PEOPLE. It's gonna cost me bout $350-$400 to fix.....GRRR

but now I'm thinking.......change of colour? what colour? great minds think alike an james now has the original colour I was thinking :) so something different.....but what?who knows? time will tell.....

see you all bright an early @ eastern beach, 8:30am Sat (16th) morning for the cruise

;)

  • Replies 65
  • Created
  • Last Reply

Top Posters In This Topic

Abcent,

repair work is alot more simple than a re-spray. Im sure you have allready been told this, but to get a car back down to bare metal & respray will cost you anywhere between $4-6K depending wether or not you have the door jams & engine bay done aswell. (Also it depends on the color you choose aswell)

I feel your pain, i had the same thing happen to me about a year ago. :)

Any ETA on when its gona be fixed?

:P trev

That really sucks, you need a baseball bat in your car for such an occasion. You need to know someone who is doing painting at tafe, it cost me $700 for the complete respray including door jams and some of engine bay. They fixed a dent in the bonnet (smash repair section) and prepared all the panels. When u compare that to what u gonna do it is worth it. In terms of colour, look at some of the new lambo colours and also the premium honda ones but they do cost a bit more. See you all in the morning. Berin are any of the other X1k ppl coming?

Talking to a few people about the re-spray next week, hopefully knowing a few contacts I can get it done at the right price, if not....white it will stay. Not sure on when I can get it fixed, almost have enough for my bigger injectors now, so the scratch unfortunatly will have to wait a month or two. I'll be selling putting my wing&bootlid up together for sale soon, after a stealth wing look now, then I wanna change the mags.....list goes on...:D it's all good :D one day:D

James: not sure if an X1K members are coming? not even sure if that even exists still?

reckon we should all just form a Geelong(an surrounding areas) section on SAU an organise our own cruise's, meetups, drinking nights....etc.

any thoughts anyone?

:P Berin

Was a great cruise......good turn out, great group of people. You missed out!!

should be another coming up in mid-late Nov? but not to certain on a date yet...

As my luck continues (getting my car keyed) I now have a defect notice today (Sunday)for being too low.....DOH' :goddam: . I was pulled over in Ryrie st in the taxi rank bit near the TAB :D (could they have picked a more public place?), at least I have adjustable coilovers so fixing the minor defect aint a prob at all, its already fixed, but still kinda annoying....the cop was pretty nice about it really, just doing his job i guess. At least he didnt put the yellow tag up, just got the blue slip which I sign myself to declare it's fixed and mail it off to VicRoads.

Whilst talking to the cop he asked me to pop the hood etc.... from my polite 10min conversation I had with him, he told me that becuase of the accident up top carpark recently they've been told to crack down on "modified" cars an "hoons" big time....and there going to....if you have a atmo BOV you can incur a $2000 fine (EPA fine), also you can now be defected for your big stereo (didnt clarify big) because with the vibration they create can weaken the cars structure by weakening the spot welds of the chassis etc (lucky i didnt have my usual 2 12" subs in the boot at the time)...kinda makes sense....but id say its more EXTREME nit picking!!! Ride heights, Tyres, tinted/modified (unroadworthy) head/tail lights, loud exhausts, power-weight ratio's (P platers)....the works.

so be carefull driving around geelong, "hoons" & "modified" cars ARE being targeted as a repercussion of the accident recently involving "hoons" in "modified" cars.

thought i'd give you the heads up rather than find out the hard way

:P Berin

should all meet up one weekend soon and catch up, bit of a meet & greet kinda thing, put names & faces to cars :D

Create an account or sign in to comment

You need to be a member in order to leave a comment

Create an account

Sign up for a new account in our community. It's easy!

Register a new account

Sign in

Already have an account? Sign in here.

Sign In Now


  • Similar Content

  • Latest Posts

    • From there, it is really just test and assemble. Plug the adapter cables from the unit into the back of the screen, then the other side to the car harness. Don't forget all the other plugs too! Run the cables behind the unit and screw it back into place (4 screws) and you should now have 3 cables to run from the top screen to the android unit. I ran them along the DS of the other AV units in the gap between their backets and the console, and used some corrugated tubing on the sharp edges of the bracket so the wires were safe. Plug the centre console and lower screen in temporarily and turn the car to ACC, the AV should fire up as normal. Hold the back button for 3 sec and Android should appear on the top screen. You need to set the input to Aux for audio (more on that later). I put the unit under the AC duct in the centre console, with the wifi antenna on top of the AC duct near the shifter, the bluetooth antenna on the AC duct under the centre console The GPS unit on top of the DS to AC duct; they all seem to work OK there are are out of the way. Neat cable routing is a pain. For the drive recorder I mounted it near the rear view mirror and run the cable in the headlining, across the a pillar and then down the inside of the a pillar seal to the DS lower dash. From there it goes across and to one USB input for the unit. The second USB input is attached to the ECUtec OBD dongle and the 3rd goes to the USB bulkhead connected I added in the centre console. This is how the centre console looks "tidied" up Note I didn't install the provided speaker, didn't use the 2.5mm IPod in line or the piggyback loom for the Ipod or change any DIP switches; they seem to only be required if you need to use the Ipod input rather than the AUX input. That's it, install done, I'll follow up with a separate post on how the unit works, but in summary it retains all factory functions and inputs (so I still use my phone to the car for calls), reverse still works like factory etc.
    • Place the new daughterboard in the case and mount it using the 3 small black rivets provided, and reconnect the 3 factory ribbon cables to the new board Then, use the 3 piggyback cables from the daughterboard into the factory board on top (there are stand offs in the case to keep them apart. and remember to reconnect the antenna and rear cover fan wires. 1 screw to hold the motherboard in place. Before closing the case, make a hole in the sticker covering a hole in the case and run the cable for the android unit into the plug there. The video forgot this step, so did I, so will you probably. Then redo the 4 screws on back, 2 each top and bottom, 3 each side and put the 2 brackets back on.....all ready to go and not that tricky really.      
    • Onto the android unit. You need to remove the top screen because there is a daughterboard to put inside the case. Each side vent pops out from clips; start at the bottom and carefully remove upwards (use a trim remover tool to avoid breaking anything). Then the lower screen and controls come out, 4 screws, a couple of clips (including 3 flimsy ones at the top) and 3 plugs on the rear. Then the upper screen, 4 screws and a bunch of plugs and she is out. From there, remove the mounting brackets (2 screws each), 4 screws on the rear, 2 screws top and bottom and 3 screws holding in the small plates on each side. When you remove the back cover (tight fit), watch out for the power cable for the fan, I removed it so I could put the back aside. The mainboard is held in by 1 screw in the middle, 1 aerial at the top and 3 ribbon cables. If you've ever done any laptop stuff the ribbon cables are OK to work with, just pop up the retainer and they slide out. If you are not familiar just grab a 12 year old from an iphone factory, they will know how it works The case should now look like this:
    • Switching the console was tricky. First there were 6 screws to remove, and also the little adapter loom and its screws had to come out. Also don't forget to remove the 2 screws holding the central locking receiver. Then there are 4 clips on either side....these were very tight in this case and needed careful persuading with a long flat screw driver....some force required but not enough to break them...this was probably the fiddliest part of the whole job. In my case I needed both the wiring loom and the central locking receiver module to swap across to the new one. That was it for the console, so "assembly is the reverse of disassembly"
    • But first....while I was there, I also swapped across the centre console box for the other style where the AV inputs don't intrude into the (very limited !) space.  Part# was 96926-4GA0A, 284H3-4GA0B, 284H3-4GA0A. (I've already swapped the top 12v socket for a USB bulkhead in this pic, it fit the hole without modification:) Comparison of the 2: Basically to do the console you need to remove the DS and PS side console trim (they slide up and back, held in by clips only) Then remove the back half of the console top trim with the cupholders, pops up, all clips again but be careful at the front as it is pretty flimsy. Then slide the shifter boot down, remove the spring clip, loose it forever somewhere in the car the pull the shift knob off. Remove the tiny plastic piece on DS near "P" and use something thin and long (most screwdrivers won't fit) to push down the interlock and put the shifter down in D for space. There is one screw at the front, then the shifter surround and ashtray lift up. There are 3 or 4 plugs underneath and it is off. Next is the rear cover of the centre console; you need to open the console lid, pop off the trim covering the lid hinge and undo the 2rd screw from the driver's side (the rest all need to come out later so you can do them all now and remove the lid) Then the rear cover unclips (6 clips), start at the top with a trim tool pulling backwards. Once it is off there are 2 screws facing rearwards to remove (need a short phillips for these) and you are done with the rear of the console. There are 4 plugs at the A/V box to unclip Then there are 2 screws at the front of the console, and 2 clips (pull up and back) and the console will come out.
×
×
  • Create New...