Jump to content
SAU Community

Recommended Posts

hi

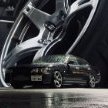
this is my car. iv had it about 9 months now. just counting down the last three months till i can bring it back to australia.

99 Nissan C35 Laurel Club S

RB25det manual

its pretty well standard

aero lip kit - the lip is made by the company i bought the car from

KTS coilovers

Blitz cat back

HKS turn flow cooler

Greddy 50mm dual core radiator

Blitz full bucket seat

cusco castor rods

cusco front and rear swaybars

1.5 way diff

ORC super single

work emotion xt7's 18x9.5 +12 all round

federal rsr fronts and ss595's rear 225/40/18

2 x r33 gtr rims with ss595's

works bell detachable boss kit

360mm nardi classic in silver

HKS boost and water temp gauges

roof spoiler

currently

img1100a.jpg

img1103.jpg

img1104.jpg

img1105.jpg

castorrods.jpg

img1107renamed3796.jpg

img1108renamed14011.jpg

img1109renamed17105.jpg

img1110renamed19236.jpg

img1185a.jpg

img1184w.jpg

img1209r.jpg

img1213.jpg

img1214v.jpg

f1001330.jpg

img1408w.jpg

f1001331.jpg

img1452ij.jpg

img1453t.jpg

the car will be getting sold so if anyone is genuinely interested shoot me a pm.

it can come with no mods or as many as someone wants as its a personal import..........

i wont be letting the car go for nothing tho :)

Edited by adam87
Link to comment
https://www.sau.com.au/forums/topic/294406-c35-laurel/
Share on other sites

  • Replies 43
  • Created
  • Last Reply

Top Posters In This Topic

Adam, you remember me telling you how I was going to buy this car off you before you even picked it up ;)

Is that my bed I can see next to the GTR rims?

What is that bracing stuff on the castor rods?

i sure do!!!!!!

im surprised you still remember that bed. haha :(

the cars all yours if you want it

Link to comment
https://www.sau.com.au/forums/topic/294406-c35-laurel/#findComment-4914209
Share on other sites

Eeek I have never seen one of these before, what a nice looking car and with an RB too.. hmmm I like :). These aren't available for import through SEVS (or whatever it is called) yet are they? Keep up the good work!

Link to comment
https://www.sau.com.au/forums/topic/294406-c35-laurel/#findComment-4923879
Share on other sites

Eeek I have never seen one of these before, what a nice looking car and with an RB too.. hmmm I like :) . These aren't available for import through SEVS (or whatever it is called) yet are they? Keep up the good work!

thanks

nope :) and there not going to be anytime soon either luckily :P

Link to comment
https://www.sau.com.au/forums/topic/294406-c35-laurel/#findComment-4935213
Share on other sites

Damn shame. How does it rate against a chaser?

my plan from the beginning was to bring it back to aus so its be the only registered one.

i was looking at chasers in the same shop i bought this from. as much as i liked them this has so much appeal because theres none in aus. so i figured it would be easy to sell.

never driven a chaser unfortunately.

its got an rb25, the interior is nicer than a chaser I think.

parts will be cheaper cause its a nissan.....

it uses s14/15 suspension so you can always change anything easily

Link to comment
https://www.sau.com.au/forums/topic/294406-c35-laurel/#findComment-4936560
Share on other sites

  • 1 month later...

^^ haha yeah all Nissan sedans do that. Having my Ceffy on blocks for soo long made me forget that it barely comes up to my chest when its on the ground on wheels.

Adam, which state are you returning to?

and may I ask approximately how much you'd be willing to let it go for? or PM me ?

I might be interested in grabbing that and a VQ30DETT if the opportunity comes up.

Link to comment
https://www.sau.com.au/forums/topic/294406-c35-laurel/#findComment-5025933
Share on other sites

nice car! , they will be eligable for import in the not too distant future :) , in the pics they look massive ;)

i have a feeling there still a long way off and even if they do get approval there all going to be non turbo autos. the turbo auto's are rare as hens teeth and they all have neo engines.

fair enough you can convert it when it gets to aust tho

they are a big car but the other car i drive here is an elgrand, so its small compared to that :thumbsup:

^^ haha yeah all Nissan sedans do that. Having my Ceffy on blocks for soo long made me forget that it barely comes up to my chest when its on the ground on wheels.

Adam, which state are you returning to?

and may I ask approximately how much you'd be willing to let it go for? or PM me ?

I might be interested in grabbing that and a VQ30DETT if the opportunity comes up.

ill be back to qld :)

will send you a pm

Edited by adam87
Link to comment
https://www.sau.com.au/forums/topic/294406-c35-laurel/#findComment-5026421
Share on other sites

Create an account or sign in to comment

You need to be a member in order to leave a comment

Create an account

Sign up for a new account in our community. It's easy!

Register a new account

Sign in

Already have an account? Sign in here.

Sign In Now


  • Similar Content

  • Latest Posts

    • Hi, is the HKS  Tower Bar still available ? negotiable ? 🤔
    • From there, it is really just test and assemble. Plug the adapter cables from the unit into the back of the screen, then the other side to the car harness. Don't forget all the other plugs too! Run the cables behind the unit and screw it back into place (4 screws) and you should now have 3 cables to run from the top screen to the android unit. I ran them along the DS of the other AV units in the gap between their backets and the console, and used some corrugated tubing on the sharp edges of the bracket so the wires were safe. Plug the centre console and lower screen in temporarily and turn the car to ACC, the AV should fire up as normal. Hold the back button for 3 sec and Android should appear on the top screen. You need to set the input to Aux for audio (more on that later). I put the unit under the AC duct in the centre console, with the wifi antenna on top of the AC duct near the shifter, the bluetooth antenna on the AC duct under the centre console The GPS unit on top of the DS to AC duct; they all seem to work OK there are are out of the way. Neat cable routing is a pain. For the drive recorder I mounted it near the rear view mirror and run the cable in the headlining, across the a pillar and then down the inside of the a pillar seal to the DS lower dash. From there it goes across and to one USB input for the unit. The second USB input is attached to the ECUtec OBD dongle and the 3rd goes to the USB bulkhead connected I added in the centre console. This is how the centre console looks "tidied" up Note I didn't install the provided speaker, didn't use the 2.5mm IPod in line or the piggyback loom for the Ipod or change any DIP switches; they seem to only be required if you need to use the Ipod input rather than the AUX input. That's it, install done, I'll follow up with a separate post on how the unit works, but in summary it retains all factory functions and inputs (so I still use my phone to the car for calls), reverse still works like factory etc.
    • Place the new daughterboard in the case and mount it using the 3 small black rivets provided, and reconnect the 3 factory ribbon cables to the new board Then, use the 3 piggyback cables from the daughterboard into the factory board on top (there are stand offs in the case to keep them apart. and remember to reconnect the antenna and rear cover fan wires. 1 screw to hold the motherboard in place. Before closing the case, make a hole in the sticker covering a hole in the case and run the cable for the android unit into the plug there. The video forgot this step, so did I, so will you probably. Then redo the 4 screws on back, 2 each top and bottom, 3 each side and put the 2 brackets back on.....all ready to go and not that tricky really.      
    • Onto the android unit. You need to remove the top screen because there is a daughterboard to put inside the case. Each side vent pops out from clips; start at the bottom and carefully remove upwards (use a trim remover tool to avoid breaking anything). Then the lower screen and controls come out, 4 screws, a couple of clips (including 3 flimsy ones at the top) and 3 plugs on the rear. Then the upper screen, 4 screws and a bunch of plugs and she is out. From there, remove the mounting brackets (2 screws each), 4 screws on the rear, 2 screws top and bottom and 3 screws holding in the small plates on each side. When you remove the back cover (tight fit), watch out for the power cable for the fan, I removed it so I could put the back aside. The mainboard is held in by 1 screw in the middle, 1 aerial at the top and 3 ribbon cables. If you've ever done any laptop stuff the ribbon cables are OK to work with, just pop up the retainer and they slide out. If you are not familiar just grab a 12 year old from an iphone factory, they will know how it works The case should now look like this:
    • Switching the console was tricky. First there were 6 screws to remove, and also the little adapter loom and its screws had to come out. Also don't forget to remove the 2 screws holding the central locking receiver. Then there are 4 clips on either side....these were very tight in this case and needed careful persuading with a long flat screw driver....some force required but not enough to break them...this was probably the fiddliest part of the whole job. In my case I needed both the wiring loom and the central locking receiver module to swap across to the new one. That was it for the console, so "assembly is the reverse of disassembly"
×
×
  • Create New...