Jump to content
SAU Community

Recommended Posts

Hey people this is my first 31, picked it up mid 09 and its in a bit of a sad state not sure if any of you know the car and could tell me more bout it, I swapped it for my Hi-lux with a lad in ballina. before i got it, it sat on 18's had gauges across the dash with wrx bucket seats installed.

Current specs are:-

* Silver top RB20DET (engineered)

* 5sp (not sure what its off)

* Microtech LT-10S, running out of the box tune needs full cold start tune, Runs alright once warmed up

* 3" Exhaust off the dump pipe (bigger cat I think)

* Silo front seats

* Import dash/cluster & centre console (temp & fuel don't work properly, speedo out 10 -15k's)

* Boost Tap

* Stock turbo currently fitting a rb25 turbo

* SMIC

* Cheap lookin Turbo timer

* Standard diff :eek4:

money is a bit of an issue atm (hence in long term project forum) so my first priority is to get it back on the road should be achievable by start of Feb.

The old owner had the boost set too high and I had no boost gauge so it threw the wheel off the exhaust side of the standard turbo (god knows where it went lol (see pic)) recently purchased an RB25 turbo just chasing the coolant lines/bolts because the bolts in the RB20 turbo were the wrong size.

currently getting the tail shaft rebuilt will be in this week sometime, the centre bearing was flogged out and the drive line place wouldn't just replace just the centre bearing they wanted to fully rebuild & balance it so I just got it done.

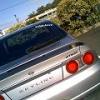
She has a bit of rust that is in need of repair for rego (see pics) hoping to eventually get a cleaner S3 wagon as a project base before I go too far with it but need to get this on the road first. have lined up a pair of guards just need some paint and cut a bit out of the tail gate and behind both guards, fit a pair of tyres also have some slotted rotors coming.

have bought a boost gauge just got to fit it

I'm doing all the work myself don't know anyone that knows much about what I'm doing so I'm on my own, so if anyone can give me any pointers would be much appreciated

Front.jpg

Back.jpg

22112009884.jpg

29082009787.jpg

net6.jpg

Tail Gate

22112009883.jpg

Drivers Guard

22112009881.jpg

Old Turbo

Old_Turbs.jpg

SMIC

Cooler.jpg

Turbo Off

no_turbs.jpg

Passenger side behind guard

Pass_side_rust.jpg

Drivers side behind guard

Driver_side_rust.jpg

Front end off

Naked_front.jpg

Waiting for tail shaft

Back_tailshaft_out.jpg

Dirty Under body, will paint and clean if I get time

Dirty_diff.jpg

found a doner car last night, put a deposit down this morning, going to pick it up tomorrow morn, bus leaves 3.20AM :-o so looks like i'm going down that route.. cant wait for the fun to begin

New_Skyline.jpg

New_Skyline_back.jpg

New_Skyline_inside.jpg

New_Skyline_inside2.jpg

New_Skyline_side.jpg

Hey man nice projected. I wouldn't mind doing a wagon projected with my spears out of my sedan as a daily driver.

The rust under the front guards is normal and a flamin mongrel to get ride off.

You gonna put all your good stuff in the new one or use the parts off the new one on this one?

got all the way to brissi, 9hr bus trip got there to look at it and it was the biggest piece of shit I'd ever seen..

he was some old prick wouldn't even leave the comfort of his air-con office, send someone else out side was one of the dodgeyest pricks around I'd say, was hoping to get it to put all my shit out of my car into it was supposed to have 180,000 on it.. had oil all over motor shot rocker cover & exhaust gasket, smashed pass side wagon glass stuffed seat belts no high beam or tail lights dirty interior, pass mirror hanging on by the just the adjuster oil nearly at a drip from the diff, rust when told no rust paint severely faded scratched.. didn't look nothing like the pictures you'd swear it was a different car

i know couldn't expect much for $600 but i worked at a wreckers and we bought better cars for $50, he wouldn't even go under $500, he told me it would be fine to drive back 5hrs to Coffs, it wouldn't have made the border and if it did nsw police would have got me and probably made me tow it

caught an 8hr bus home wasted 24hrs of my life and $200

now considering stripping it and parting it out on ebay... soo over it

Edited by de Powa
got all the way to brissi, 9hr bus trip got there to look at it and it was the biggest piece of shit I'd ever seen..

he was some old prick wouldn't even leave the comfort of his air-con office, send someone else out side was one of the dodgeyest pricks around I'd say, was hoping to get it to put all my shit out of my car into it was supposed to have 180,000 on it.. had oil all over motor shot rocker cover & exhaust gasket, smashed pass side wagon glass stuffed seat belts no high beam or tail lights dirty interior, pass mirror hanging on by the just the adjuster oil nearly at a drip from the diff, rust when told no rust paint severely faded scratched.. didn't look nothing like the pictures you'd swear it was a different car

i know couldn't expect much for $600 but i worked at a wreckers and we bought better cars for $50, he wouldn't even go under $500, he told me it would be fine to drive back 5hrs to Coffs, it wouldn't have made the border and if it did nsw police would have got me and probably made me tow it

caught an 8hr bus home wasted 24hrs of my life and $200

now considering stripping it and parting it out on ebay... soo over it

Cheer up champ.

Wagons are awsome! Find a good shell, paint it black, throw some tough rims on, chuck all the good stuff in it and have some fun.

Insipration:

post-22624-1262787055_thumb.jpg

post-22624-1262787129_thumb.jpg

post-22624-1262787193_thumb.jpg

Create an account or sign in to comment

You need to be a member in order to leave a comment

Create an account

Sign up for a new account in our community. It's easy!

Register a new account

Sign in

Already have an account? Sign in here.

Sign In Now


  • Similar Content

  • Latest Posts

    • Hi, is the HKS  Tower Bar still available ? negotiable ? 🤔
    • From there, it is really just test and assemble. Plug the adapter cables from the unit into the back of the screen, then the other side to the car harness. Don't forget all the other plugs too! Run the cables behind the unit and screw it back into place (4 screws) and you should now have 3 cables to run from the top screen to the android unit. I ran them along the DS of the other AV units in the gap between their backets and the console, and used some corrugated tubing on the sharp edges of the bracket so the wires were safe. Plug the centre console and lower screen in temporarily and turn the car to ACC, the AV should fire up as normal. Hold the back button for 3 sec and Android should appear on the top screen. You need to set the input to Aux for audio (more on that later). I put the unit under the AC duct in the centre console, with the wifi antenna on top of the AC duct near the shifter, the bluetooth antenna on the AC duct under the centre console The GPS unit on top of the DS to AC duct; they all seem to work OK there are are out of the way. Neat cable routing is a pain. For the drive recorder I mounted it near the rear view mirror and run the cable in the headlining, across the a pillar and then down the inside of the a pillar seal to the DS lower dash. From there it goes across and to one USB input for the unit. The second USB input is attached to the ECUtec OBD dongle and the 3rd goes to the USB bulkhead connected I added in the centre console. This is how the centre console looks "tidied" up Note I didn't install the provided speaker, didn't use the 2.5mm IPod in line or the piggyback loom for the Ipod or change any DIP switches; they seem to only be required if you need to use the Ipod input rather than the AUX input. That's it, install done, I'll follow up with a separate post on how the unit works, but in summary it retains all factory functions and inputs (so I still use my phone to the car for calls), reverse still works like factory etc.
    • Place the new daughterboard in the case and mount it using the 3 small black rivets provided, and reconnect the 3 factory ribbon cables to the new board Then, use the 3 piggyback cables from the daughterboard into the factory board on top (there are stand offs in the case to keep them apart. and remember to reconnect the antenna and rear cover fan wires. 1 screw to hold the motherboard in place. Before closing the case, make a hole in the sticker covering a hole in the case and run the cable for the android unit into the plug there. The video forgot this step, so did I, so will you probably. Then redo the 4 screws on back, 2 each top and bottom, 3 each side and put the 2 brackets back on.....all ready to go and not that tricky really.      
    • Onto the android unit. You need to remove the top screen because there is a daughterboard to put inside the case. Each side vent pops out from clips; start at the bottom and carefully remove upwards (use a trim remover tool to avoid breaking anything). Then the lower screen and controls come out, 4 screws, a couple of clips (including 3 flimsy ones at the top) and 3 plugs on the rear. Then the upper screen, 4 screws and a bunch of plugs and she is out. From there, remove the mounting brackets (2 screws each), 4 screws on the rear, 2 screws top and bottom and 3 screws holding in the small plates on each side. When you remove the back cover (tight fit), watch out for the power cable for the fan, I removed it so I could put the back aside. The mainboard is held in by 1 screw in the middle, 1 aerial at the top and 3 ribbon cables. If you've ever done any laptop stuff the ribbon cables are OK to work with, just pop up the retainer and they slide out. If you are not familiar just grab a 12 year old from an iphone factory, they will know how it works The case should now look like this:
    • Switching the console was tricky. First there were 6 screws to remove, and also the little adapter loom and its screws had to come out. Also don't forget to remove the 2 screws holding the central locking receiver. Then there are 4 clips on either side....these were very tight in this case and needed careful persuading with a long flat screw driver....some force required but not enough to break them...this was probably the fiddliest part of the whole job. In my case I needed both the wiring loom and the central locking receiver module to swap across to the new one. That was it for the console, so "assembly is the reverse of disassembly"
×
×
  • Create New...