Jump to content
SAU Community

Recommended Posts

Hi,

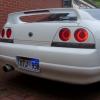
My mate gave me his R33 front bar.

But theres a couple of problems with it

Firstly it has a crack in the bottom of it

and also i want to insert some mesh in the two bottom corners of the bar. But hes chopped away at it and both sides have uneven sides.

What do you guys recommened to repair a crack?? I want something i can apply which will fill in the holea and i can sand it back?

Also what do you think i should use in terms of lasting and durability for the mesh?

And what do you recommened to keep it held in place?

thankyou

post-63140-1263522833_thumb.jpg

Link to comment
https://www.sau.com.au/forums/topic/304013-front-bar/
Share on other sites

that to me looks like a series 1 or 1.5 front bar.....best thing to do is contact a Japanese Import Wrecker and see if they have a front bar of same sort in stock in good condition....JIS have a shiatload of panels and kits.....that will be cheaper option for you mate.....

hope this helps :(

Link to comment
https://www.sau.com.au/forums/topic/304013-front-bar/#findComment-5036196
Share on other sites

well

first

take it to a

panel

beater.

then he will fix it, rub it back, and fibreglass in some metal tabs that can fold down to support the mesh.

go to autobarn

buy mesh (not blue)

then the rest is up to you

good

luck

Link to comment
https://www.sau.com.au/forums/topic/304013-front-bar/#findComment-5036220
Share on other sites

it holds a special place with me for the fond memories for the net sau vs ns.com battles that soon followed its arrival :D

Yes ... I had deeply apologised to NS.com for not fitting cheap chinese or ebay parts to my car ... warranting their slagging, so they attacked the blue mesh. Clearly my error was not consulting them on how I should have modified my car. Shame on me for doing what I wanted and looking up brand names like Nismo, HKS, Apexi, Sard, Gates, Walbro, Turbosmart, BBS, just to name a few. :P

Link to comment
https://www.sau.com.au/forums/topic/304013-front-bar/#findComment-5036686
Share on other sites

LOL you really need to ask!?

Would look better with my boot sunk into it :O

And on a serious note, I fully understand ns.com's lifetime ban just because you have blue mesh. :)

Take ya tractor and your rig, and move along old man :) We're perfectly capable of going OT without your assistance! :O

Link to comment
https://www.sau.com.au/forums/topic/304013-front-bar/#findComment-5037176
Share on other sites

don't listen to half the people on here man... no one does their own stuff these days. no point taking it to a pannel beater or buying another one as youre gonna get ripped off either way.

that's an easy fix and you can do it at home for next to nothing.

i bought same style bumper bar off a member on here which was completely ripped in the bottom section, had 3 cracks through it.

(sorry no pics of before)

tools i used,

soldering ion + zipties

bog

primer

paint

firstly, align the cracks to where they ripped. Get someone to hold it in place or simply use duct tape to hold it all together temporarily.

use the soldering ion to melt the cracks and use zipties as a plastic filler, work the plastic in to itself with the soldering ion untill its completely joined together, it should look something like this:

th_DSC00095.jpg

then grab bog, mix it and fill in the uneven surface till it covers everything, sand it and keep repeating till its the right shape...

th_DSC00195.jpg

primer n paint. presto.

th_blakfront.jpg

i did it matte coz i was gonna respray the whole car like that at the time. unfortunately i smashed and cracked the bar again a few times so ill be doing this myself again soon.

hope this helped :P

Edited by SkyHi_33
Link to comment
https://www.sau.com.au/forums/topic/304013-front-bar/#findComment-5038503
Share on other sites

Create an account or sign in to comment

You need to be a member in order to leave a comment

Create an account

Sign up for a new account in our community. It's easy!

Register a new account

Sign in

Already have an account? Sign in here.

Sign In Now


  • Similar Content

  • Latest Posts

    • I get that taking off the head is best but that's a bit much for "just" valve seals. I was just under the impression that one would be able to rotate to TDC and be able to temporarily drop the valve without losing it and effectively having to remove the head to then recover it. I never knew people actually pushed rope into the cylinder to do valve seals hahaha So just to confirm, just going to TDC will not work? In that case I know when I do valve seals I'll maybe just remove the head and do some other things while I'm there, or just wait until I do an engine build.
    • The old approach was to fill the cylinder/chamber with a length of rope pushed in through the sparkplug hole. The new approach is to connect compressed air to the sparkplug hole and fill it with enough pressure to push the valves up. Doing either of these things with the head on and the engine in the car is a lot less pleasant than doing it properly.
    • Can't you put the pistons to TDC and then do the valve seals? Or will the drop down too far to pull them back up?
    • One thing I can tell you is, do it properly the first time. If you encounter unexpected problems just let the car sit for a week or two if you have to get some other parts or figure stuff out.  I'd have said go and use as many OEM parts as possible but since you want to change the turbo later on a custom kit is probably the better choice. Since I have no experience with RB25 just compare parts diagrams and images before buying a line kit and it should be easy to see if it has everything you need. Amayama has very good parts diagrams and part number lists, that is what I used a bunch to figure out what I might need. And don't forget to plan ahead and possibly renew other stuff that's easy to get to while you're in there doing the turbo lines. Happy wrenching
    • Update 4:   Hi all, good news. Engine is running and all the gaskets and seals seem to be working as intended. No leaks so far, even the JB Weld seems to hold. I flushed out the old coolant a few times and put in fresh coolant, not Nissan stuff, I decided to try the Ravenol Protect FL22, they claim it works for a wide variety of JDM cars and the opinions on it by some people were pretty good. And it has the nice poison green color! And man am I glad I bought a coolant system tester earlier this year, vacuum filling works wonders on this engine. I can definitely recommend this to anyone still doing it the old school way. All you need is compressed air supply. Will have to do a small test drive as soon as I can, I removed the gauge cluster again as the tacho needle was still bouncing around a bit but it was much better than before already.  I also found some cracks on all 4 tires inner and outer sidewalls. Apparently these tires should 't be parked on for extended periods or be kept under 0 degrees during storage, which I did not know. Clearly the previous owner didn't look into those details either, he probably bought them just cause they are cool semi-slicks. I'm just wondering how tf I am supposed to reach 30-80 degree tire temperatures on the public road consistenly, these tires were never going to work for my use case. I'll probably order Continental SportContact7 ones as these are the best allround summer tire available right now and I don't think I'll need anything crazier for now. Do let me know if you have experience with various tires and which ones you recommend.
×
×
  • Create New...