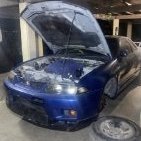
Scotty Posted December 29, 2003 Share Posted December 29, 2003 Hey All, I think I posted this up previously, but was lost in the server upgrade. Anyway, I have a set of R33 GTR rims available. I guess the main things are: - each rim has some gutter marks on them. (they can be fixed at 80 bucks a wheel) - tyre sizes are 245x40x17 Falken GS (I think) with approximately 40% tread left. Photos can be found here, please note I have highlighted the scratches on each wheel. They are not bad nor deep, but for the perfectionist, they always can be repaired. EDIT: Price update. 1500. Thanks! Located in SE Melbourne. Thanks. Link to comment https://www.sau.com.au/forums/topic/30689-fs-r33-gtr-rims-and-tyres/ Share on other sites More sharing options...
mines Posted December 29, 2003 Share Posted December 29, 2003 check ur pm Link to comment https://www.sau.com.au/forums/topic/30689-fs-r33-gtr-rims-and-tyres/#findComment-621210 Share on other sites More sharing options...
Scotty Posted December 29, 2003 Author Share Posted December 29, 2003 replied.......please check your pm. Link to comment https://www.sau.com.au/forums/topic/30689-fs-r33-gtr-rims-and-tyres/#findComment-621261 Share on other sites More sharing options...
Scotty Posted January 18, 2004 Author Share Posted January 18, 2004 price update........ best offer above 1500, and they're yours! Link to comment https://www.sau.com.au/forums/topic/30689-fs-r33-gtr-rims-and-tyres/#findComment-647821 Share on other sites More sharing options...
lowflyer Posted January 18, 2004 Share Posted January 18, 2004 If you could get them to Sydney I would gladly give you $1500. Regards, Karl Link to comment https://www.sau.com.au/forums/topic/30689-fs-r33-gtr-rims-and-tyres/#findComment-649000 Share on other sites More sharing options...
Scotty Posted January 18, 2004 Author Share Posted January 18, 2004 Hey Karl, Thanks for your offer, but I don't think I'll be able to cover shipping at that price. I can however research the cheapest option to get them to you. I'm hoping it won't be too much. Please reply with your thoughts. Cheers! Link to comment https://www.sau.com.au/forums/topic/30689-fs-r33-gtr-rims-and-tyres/#findComment-649035 Share on other sites More sharing options...
sewid Posted January 18, 2004 Share Posted January 18, 2004 Shipping will cost $80 - $100 for these rims to sydney using a courier such as http://www.tollipec.com.au/ . I know this because ive already made that enquiry when I was thinking of buying these rims off Scotty! Link to comment https://www.sau.com.au/forums/topic/30689-fs-r33-gtr-rims-and-tyres/#findComment-649051 Share on other sites More sharing options...
Scotty Posted January 18, 2004 Author Share Posted January 18, 2004 Sewid! How's it going bud! Forgot that I spoke to you about these. How'd those 18inch rims go in the end...... Great buy from what I recall. Thanks for your comments. So Karl, there you go! Link to comment https://www.sau.com.au/forums/topic/30689-fs-r33-gtr-rims-and-tyres/#findComment-649057 Share on other sites More sharing options...
sewid Posted January 18, 2004 Share Posted January 18, 2004 Hey mate Theyre going well. No gutter scrapes yet. Very careful when parking. Good luck with the sale! Link to comment https://www.sau.com.au/forums/topic/30689-fs-r33-gtr-rims-and-tyres/#findComment-649063 Share on other sites More sharing options...
Scotty Posted January 19, 2004 Author Share Posted January 19, 2004 Thanks to a good friend in these forums, we may have another shipping option BORDER EXPRESS: 4 rims (assuming they weigh under 40kgs each) will cost $75 door to door from melb to syd. $110 for the rims to be shipped with INSURANCE of $2000 for all the rims. So yeah, another option. Link to comment https://www.sau.com.au/forums/topic/30689-fs-r33-gtr-rims-and-tyres/#findComment-649153 Share on other sites More sharing options...
NickySantoro Posted January 19, 2004 Share Posted January 19, 2004 Guys comon... these guy is selling em for under half retail price. I had an accident and Just Cars paid up over 4 g's to replace em. There a nice set of forged original wheels. A bargains not a fkn bargain if you dont buy it... simple as that. These are perfect for any skyline. Dont be stupid and let this guy sell em to someone else... take the innitiative people, and dont be like fkn hobos... I mean this guys got a good solid set of wheels for sale.. and i mean sale at 1500. and you guys are always after a fkn bargain. seriously. Link to comment https://www.sau.com.au/forums/topic/30689-fs-r33-gtr-rims-and-tyres/#findComment-649764 Share on other sites More sharing options...
lowflyer Posted January 19, 2004 Share Posted January 19, 2004 Thanks to a good friend in these forums, we may have another shipping optionBORDER EXPRESS: 4 rims (assuming they weigh under 40kgs each) will cost $75 door to door from melb to syd. $110 for the rims to be shipped with INSURANCE of $2000 for all the rims. So yeah, another option. A friend of mine travels to Vic on the odd occasion, let me check with him and what I can do on freight rates. I am also looking at some wheels in Sydney so leave it with me a couple of days. Thanks. Link to comment https://www.sau.com.au/forums/topic/30689-fs-r33-gtr-rims-and-tyres/#findComment-650008 Share on other sites More sharing options...
Scotty Posted January 19, 2004 Author Share Posted January 19, 2004 No worries, speak to you soon. Link to comment https://www.sau.com.au/forums/topic/30689-fs-r33-gtr-rims-and-tyres/#findComment-650036 Share on other sites More sharing options...
Scotty Posted January 21, 2004 Author Share Posted January 21, 2004 Bumpity....... Link to comment https://www.sau.com.au/forums/topic/30689-fs-r33-gtr-rims-and-tyres/#findComment-652758 Share on other sites More sharing options...
king_kw13 Posted January 21, 2004 Share Posted January 21, 2004 Is your car gonna sit on bricks once u have sold these rims Scotty? Whats next? Link to comment https://www.sau.com.au/forums/topic/30689-fs-r33-gtr-rims-and-tyres/#findComment-652867 Share on other sites More sharing options...
Scotty Posted January 23, 2004 Author Share Posted January 23, 2004 Going back to stock........ can no longer maintain these, given my car has been violated in recent times..... need a new HU bumping....... Link to comment https://www.sau.com.au/forums/topic/30689-fs-r33-gtr-rims-and-tyres/#findComment-656450 Share on other sites More sharing options...
Scotty Posted February 5, 2004 Author Share Posted February 5, 2004 Hey, where'd my pics go? Oh well, for those enquiring, I've sent them to your email accounts. Thanks Link to comment https://www.sau.com.au/forums/topic/30689-fs-r33-gtr-rims-and-tyres/#findComment-675206 Share on other sites More sharing options...
Skyline Trev Posted February 15, 2004 Share Posted February 15, 2004 PM sent Link to comment https://www.sau.com.au/forums/topic/30689-fs-r33-gtr-rims-and-tyres/#findComment-686914 Share on other sites More sharing options...


Recommended Posts
Create an account or sign in to comment
You need to be a member in order to leave a comment
Create an account
Sign up for a new account in our community. It's easy!
Register a new accountSign in
Already have an account? Sign in here.
Sign In Now