Jump to content
SAU Community

Recommended Posts

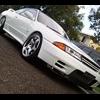
heya guys i thought i might start myself a little thread detailing my work on my gtr. I bought it in feb this year and well i love it but it defiantly has been a pain lol. I bought it cheap and i know it had a few problems but i am fixing them all slowly. It started in my possession looking like this.

73d37aab.th.jpg

Uploaded with ImageShack.us

The mods on the car where

Built 26 with cp pistons eagle rods, n1 pumps, standard head and cams ect it was basically a freshen up rebuild with a new crank after a oil pump failure, high flowed turbos and a cat back exhaust power fc computer and it was producing 240 kw

It also had billstein coil overs and that was about it.

It needed afair bit of work when i got it for rego. Needed 4 new tyres, front upper control arm bushes, tyre rod ends on the rear, and acouple of oil leaks fixed up. I decided on getting a new set of wheels for the old gurl when i got the tyres and it took me a good couple of months to find them ones i wanted. I would have loved to go for a set of volk gt-c's but wheel i wasnt paying $3000 for a set of wheels without rubber. I settled for a set of Lenso DR1's which i thought looked tuff as and where one of the few wheels with the offset to suit the gtr. Next problem arrised well who supplied them well back in apirl no one seemed to be supplying the wheels and i found one place drift garage in sydney where like the only people that where bring them in. So i ordered them in and picked them up for $1300 for 18*9 with a + 15 offset i went for the 9 inch wide because i thought at the time 10 inch wide rims all round would be abit over the top. Than it was off to tempe tyres to get some rubber for it and i settled on a set of kumo ku31's. So all up the package sett me back alittle over $2000 which i was pretty happy about and this is how they look now.

photo009zz.th.jpg

Uploaded with ImageShack.us

As money was a little bit of a issue well lets face it i was being a tight ass i chose to go and get a sett of camber adjustable arms all round for the gtr and i end up using the jjr ones from just jap which seem to have done the job pretty well. I am not tracking the car atm so for street they should be fine for now.

Also when i picked the car up i knew that the gearbox had the typical 4th and 5th sincro problem so i picked myself up a second hand box and transfer at the right price. All was going well for about 2 months and it all went pear shaped as gtr owns would know it seems. Pulled up to work one day and when i was reversing into the car spot i knowticed a heap of whitish smoke blowing pasted the front and well i didn't know what to think at that stage. I keeped abit of a eye on it and well it just got worse and worse, I original thought it was turbo as the catch can had no oil coming through it but after racking my brain for weeks i took it into hunter and thoams automotive in newcastle he confirmed the worst this was about 3 months ago now.

So yeah the time came to search for a place to do a engine rebuild as i was not game to tempt fate and do it myself risking so much money. I have built quite a few stock cars falcons, and commodores but not a 26. I spoke to crd and a few other people and they where looking like the best bet with a exchange motor with the following

- Nitto 20 thou over pistons

- Nitto H beam rods

- Blue printed and balanced block and crank

- Nitto hi volume pump

- Nitto head gasket

- Tomei type b pon cams

- Gasket kit and ect

For $9000 exchange if my block was ok.

I was just about to go through with this and i finaly got ahold of Paul from Red R racing. Thank Christ i did, So than came the fun part of ripping out the motor as i did it myself and i gave it to paul to build. Here is some photos from the engine removal and stripping.

photo135x.th.jpg

photo139.th.jpg

photo140.th.jpg

photo151.th.jpg

photo152z.th.jpg

photo153e.th.jpg

photo154fg.th.jpg

photo155f.th.jpg

photo156.th.jpg

photo157l.th.jpg

photo158g.th.jpg

photo159r.th.jpg

Link to comment
https://www.sau.com.au/forums/topic/342008-my-gtr-build/
Share on other sites

When i droped it off to paul it was really ment to be a basic rebuild to get me going again but that soon changed as everything does. I ended up deciding and ending up with over a 4 or 5 week period.

reuse my CP 40 over pistons and eagle rods however my rods studs where resized

Tomei type b pon cams and valve springs and a pair of adjustable cam gears

Hks hi volume oil pump

Hks 1000cc injectors

Jim berry clutch

Rb30 flywheel as mine is time bomb to happen (stress fractures)

crank collar

Oil restrictor

Ross 1000hp 25 % over driven harmonic balancer

hi volume sump

A pair of 2860-5's which are on there way soon

Acl bearings and new rings ect

Nitto head gasket i believe

Gates timing belt and new tensioners ect

New Nissan water pump and all the other borning but necessary parts

The block ended up been to far over bored and had bad scoring so it was used as a boat ancher. The hunt was on for a new block it came in a form of a early series's block that had a oil pump failure with a standard bore it appeared to all good till paul measured up the crank tunnel and found it was out of alignment bugger, however paul saved me looking for another block and we did a trade as he could use my block.

Pretty much thats where we stand atm, the block is coming back from the machine shop this week and it can be reassembled.

Link to comment
https://www.sau.com.au/forums/topic/342008-my-gtr-build/#findComment-5519274
Share on other sites

As far as the cosmetic side of things are concerned the engine bay and parts where beyond flithy for a 60 000 km old motor or it wasnt cleaned correctly when the last rebuild. Any how with the engine nearing completion it was time to get a move on with cleaning up the engine parts for the fitment of the new motor. Like painting the throttle bodies and thermostat housing and ect

215i.th.jpg

Uploaded with ImageShack.us

as you can see a huge improvement i will be getting the linkages and ect re-zink coated to make them look new again also

217y.th.jpg

Uploaded with ImageShack.us

You get the idea pretty much most things will be repainted and with the engine covers they are going wrinkle coated black like this and me inlet manifold will be done the same i was also maybe getting the twin turbo compressor pipes done to but i will see how it looks when it is back together it can be always done latter

0711impp02znissanskylin.jpg

Uploaded with ImageShack.us

With the engine bay i have decided to paint it white from the chassis rails up because well it is just beyond discussing. By all means this will be not a perfect job and i am not a professional painter by any means well actually this will be my first with a proper spray gun lol it will be the same colour as the car white to clean the engine bay up and make it look like it has been well looked after and clean not the way it is now. No point seeing my house deposit go into a dirty home. Here are some pics over the last 2 nights of work

photo137rp.th.jpg

Uploaded with ImageShack.us

How it looked just after the motor came out

030mq.th.jpg

Uploaded with ImageShack.us

031do.th.jpg

Uploaded with ImageShack.us

030szk.th.jpg

Uploaded with ImageShack.us

Most of the engine bay has been cleared out to paint, i will be removing the guards and tucking the wiring in behind them and than start preping for the under coat. I also removed my front bar as i will be removing the intercooler to get it cleaned and pressure tested as it had alot of oil go through it was well as the piping here is acouple of pics just before we locked up tonight

033amw.th.jpg

Uploaded with ImageShack.us

036c.th.jpg

Uploaded with ImageShack.us

I think it is time to call it a night there will be more work done tomorrow where the degreasing again for the 3rd time lol prep work and sanding will begin and the removal of the intercooler.

Link to comment
https://www.sau.com.au/forums/topic/342008-my-gtr-build/#findComment-5519345
Share on other sites

Quick update picked up my pair of r34 gtr v-spec dump pipes thanks barbsgtr and motor should be completed in the next week or so, so paul says hopefully the car will be sent off to get the engine bay painted next week weather permitting i still have to remove the last bits of wiring.

Link to comment
https://www.sau.com.au/forums/topic/342008-my-gtr-build/#findComment-5526432
Share on other sites

quick update block is back from machining just waiting on the crank now and it can start going back together. I also picked up a oil filter relocation kit and a hose kit. I should have a short motor by the end of next week which i am cheering about

Link to comment
https://www.sau.com.au/forums/topic/342008-my-gtr-build/#findComment-5537130
Share on other sites

  • 2 weeks later...

Engine bay is finished just waiting for the paint to dry and i will start refitting the wiring harnesses back in and stuff. By then the motor will be ready to drop in starting to get excited.

post-71662-1290169533_thumb.jpg

post-71662-1290169588_thumb.jpg

Link to comment
https://www.sau.com.au/forums/topic/342008-my-gtr-build/#findComment-5557828
Share on other sites

engine bay is reassembled today thanks to my mate joshy for giving me a hand its all starting to come together hopefully can drop the motor in this weekend coming photos up tomorrow

Link to comment
https://www.sau.com.au/forums/topic/342008-my-gtr-build/#findComment-5568633
Share on other sites

  • 4 months later...

Well its been a long time since i last updated this. All i can say it has been a character building process. With alot of delays and problems but firstly i have to say a huge thank you to paul at red r he truly went above and beyond that was required we spent a few very late nights getting this car back together. The end result is atm 320awkw. With drama's on the dyno we just ran out of time to tune it propley to its full potential. Saying that the power difference to what it was with the old motor and this one there is no compassion and there isnt a huge difference in lag time. All seemed to be going ok however a oil leak has raised its ugly head around the turbo oil lines which all i can say about that is FML. But i guess it is one of those little tests that life throws at you ey. So where it stands at the moment is :

  • Fix the oil leak
  • Fix a dead wheel bearing
  • Get the muffler made up its insanely loud but awesome lol
  • Bigger front mount
  • New O2 sensors
  • Get another tune
  • Get the body work done
  • And finaly replace all the disc rotors and pads

So yeah there is abit more to do but atm i got to tell myself it is back on the road and is drivable and it is a hole heap of fun to drive. I will up load some photos of the motor and ect this weekend

Link to comment
https://www.sau.com.au/forums/topic/342008-my-gtr-build/#findComment-5767798
Share on other sites

Create an account or sign in to comment

You need to be a member in order to leave a comment

Create an account

Sign up for a new account in our community. It's easy!

Register a new account

Sign in

Already have an account? Sign in here.

Sign In Now


  • Similar Content

  • Latest Posts

    • As discussed in the previous post, the bushes in the 110 needed replacing. I took this opportunity to replace the castor bushes, the front lower control arm, lower the car and get the alignment dialled in with new tyres. I took it down to Alignment Motorsports on the GC to get this work done and also get more out of the Shockworks as I felt like I wasn't getting the full use out of them.  To cut a very long story short, it ended up being the case the passenger side castor arm wouldn't accept the brand new bush as the sleeve had worn badly enough to the point you could push the new bush in by hand and completely through. Trying a pair of TRD bushes didn't fix the issue either (I had originally gone with Hardrace bushes). We needed to urgently source another castor arm, and thankfully this was sourced and the guys at the shop worked on my car until 7pm on a Saturday to get everything done. The car rides a lot nicer now with the suspension dialled in properly. Lowered the car a little as well to suit the lower profile front tyres, and just bring the car down generally. Eternally thankful for the guys down at the shop to get the car sorted, we both pulled big favours from our contacts to get it done on the Saturday.  Also plugged in the new Stedi foglights into the S15, and even from a quick test in the garage I'm keen to see how they look out on the road. I had some concerns about the length of the LED body and whether it'd fit in the foglight housing but it's fine.  I've got a small window coming up next month where I'll likely get a little paint work done on the 110 to remove the rear wing, add a boot wing and roof wing, get the side skirt fixed up and colour match the little panel on the tail lights so that I can install some badges that I've kept in storage. I'm also tempted to put in a new pair of headlights on the 110.  Until then, here's some more pictures from Easter this year. 
    • I would put a fuel pressure gauge between the filter and the fuel rail, see if it's maintaining good fuel pressure at idle going up to the point when it stalls. Do you see any strange behavior in commanded fuel leading up to the point when it stalls? You might have to start going through the service manual and doing a long list of sensor tests if it's not the fuel system for whatever reason.
    • Hi,  Just joined the forum so I could share my "fix" of this problem. Might be of use to someone. Had the same hunting at idle issue on my V36 with VQ35HR engine after swapping the engine because the original one got overheated.  While changing the engine I made the mistake of cleaning the throttle bodies and tried all the tricks i could find to do a throttle relearn with no luck. Gave in and took it to a shop and they couldn't sort it. Then took it to my local Nissan dealership and they couldn't get it to idle properly. They said I'd need to replace the throttle bodies and the ecu probably costing more than the car is worth. So I had the idea of replacing the carbon I cleaned out with a thin layer of super glue and it's back to normal idle now. Bit rough but saved the car from the wreckers 🤣
    • After my last update, I went ahead with cleaning and restoring the entire fuel system. This included removing the tank and cleaning it with the Beyond Balistics solution, power washing it multiple times, drying it thoroughly, rinsing with IPA, drying again with heat gun and compressed air. Also, cleaning out the lines, fuel rail, and replacing the fuel pump with an OEM-style one. During the cleaning process, I replaced several hoses - including the breather hose on the fuel tank, which turned out to be the cause of the earlier fuel leak. This is what the old fuel filter looked like: Fuel tank before cleaning: Dirty Fuel Tank.mp4   Fuel tank after cleaning (some staining remains): Clean Fuel Tank.mp4 Both the OEM 270cc and new DeatschWerks 550cc injectors were cleaned professionally by a shop. Before reassembling everything, I tested the fuel flow by running the pump output into a container at the fuel filter location - flow looked good. I then fitted the new fuel filter and reassembled the rest of the system. Fuel Flow Test.mp4 Test 1 - 550cc injectors Ran the new fuel pump with its supplied diagonal strainer (different from OEM’s flat strainer) and my 550cc injectors using the same resized-injector map I had successfully used before. At first, it idled roughly and stalled when I applied throttle. Checked the spark plugs and found that they were fouled with carbon (likely from the earlier overly rich running when the injectors were clogged). After cleaning the plugs, the car started fine. However, it would only idle for 30–60 seconds before stalling, and while driving it would feel like a “fuel cut” after a few seconds - though it wouldn’t fully stall. Test 2 – Strainer swap Suspecting the diagonal strainer might not be reaching the tank bottom, I swapped it for the original flat strainer and filled the tank with ~45L of fuel. The issue persisted exactly the same. Test 3 – OEM injectors To eliminate tuning variables, I reinstalled the OEM 270cc injectors and reverted to the original map. Cleaned the spark plugs again just in-case. The stalling and “fuel cut” still remained.   At this stage, I suspect an intermittent power or connection fault at the fuel pump hanger, caused during the cleaning process. This has led me to look into getting Frenchy’s fuel hanger and replacing the unit entirely. TL;DR: Cleaned and restored the fuel system (tank, lines, rail, pump). Tested 550cc injectors with the same resized-injector map as before, but the car stalls at idle and experiences what feels like “fuel cut” after a few seconds of driving. Swapped back to OEM injectors with original map to rule out tuning, but the issue persists. Now suspecting an intermittent power or connection fault at the fuel pump hanger, possibly cause by the cleaning process.  
×
×
  • Create New...