Jump to content
SAU Community

Recommended Posts

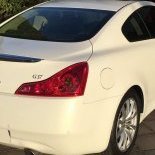
Just thought I would show off my 'new' toy. Have had this Limited Edition SAFCII for a while (used to have it on my R34) and finally got around to fitting it today. Looks factory to me, which was the whole idea. Cutting the back of the ashtray out was a bit scary, but I never used it anyhow.

If anyone ever wants the wiring diagrams etc for an SAFCII into a 2003 V35 let me know and I will post them up. Now to go get her tuned and see what benefits there are.

I will get around to doing a complete thread on all the things I have done to my baby - they are quite extensive (including Heads-up display, Dual din touchscreen DVD/radio, 10" Sub in custom fibreglass enclosure, Kinetix intake Plenum, Carbon fibre intake pipe, Godspeed adjustable sway bars, KYB gas struts, Eibach lowered springs, Stoptech Braided brake lines, Factory Brembos (came with standard brakes), Stoptech 2 piece floating slotted rotors, Kinetix high flow cats, Apexi exhaust control valve, Megan Racing Y-pipe, Straight pipe from Y-pipe to rear axle, Ganador mirrors, Full bodykit (carbon wrapped), Knightrider style moving red led, 18 x 10 +12/18 x 9.5 +20 wheels, etc etc) .... one day.

Enjoy the pics.

post-669-0-44999900-1308575292_thumb.jpg

post-669-0-50534500-1308575300_thumb.jpg

post-669-0-77465900-1308575308_thumb.jpg

post-669-0-82418400-1308575315_thumb.jpg

post-669-0-10367200-1308575323_thumb.jpg

Thanks Scarf!

Haxorz I currently get around 450km-500km city driving, and over 650km highway. So pretty happy with the economy already - always doesn't hurt to have better though. If I got a 5%-10% fuel saving and a bit more power I would be stoked. not having it tuned for a couple of weeks yet, as I am going to put a resonator back in to stop it being so ridiculously loud/raspy.

Let me know how fuel economy goes. My V36 sucks!!! 350-400km to a tank city driving. 600km absolute best highway driving.

Really? damn son

i usually get about 450km on a full tank city driving.

98 octane?

Hmmm i get 300-350km pure city driving, like my max speed zone is 70. What exactly is this thing you installed and what does it do? im very interested. Also is it easy to install like a DIY or would you recommend pro installation.

Edit: I use 98 octane

Edited by jawrgy

I am pretty handy at car things and electronics so did it myself, but it really is a pro job.

If you are comfortable :

- Pulling apart your centre console and cutting out the ashtray to mount the head unit (or manufacture another mounting position)

- Cutting/splicing and soldering around 8 different wires out of your ECU

- Routing the wire loom under your dash to the head unit (in the ashtray position)

Then go for it. It was only a 2 hour job for me from start to finish.

Cost of an SAFCII is around $200 del 2nd hand (or more if you can find a limited edition black one like mine).

http://www.ebay.com.au/itm/APEXi-SAFC-2-Piggyback-ECU-Controller-JDM-Drift-Boost-/290580010162?pt=AU_Car_Parts_Accessories&hash=item43a7eb14b2

Or better option would be to buy the newer

http://www.ebay.com.au/itm/APEXI-NEO-SAFC-AIR-FUEL-CONTROLLER-AFC-VAFC-VTEC-/230635444899?pt=AU_Car_Parts_Accessories&hash=item35b2f19aa3

for $410 del which has a prettier colour screen and does some cool things.

A dyno tune will involve 5-10 dyno runs and a street check, and can cost $300-$500(depending on where you take it and how well you know the tuner).

But for an extra 10%ish of power, and hopefully a 10%ish improvement in fuel economy it is the best $500-$900 you can spend I think.

jawrgy if you are only getting 5km/l then I would definitely be changing your oxygen sensors. Bad news is that we have 4 of them in our cars, and it costs around $1k for 4 of them. there is something definitely wrong there.

FYI mine is an auto (so uses more fuel than a manual), AND I spend decent periods of time sitting in my car with it idling and the a/c on (due to my work) .... and I still have NEVER had less than 400km out of a tank.

I am doing a 340km round trip for work up to Clare tomorrow (might have to stop in on the way at Sevehill Winery, Kilikanoon, Mitchell's and Knappsteins on the way, just to make any wine lovers out there jealous), so will see what my highway economy is like with my new Kinetix intake manifold fitted, my new Kintetix HFCs/Megan Racing Y-pipe and the resonator free high flowing exhaust.

Very, very nice list of mods thumbsup.gif

Any chance letting me know where you got the custom subwoofer housing made and how much? Been looking into having a sub without having it take half the space in the boot.

Is yours similar to this?

post-63310-0-84440400-1308814274_thumb.jpg

Thanks Doddy. No I got the sub enclosure and 10" JL Audio sub from the guy below - from memory it was $550 delivered, but that was over a year ago when the US exchange rate was nowhere near as good as it is now.

http://cgi.ebay.com/G35-COUPE-STEALTH-SUBWOOFER-BOX-ENCLOSURE-MAGIC-BOX-10-/350315939618?pt=LH_DefaultDomain_0&hash=item5190750722

Here is a video I took when I first installed it to give you an idea.

  • 1 year later...

Hi from New Zealand!

Nice car and mods you have here - if you don't mind, I would like to ask a couple of questions regarding the things you have done for your V35 as I would like to do something very similar to mine here in little ol' Auckland.

1). S-AFC/AFC Neo:

I currently have a V35 Coupe (Manual), and also an AFC Neo which has been sitting around in my room for almost 5 years now! Finally wishing to install it and started doing some research and stumbled across your post. Can you kindly send me the wiring diagrams for it if possible? Are they off the Apexi-USA website?

What "type" of airflow meter sensor does it have? As the installation method is dependent on this factor I believe?

And finally, any suggestions on tuning? Would you mind sharing your tune figures from your AFC2?

2). JVC AVX2:

I also currently have a single DIN JVC head unit which I would like to install. I am a little confused through research as to exactly what kit will I require to take out the OEM unit. I have located kits online for the dash kit itself (I will use OEM dash rather than the aftermarket kits), but not sure if I need to get another Air Con control unit as many USA forums have suggested? I have SAT-NAV, and I do not think I have a BOSE system as it doesn't say so anywhere on the factory head unit (and only 6 speakers).

Sorry this maybe a bit vague, if you require any further info then please kindly let me know. I am excited to get back into car modifications after 10 years away from it!!!

Regards,

Isaac

Just thought I would show off my 'new' toy. Have had this Limited Edition SAFCII for a while (used to have it on my R34) and finally got around to fitting it today. Looks factory to me, which was the whole idea. Cutting the back of the ashtray out was a bit scary, but I never used it anyhow.

If anyone ever wants the wiring diagrams etc for an SAFCII into a 2003 V35 let me know and I will post them up. Now to go get her tuned and see what benefits there are.

I will get around to doing a complete thread on all the things I have done to my baby - they are quite extensive (including Heads-up display, Dual din touchscreen DVD/radio, 10" Sub in custom fibreglass enclosure, Kinetix intake Plenum, Carbon fibre intake pipe, Godspeed adjustable sway bars, KYB gas struts, Eibach lowered springs, Stoptech Braided brake lines, Factory Brembos (came with standard brakes), Stoptech 2 piece floating slotted rotors, Kinetix high flow cats, Apexi exhaust control valve, Megan Racing Y-pipe, Straight pipe from Y-pipe to rear axle, Ganador mirrors, Full bodykit (carbon wrapped), Knightrider style moving red led, 18 x 10 +12/18 x 9.5 +20 wheels, etc etc) .... one day.

Enjoy the pics.

I remembered when I installed my SAFC II in my v35 with the only a X-force catback system, Z tube and panel filter with a modified box.

Few base dyno runs and it was getting a bit rich through the mid to top range, pulled some fuel out and gained 4rwkw. It made 174rwkw which was quite impressive IMO.

5AT aswell.

Hi Isaac

I will dig up the install diagram tomorrow if I can find it, but basically you need power, earth and air/fuel signal (to splice into), and that's about it. No idea what type of airflow sensor it has, but I am sure the Neo will work on a V35. I don't even know how to pull out the tuning settings off my SAFCII, but every car is quite different, so I am sure they would be of little use to you anyhow.

When you buy the dual DIN kit, it has the a/c controller built into it. All you really need is a harness to connect the JVC to the non-bose system (which you should be able to find online, or PM Chris Rogers on SAU - I am sure he would sell you one. Mine was pretty straight forward to do from memory.

Thanks Andrew,

If you do find your wiring diagram, it would be greatly appreciated! As there are 2 ways to wire up and then pre-configure the AFC so it would give me an indication as to which one I require.

As for the head unit setup, am I right to assume ALL stereo changes will require a new A/C controller? I am thinking from a cost perspective, as this is much cheaper at only $145US+Shipping:

http://www.ebay.com/itm/JDM-Double-Din-Conversion-Surround-G35-Brushed-2003-2004-/261131288165?pt=Motors_Car_Truck_Parts_Accessories&fits=Model%3AG35&hash=item3ccca33e65&vxp=mtr

As opposed to a full kit at almost double the price, $350US+Shipping:

http://www.ebay.com/itm/JDM-INFINITI-NISSAN-SKYLINE-G35-DOUBLE-DIN-DASH-KIT-IN-SILVER-WITH-AC-CONTROL-/251204907913?pt=Motors_Car_Truck_Parts_Accessories&fits=Model%3AG35&hash=item3a7cfab389&vxp=mtr

Again thank you for helping me clear all this up, I wish the community was much larger here in NZ :(

Cheers,

Isaac

Create an account or sign in to comment

You need to be a member in order to leave a comment

Create an account

Sign up for a new account in our community. It's easy!

Register a new account

Sign in

Already have an account? Sign in here.

Sign In Now


  • Similar Content

  • Latest Posts

    • Hi, is the HKS  Tower Bar still available ? negotiable ? 🤔
    • From there, it is really just test and assemble. Plug the adapter cables from the unit into the back of the screen, then the other side to the car harness. Don't forget all the other plugs too! Run the cables behind the unit and screw it back into place (4 screws) and you should now have 3 cables to run from the top screen to the android unit. I ran them along the DS of the other AV units in the gap between their backets and the console, and used some corrugated tubing on the sharp edges of the bracket so the wires were safe. Plug the centre console and lower screen in temporarily and turn the car to ACC, the AV should fire up as normal. Hold the back button for 3 sec and Android should appear on the top screen. You need to set the input to Aux for audio (more on that later). I put the unit under the AC duct in the centre console, with the wifi antenna on top of the AC duct near the shifter, the bluetooth antenna on the AC duct under the centre console The GPS unit on top of the DS to AC duct; they all seem to work OK there are are out of the way. Neat cable routing is a pain. For the drive recorder I mounted it near the rear view mirror and run the cable in the headlining, across the a pillar and then down the inside of the a pillar seal to the DS lower dash. From there it goes across and to one USB input for the unit. The second USB input is attached to the ECUtec OBD dongle and the 3rd goes to the USB bulkhead connected I added in the centre console. This is how the centre console looks "tidied" up Note I didn't install the provided speaker, didn't use the 2.5mm IPod in line or the piggyback loom for the Ipod or change any DIP switches; they seem to only be required if you need to use the Ipod input rather than the AUX input. That's it, install done, I'll follow up with a separate post on how the unit works, but in summary it retains all factory functions and inputs (so I still use my phone to the car for calls), reverse still works like factory etc.
    • Place the new daughterboard in the case and mount it using the 3 small black rivets provided, and reconnect the 3 factory ribbon cables to the new board Then, use the 3 piggyback cables from the daughterboard into the factory board on top (there are stand offs in the case to keep them apart. and remember to reconnect the antenna and rear cover fan wires. 1 screw to hold the motherboard in place. Before closing the case, make a hole in the sticker covering a hole in the case and run the cable for the android unit into the plug there. The video forgot this step, so did I, so will you probably. Then redo the 4 screws on back, 2 each top and bottom, 3 each side and put the 2 brackets back on.....all ready to go and not that tricky really.      
    • Onto the android unit. You need to remove the top screen because there is a daughterboard to put inside the case. Each side vent pops out from clips; start at the bottom and carefully remove upwards (use a trim remover tool to avoid breaking anything). Then the lower screen and controls come out, 4 screws, a couple of clips (including 3 flimsy ones at the top) and 3 plugs on the rear. Then the upper screen, 4 screws and a bunch of plugs and she is out. From there, remove the mounting brackets (2 screws each), 4 screws on the rear, 2 screws top and bottom and 3 screws holding in the small plates on each side. When you remove the back cover (tight fit), watch out for the power cable for the fan, I removed it so I could put the back aside. The mainboard is held in by 1 screw in the middle, 1 aerial at the top and 3 ribbon cables. If you've ever done any laptop stuff the ribbon cables are OK to work with, just pop up the retainer and they slide out. If you are not familiar just grab a 12 year old from an iphone factory, they will know how it works The case should now look like this:
    • Switching the console was tricky. First there were 6 screws to remove, and also the little adapter loom and its screws had to come out. Also don't forget to remove the 2 screws holding the central locking receiver. Then there are 4 clips on either side....these were very tight in this case and needed careful persuading with a long flat screw driver....some force required but not enough to break them...this was probably the fiddliest part of the whole job. In my case I needed both the wiring loom and the central locking receiver module to swap across to the new one. That was it for the console, so "assembly is the reverse of disassembly"
×
×
  • Create New...