Jump to content
SAU Community

Recommended Posts

Hi Ppl

My name is Mick and this is my R32 GTST

I have owned plenty of cars althou this is my first import

03 XR6TURBO 455rwhp , 4 Vl calais turbo's one a calais aero turbo , supercharged 929 mazda

To cut a long story short i bought this car and went to register it and came back with the fact that the engine in the car had been stolen and not yet recoverd..,,,, see here : http://www.skylinesa..._1#entry5764020

Car was stock with just a cat back exhaust and 19'' rims

2011-03-25163804.jpg

2011-03-25163715.jpg

Any way i decided to purchase a new engine from silver gtst off the forums so i ended up with a low k (98,***) auto RB20DET travelled down to sydney and picked up the engine hoping for a decent running engine it was already out of the car.

OK so now i had the task of swapping the engines over and doing a major service on my new engine , timing belt ,water pump, crank seal , spark plugs , belts alot easier doing it out of the car (first time doing a major service btw)

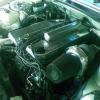
ok so old engine out next to the new one

2011-04-02165735.jpg

2011-04-16111827.jpg

Can you tell which is my new motor? haha

Time to fit up my China spec turbo , now i bought this turbo from a factory in the midddle of china and the same guy makes crankshafts , cant be to bad can it? lol

as you can see big differece from stock althou i need to port the wastegate hole which i didint do while it was out :(

2011-04-15113959.jpg

2011-04-15113950.jpg

So while the bay was empty i installed a gktech solid steering bush and removed the aircon

2011-04-17163115.jpg

The clutch didint look to healthy to while the gbox was off the engine i bought a Exedy hd clutch (nothing to serious , rb20 boxes are like glass imo) and had the flywheel machined

time to remove the auto spigot PRICK of a thing ok so all was bolted back together and started to think about installing my new engine

2011-04-16111821.jpg

Bought a GTR fibreglass front bumper , car had a m spec bumper on it when i bought it

2011-04-11135615.jpg

ok so after a weekend or 2 i had a running car

2011-04-15115514.jpg

2011-04-23131830.jpg

Time to get some rego and drive the thing

Had a little bit of fun at a ghetto skid pan nothign big as this was not long after i got it all running

<iframe width="425" height="349" src="http://www.youtube.c...bed/S3D7q2HKLYY" frameborder="0" allowfullscreen></iframe>

ok more to come soon

Link to comment
https://www.sau.com.au/forums/topic/372306-kebab_drifters-r32/
Share on other sites

Looks good mate, haha i rebuilt one of these with my brother once, it started and expected to do the same thing, a engine swap and do major service on the new engine, then while searching we ended up buying a rb25 and building it to a 300kw motor hahaha. and it was alot longer then a couple of weeks

  • 11 months later...

So i replaced the stock dump pipe with a 3'' bellmouth

increased the spool time as the turbo is quite big and a little laggy , nothing a clutch kick doesnt fix LOL

2011-05-15141319.jpg

So while the motor was getting installed i replaced the timining belt and water pump (big job for a first timer)

in went a new 52mm radiator , and would you know it big lauch and the fan hit the radiator smashed it to pieces and broke my new water pump $$$ later had it going again

2011-05-07121245.jpg

Picked up a genuine N1 GTR bumper , these things are so much bigger and bulkier then the fibreglass copys , only problem is its missing an intake vernt but im chasing one up

gave it a coat of paint in the shed

2011-06-11133007.jpg

Ok , so a bit of an update ran a set of EUROLINE 18x9 +20 front 18x9 +20 rear for a little while

eurohart.jpg

2011-07-27130924.jpg

2011-07-27130937.jpg

ran some 19x8 30 somthing offset BBS MESH C1 copies plus polished the car up and can see the genuine gtr front bar

2011-08-17201622.jpg

2011-08-17201637.jpg

2011-08-17201644.jpg

Got some aftermarket mirrors from GKTECK.COM

2011-09-12145047.jpg

2011-09-12145109.jpg

2011-09-12151742.jpg

Bought some Rota grid r in gunmetal 18x9 +25 with a 8 mm slip on front and 18x9.5 +25 rear and got some low

Tien HR Coil overs maxxed out

jdmyo.jpg

2011-09-13170528.jpg

2011-09-14170800-1.jpg

2011-09-14170733-1.jpg

I then installed a nistune got some gtr injectros highflowed z32 afm and a tune

EBAYturbo.jpg

2011-07-28110525.jpg

523852_202473743204103_853892380_n-1.jpg

149794_393248650698450_2046922351_n-1.jpg

then drove the pants off it

realised the ebay turbo wasnt doing the rb20 any justice i bought

419120_10150760308395120_1257531402_n.jpg

and a retune by JEZ

HKS2535.jpg

HKS 25/35 turbo

  • 3 months later...

Ok so i fitted up some parts dumped it and maxxed out the tein coilovers

318140_250017178446359_640248155_n-2.jpg

DSC_0877-1.jpg

KEBABDRIFTER-2.jpg

Crusing down the road spot an unmarked hwy was about 1 mins from my house and got pulled up in my driveway and got defected for wheels to wide , sticking outside the guards too low exhaust and airbox

427709_10150676298505120_1922174740_n.jpg

somthing diff

523852_202473743204103_853892380_n.jpg

248597_224308447596434_6934963_n.jpg

522154_10150980321305898_1012130762_n.jpg

2011-09-17131400.jpg

2011-09-13130050.jpg

Decided to buy myself a present Mint S2 RB25

559179_10151338269775120_1120617381_n-1.jpg

Perfect turbo to go with it HKS 30/37 Pro S .87 rear housing internal gate

301_10151338268820120_274396932_n-1.jpg

old turbo on the 20 hks25/35 double the hp :)

turbocomparisonfdf.jpg

333058_10151185114535120_1482828498_o.jpg

awesome wgate design should flow well

620492_10151185129405120_1329926016_o.jpg

nice dumpsetup and clutch im running

559149_10151338268015120_591207782_n.jpg

installed SARD 550 injectors

thought if im going to do it ill do it properly and bought my self a r33 gearbox and got a custom tailshaft made up

installed and wired it up myself got it running

286737_10151221859635120_358288361_o.jpg

took it to DVS JEZ to get the dumpipe modded and External Msd switch wired up then tuned , was asked what results id be happy with and my reply was 260rwkw or 350rwhp . now i knew this turbo had produced some good numbers from the previous owner 350ishrwkw forged RB25 E85

Fingers crossed

332518_10151246159605120_1671567377_o.jpg

HI BOOST VS LOW BOOST

396376_10151246474695120_778672304_n.jpg

RB20 VS RB25

296337_10151246473480120_397864954_n.jpg

Huge difference it went well with the rb20 ! Cheers DVS TUNING (JEZ)

fitted a roof lip and led taillights

2011-09-13134425-2.jpg

some sweet sideskirts

2011-09-13130038.jpg

Hicas lock bar

2011-09-13132402.jpg

Camber arms

2011-09-13132316-1.jpg

removed paint off rims and gave a quick polish

12757_10151338270755120_1670360358_n.jpg

rims-1.jpg

Goes hard lights up 3rd no worries ITS A BEAST

meetup-1.jpg

looks like a gtr here

At the moment there is a huge defect blitz in newcastle ''Operation hammer ''

so im trying to run under the radar sleeper spec what do you think?

536458_10151338266520120_1141699408_n.jpg

gtr lip off

sideskirts off

pods off

all stickers off

stockies with big tyres

airbox

547451_130118770455792_1351827142_n.jpg

Time for a drive ...... ;)

Edited by KEBAB_DRIFTER
  • 1 month later...
  • 6 months later...

Create an account or sign in to comment

You need to be a member in order to leave a comment

Create an account

Sign up for a new account in our community. It's easy!

Register a new account

Sign in

Already have an account? Sign in here.

Sign In Now


  • Similar Content

  • Latest Posts

    • So, that is it! It is a pretty expensive process with the ATF costing 50-100 per 5 litres, and a mechanic will probably charge plenty because they don't want to do it. Still, considering how dirty my fluid was at 120,000klm I think it would be worth doing more like every 80,000 to keep the trans happy, they are very expensive to replace. The job is not that hard if you have the specialist tools so you can save a bit of money and do it yourself!
    • OK, onto filling. So I don't really have any pics, but will describe the process as best I can. The USDM workshop manual also covers it from TM-285 onwards. First, make sure the drain plug (17mm) is snug. Not too tight yet because it is coming off again. Note it does have a copper washer that you could replace or anneal (heat up with a blow torch) to seal nicely. Remove the fill plug, which has an inhex (I think it was 6mm but didn't check). Then, screw in the fill fitting, making sure it has a suitable o-ring (mine came without but I think it is meant to be supplied). It is important that you only screw it in hand tight. I didn't get a good pic of it, but the fill plug leads to a tube about 70mm long inside the transmission. This sets the factory level for fluid in the trans (above the join line for the pan!) and will take about 3l to fill. You then need to connect your fluid pump to the fitting via a hose, and pump in whatever amount of fluid you removed (maybe 3 litres, in my case 7 litres). If you put in more than 3l, it will spill out when you remove the fitting, so do quickly and with a drain pan underneath. Once you have pumped in the required amount of clean ATF, you start the engine and run it for 3 minutes to let the fluid circulate. Don't run it longer and if possible check the fluid temp is under 40oC (Ecutek shows Auto Trans Fluid temp now, or you could use an infrared temp gun on the bottom of the pan). The manual stresses the bit about fluid temperature because it expands when hot an might result in an underfil. So from here, the factory manual says to do the "spill and fill" again, and I did. That is, put an oil pan under the drain plug and undo it with a 17mm spanner, then watch your expensive fluid fall back out again, you should get about 3 litres.  Then, put the drain plug back in, pump 3 litres back in through the fill plug with the fitting and pump, disconnect the fill fitting and replace the fill plug, start the car and run for another 3 minutes (making sure the temp is still under 40oC). The manual then asks for a 3rd "spill and fill" just like above. I also did that and so had put 13l in by now.  This time they want you to keep the engine running and run the transmission through R and D (I hope the wheels are still off the ground!) for a while, and allow the trans temp to get to 40oC, then engine off. Finally, back under the car and undo the fill plug to let the overfill drain out; it will stop running when fluid is at the top of the levelling tube. According to the factory, that is job done! Post that, I reconnected the fill fitting and pumped in an extra 0.5l. AMS says 1.5l overfill is safe, but I started with less to see how it goes, I will add another 1.0 litres later if I'm still not happy with the hot shifts.
    • OK, so regardless of whether you did Step 1 - Spill Step 2 - Trans pan removal Step 3 - TCM removal we are on to the clean and refill. First, have a good look at the oil pan. While you might see dirty oil and some carbony build up (I did), what you don't want to see is any metal particles on the magnets, or sparkles in the oil (thankfully not). Give it all a good clean, particularly the magnets, and put the new gasket on if you have one (or, just cross your fingers) Replacement of the Valve body (if you removed it) is the "reverse of assembly". Thread the electrical socket back up through the trans case, hold the valve body up and put in the bolts you removed, with the correct lengths in the correct locations Torque for the bolts in 8Nm only so I hope you have that torque wrench handy (it feels really loose). Plug the output speed sensor back in and clip the wiring into the 2 clips, replace the spring clip on the TCM socket and plug it back into the car loom. For the pan, the workshop manual states the following order: Again, the torque is 8Nm only.
    • One other thing to mention from my car before we reassemble and refill. Per that earlier diagram,   There should be 2x B length (40mm) and 6x C length (54mm). So I had incorrectly removed one extra bolt, which I assume was 40mm, but even so I have 4x B and 5x C.  Either, the factory made an assembly error (very unlikely), or someone had been in there before me. I vote for the latter because the TCM part number doesn't match my build date, I suspect the TCM was changed under warranty. This indeed led to much unbolting, rebolting, checking, measuring and swearing under the car.... In the end I left out 1x B bolt and put in a 54mm M6 bolt I already had to make sure it was all correct
    • A couple of notes about the TCM. Firstly, it is integrated into the valve body. If you need to replace the TCM for any reason you are following the procedure above The seppos say these fail all the time. I haven't seen or heard of one on here or locally, but that doesn't mean it can't happen. Finally, Ecutek are now offering tuning for the 7 speed TCM. It is basically like ECU tuning in that you have to buy a license for the computer, and then known parameters can be reset. This is all very new and at the moment they are focussing on more aggressive gear holding in sports or sports+ mode, 2 gear launches for drag racing etc. It doesn't seem to affect shift speed like you can on some transmissions. Importantly for me, by having controllable shift points you can now raise the shift point as well as the ECU rev limit, together allowing it to rev a little higher when that is useful. In manual mode, my car shifts up automatically regardless of what I do which is good (because I don't have to worry about it) but bad (because I can't choose to rev a little higher when convenient).  TCMs can only be tuned from late 2016 onwards, and mine is apparently not one of those although the car build date was August 2016 (presumably a batch of ADM cars were done together, so this will probably be the situation for most ADM cars). No idea about JDM cars, and I'm looking into importing a later model valve body I can swap in. This is the top of my TCM A couple of numbers but no part number. Amayama can't find my specific car but it does say the following for Asia-RHD (interestingly, all out of stock....): So it looks like programable TCM are probably post September 2018 for "Asia RHD". When I read my part number out from Ecutek it was 31705-75X6D which did not match Amayama for my build date (Aug-2016)
×
×
  • Create New...