Jump to content
SAU Community

Recommended Posts

Hey everyone,

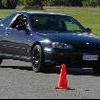
Ive just finished a restoration #2 detail on Colins 34 Sedan!

I also detailed his engine bay, plastics, and interior

Here are some of the pics, unfortunately I didnt quite think the picture taking through, and some of the shots arent in the same spot, or some with flash and some without. however i hope you can still see the difference the detail made to his car!

Some of the most intensive work went into detailing his engine bay, as you can see, it was pretty dirty! Its still not 100% perfect, but after a decontamination with GPC, Xenit, and with some PERL on the plastics and gloss boost on the paintwork it came out alright!

EngineBay1.jpg

EngineBay2.jpg

After decontaminating areas like the door jambs and engine bay, i moved to the paintwork. starting with a clay black .. which ended up looking like

IMG_9341.jpg

after the clay block, i moved onto machine polishing.

this is the condition of the car before the detail

IMG_9333.jpg

IMG_9347.jpg

IMG_9402.jpg

IMG_9445.jpg

and now after the 2 stages of machine polishing and 2 layers of sealant

IMG_9520.jpg

IMG_9538.jpg

IMG_9541.jpg

IMG_9668.jpg

Exterior3.jpg

Exterior2.jpg

Exterior5.jpg

Exterior7.jpg

Exterior4.jpg

Edited by Jonno34
Link to comment
https://www.sau.com.au/forums/topic/384760-colins-r34-sedan-detailed/
Share on other sites

after finishing with the paintwork, it was onto the fine trimming

this involved .. badges:

Exterior1.jpg

headlights: Exterior6.jpg

plastic trim:

Interior4.jpg

Interior7.jpg

Interior2.jpg

IMG_9793.jpg

Interior8.jpg

IMG_9712.jpg

IMG_9701.jpgIMG_9703.jpgIMG_9709.jpg

i went all out with this, ensuring every single plastic trim was looking its best. window rubbers and the edges of his guards were also done.

exhaust tips:

IMG_9561.jpg

and a clean of his interior, followed by protectant and some extra shine!

IMG_9780.jpg

Interior1.jpgInterior3.jpgInterior5.jpgInterior6.jpg

IMG_9788.jpg

there are milllions more pictures, which i burnt onto a CD for him :)

this detail took me the better part of 3-4 days in total.

Hope you enjoyed!

cheers mate appreciate it especially coming from you! :)

thumbsup.gif to that.

P.S. Jonno......I need an engine bay clean and plastic trim detail......Your place or mine?? When??

Txt me a day and time...and I will try and book off work or something....mon or tues works best hey.....

cheers mate appreciate it especially coming from you! :)

No worries, WOW guess thats a compliment to me also thanks :)

thumbsup.gif to that.

P.S. Jonno......I need an engine bay clean and plastic trim detail......Your place or mine?? When??

Txt me a day and time...and I will try and book off work or something....mon or tues works best hey.....

Brushes, degreaser, aerospace 303 or Carpro PERL, and some microfibres boom done :)

yeap for colins engine bay I used - FI's GPC and Xenit on the tougher spots, rinsed it off and applied PERL

i generally use simple green for this sort of stuff, but it needed something stronger and GPC was far more effective

  • 5 weeks later...

How did the drivers side electric window panel come up after you cleaned it? All of my front electric window panels and centre console look like the driver side one you show in the thread. Have been considering wrapping them in carbon fibre wrap but if there is a way to properly clean them so they come up looking good I would consider doing that first.

hey mate

i believe thats cos the paint on it has melted. a clean doesnt really help in that area, and neither does any detailing product I have (believe me i tried :( ) - i tried to use both aerospace protectant and carpro PERL on it, but neither worked - the best way to get it looking good again is to remove them, sand them down and spray them - theres a few threads around the cosmetic section for it. you could probably try wrapping them in CF also though

it is a real bummer when I cant just respray and/or replace stuff in a detail - some of those small things just dont make the finished product look as good as it should :(

Create an account or sign in to comment

You need to be a member in order to leave a comment

Create an account

Sign up for a new account in our community. It's easy!

Register a new account

Sign in

Already have an account? Sign in here.

Sign In Now


  • Similar Content

  • Latest Posts

    • @666DAN sorry to bring you and old thread.     I've got my de+t done and it's all running great other than 1 small issue.    Car has remained auto with the na auto and tcm, I've used a stagea ecu with. NIstune board and everything is great other than my gear selection on the dash. It illuminates park, reverse, neutral, 3rd and 2nd when selected . But nothing when in  drive or what gear your in when you pop it into tiptronic. I'm sure there is maybe 1 wire in the ecu plug I need to move to rectify this. Do ya have any ideas?     Cheers man
    • Well I recently changed my rear axles and was thinking if I bumped anything, I have been driving the car for a while now though... But it has been raining today so everything is wet under the wheel arches. Brakes feel fine and can't hear any of the metal screamers, I had a squeak coming from one of the handbrake drums but that seems to have gone away a while ago. I was going down a hill when it lit up and I did feel the abs bite for a second and question why it did it?
    • Correct. Um. I dunno. I haven't cared enough about the way that the NA cars work to know for sure. But..... The 33/34 turbo manual cars have an electronic speed sensor in the gearbox that outputs a +/- (ie, sawtooth AC) voltage signal. That is connected to the speedo. The speedo then outputs a 0-5v square wave (ie, PWM) signal that the ECU (and any other CU on the bus) sees. The speed sensor is NOT directly connected to the ECU. So here's the problem. Your new ECU expects to see the PWM signal, but must somehow be getting a direct signal from the diff speed sensor. Which would suggest that the wiring of the NA car is not the same as the turbo cars. I think you will need to spend some time with (hopefully the wiring diagram for the car) and a multimeter to see what is connected to what. Then, presuming I am correct**, you would then want to separate the ECU speed signal input from the rest of the car's wiring, and probably either buy a speed signal converter, or build one using an arduino (or similar). That would take in the speed sensor signal and output a scaled (and suitably rearranged) signal for the ECU. ** We shouldn't presume that I am correct here, because there might be something else crazy going on. I don't think you could convert the speedo to be fed from the gearbox sensor, because the pulse rate from that sensor is probably different to the diff sensor and then the speedo would read wrongly. And this also wouldn't fix the ECU's problem either, because the ECU doesn't want to see the gearbox signal direct either (assuming that they are all on the same wiring, for some odd NA related reason, see above caveat!) Does this help? Probably not. Can you make it work? Almost certainly. With the above work. You should buy a handheld oscilloscope from Aliexpress so that you can view these signals directly. Connect up the probes and drive the car. Show photos of the screen when drving at known speeds and connected to different places, and we'll see what we can learn about it.
    • Assuming your brake pads are not worn right down, I'd add a little brake fluid. Is there any sign of a brake fluid leak?
    • Hello all,  I need of some help. On my drive home my handbrake light lit up and started flashing. When I got home I checked my handbrake sensor under the centre console and nothing seemed out of the ordinary. I have scanned my car via the consult port, no codes shown. Checked my brake fluid as well which is half full. Tried unplugging the brake master but it didn't change anything. Thoughts on what it could be? The master float doesn't seem to be stuck. My car is an 1998 ER34 sedan GT. No hicas but has ABS Photos below 👇🏾 
×
×
  • Create New...