Jump to content
SAU Community

Recommended Posts

Hi, i should probably introduce myself. First off, im not Kirk i am his 14yo son, i will be writing his build thread aswel as, i work on the car quite a bit.

The R32, was bought from an import yard, in 2007 as a Race only vehicle, it didn't pass RWC hence, purchasing this particular car, as it was only going to be used for racing. It sat in a garage until October in 2010, where the car was driven for the first time at a paul ruzic time attack day at lakeside. The car managed to post a Flying time of

1:11! After getting a nistune, and a bit more horsepower, the car went into the Lakeside open sprints and made a time of 1:04. By the end of the year, we won the series despite Putting a hole through a piston and destroying the old RB20 to miss the last round. After blowing the RB20, it was time to go faster and later that month an RB26 bottom end was bought for a steal. We then also picked up an Rb26 head, and standard intake manifold for a great price.

IMG_20111002_153515.jpg

Loading the car up at lakeside, after blowing the engine.

DSCF2394.JPG

Updates coming very soon!

Edited by SlidingAlex
Link to comment
https://www.sau.com.au/forums/topic/390593-kirks-r32-gts-t-race-car-build/
Share on other sites

  • Replies 43
  • Created
  • Last Reply

Top Posters In This Topic

Starting off, updating some specs for people to get a bit more knowledge about the car.

Interior:

- 6 Point Roll Cage, CAMS approved.

- Sparco seat

- Monza 5 point harness.

- Interior is stripped out, no sound deadening.

- Center console is gone, Just a small sheet for gauges in the dash.

- JustJap Steering wheel (Needs to be replaced)

DSCF2391.JPG

Going to skip the boring specs, if anyone needs them they can ask! Now for the Exciting Engine development etc.

Boot is cut out, made a frame and bolted the 40L fuel cell in. Pumps fitted also. Speedflow fittings throughout fuel system.

Fuel cell

DSCF2392.JPG

Pumps (Twin 044 setup)

DSCF2393.JPG

Top secret carbon diffuser fitted, hides the fuel cell and pumps perfectly.

DSCF2390.JPG

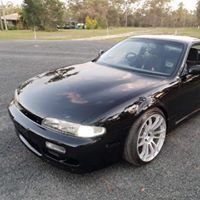
New rims fitted, Starcorps - F18x8, R18x9, i think they look great.

DSCF2397.JPG

Now for the exciting parts!

Garret GT35R

DSCF2401.JPG

6Boost manifold, Made for RB25, so we will have to modify 2 stud locations.

DSCF2400.JPG

And some attention to looks - Dad decided to paint Cam covers, timing belt cover and block

DSCF2398.JPG

DSCF2399.JPG

The reason for picking Blue - Basically, we wanted the engine bay to stand out a little, and just about everything dad has a pick of colour its blue.

Should have some more updates soon, just waiting on gasket kit and collecting a few bits an pieces. The first gasket kit got lost in spain!

Some more updates.

Dad bought a GTR Sump yesterday, needs modification (Still has the front diff housing). The Sump did not have baffles, so dad bought some galvabond to make some himself. I'd like to ask, on your opinions for this as im not sure how complex they would have to be or what we need to do for baffles. I was thinking of having 3 plates running along the sump, with holes drilled for baffling.

DSCF2404.JPG

All input will be appreciated thumbsup.gif

Edited by SlidingAlex

More updates!

Wednesday night we got some adjustable Rear camber arms.

DSCF2406.JPG

To find out we also need, what i think are called adjustable traction rods?(Not sure if this is what they're called) See below.

DSCF2411.JPG

Also started fitting engine mounts, and test fitting the blue cam covers thumbsup.gif

DSCF2408.JPG

Then on thursday night, picked up some front camber arms. These do fit, i managed to get one of them fitted. Ill fit the other tonight. happy.gif

DSCF2412.JPG

While dad was installing turbo and oil fittings, and hacking up the sump.

DSCF2414.JPG

DSCF2413.JPG

Dad managed to half hack the sump, before he pulled out the hammer and chisel. Ofcourse, did not end well and the sump cracked in half. So, we'll have to modify an RB25 tin sump, and some pickups and make one of those fit. spank.gif

Engine will be pieced together tommorow night!

Did a large amount of work on the car this weekend.

DSCF2421.JPG

The sump received a lick of paint.

DSCF2419.JPG

Fitted up the sump

DSCF2422.JPG

I wonder what's going on here?..

DSCF2424.JPG

Ok here's the story. Around 6 months ago, a chance to grab an R324 widebody came up. We took up the chance, and has sat in dad's work storage ever since. Another offer came up yesterday, to swap our bonnet and lights, for another kit. Yesterday, we made the swap and now It will be fitted. The other will be used for spares, or if we want a variant between the two (There is slight differences, such as different bonnet vent and vents in the front guard). Anyway, the car is gonna get PHAT!

DSCF2433.JPG

I had a go at test fitting the front guards

DSCF2439.JPG

They line up alright, but there is certainly some work to do. I doubt this will be an easy task.

fitting up the head.

DSCF2437.JPG

Cam covers, little bits 'n' bobs.

DSCF2438.JPG

DSCF2441.JPG

Fitting up the turbo. We fitted it up properly today, with all the oil/water lines although i dont have a photo. I will post one soon!

DSCF2442.JPG

After a bit of fiddling, we had a bit of a play with the kit. Having a look at guards, and bonnet fitment.

DSCF2443.JPG

We didn't fit the bonnet to the hinges, but it quite clearly is a bit short on width.

And.. we packed up for the night like this.

DSCF2444.JPG

With a 2:30am finish.

Today, dad spent most of the day fitting up lines, fixing up fittings, and small details. Didn't get enough pictures, i forgot to take some after the manifold was fitted.

DSCF2447.JPG

Unfortuneately, the waste gate rubs on the cam covers. Dad decided to grind through it to stop the rub before putting a hole in it. This ended his day.

I, fitted the wiring loom and ECU (No photos) and fit the rear bar as a proper start to the widebody.

DSCF2445.JPG

And, finished by packing up like so.

DSCF2450.JPG

More updates soon, engine should be in the car by this week.

just curious, with the engine being blue, what would the cars colour be?, other then that, it is looking good, and it looks like a lot of work was done on the weekend

We arn't quite sure, but it must be easy to source incase something needs to be painted again, such as front bars. We've talked about a few colours in mind. One thing for sure, is it may not get paint before it goes on track, there simply isn't enough time for the moment.

It was mainly the pressure of Unc. anthony and Dean, always telling him his cam covers had to be painted. nyaanyaa.gif We went one step further to impress them and did all the rest. But like you said, i dont think blue will look good with the engine as it is although, blue and red may be a nice contrast. Still needs more discussion and thought though.

Engine should be in, kit will be on shortly after motor goes in. Hopefully the motor will go in this week/next week, it is 98% ready to go in.thumbsup.gif

Edited by SlidingAlex

Looking good guys! Sound be finished before I get back?

Think you better stay longer if you want it finished before you get back. Busy weekend this weekend but hopefully have engine in at least.

Motor and box is pretty much ready to drop in now but everthing i do i find something else that doesn't fit or work or needs replacing!! just goto keep chipping away at it.

no worries, i was just wondering as you said your dad likes the engine bay to stand out, so i would think blue would be out

Can't decide yet what to paint it. As Alex said it needs to be easy to patch up as I'm not much of a painter.

Will be something basic, non metalic but still has to stand out. A racecar should attract attention!!

I welcome anyone to offer some ideas for me? I can already rule out orange thought. Just dont like it in cars.

Aaagghh i want it to be orange. People might start mixing you up with dwane! Orange cars are always the fastest.

post-10-1301809139486131439.jpg

(Not my photo)

People have seen him on ONE wheel just after the bridge at lakeside. He is definently quick.

Edited by SlidingAlex

Create an account or sign in to comment

You need to be a member in order to leave a comment

Create an account

Sign up for a new account in our community. It's easy!

Register a new account

Sign in

Already have an account? Sign in here.

Sign In Now


  • Similar Content

  • Latest Posts

    • And one last super random thought, I remember when SAUNSW had a dinner with Alan Heaphy, and another with Fred Gibson there was talk of the R32 GTR cast alloy uprights failing in racing, and one of the things Fred did when they had to add weight to the vehicle was taken the failing alloy uprights, and have them made of steel. Does anyone remember back to 1990/1991/1992 and WHAT was failing in the front hubs/uprights?
    • If you truly want to know how the original failed though, was it a factory defect possibly etc, send it off for investigation. Would probably cost a shit tonne.   The ones that you need to win lotto for, unless you have a good reason for that part to be bolt on, I'd probably roll with getting a few small stitch welds carefully put in place as an extra safety factor once everything is all torqued up tight
    • Are you sure? Because I wouldn't necessarily be. Do we even know the material they've made the new uprights from?   Looking at the fractures in the earlier pics, it does to me look like both a twisting, and levering upward action doing the damage, so you're hoping for both compression, and tension. Depending on the bolts, they can stretch (even high grade bolts will) and now you're hoping for the threads themself not to stretch, as if they do, bye bye mating surfaces holding together, hello bolts now going into shear.
    • Lets say I wanted to buy this, specifically for this purpose. How do I actually perform the function. Can I still buy a Consult-1? Am I about to be burned by the fact my car is a 2000 model Series 2 R34 and thus will be some stupid other system? Do I just need this -> https://obd2australia.com.au/product/nissan-consult-14-pin-to-usb-ddl-diagnostic-interface-with-ftdi-ft232r-chip/ And with what software?
    • That's probably OK. That's a face to face compression joint between two surfaces with the clamping load provided by those bolts. So.... it's unlikely that the bolts will end up feeling that load in shear, unless the clamping surfaces are not large enough, bolts not got enough tension on them, etc etc to prevent the two faces from moving wrt each other. Which... I would hope the designers have considered, seeing as it's probably one of the most important things the upright has to do apart from resist collapsing in its own right. But yes, it would definitely be worth asking them what their safety factor on that part of the design was. I tend to think that the casting, being a casting, is not necessarily the strongest bit of material in the world. It's about an inch square, and when you think about the loads that are being put into it, you have to wonder what safety factor the Nissan boys (and every other OEM engineer who has designed all the millions of other uprights that look essentially the same) used to account for defective casting, aging, severe impacts on the wheel, etc etc. 
×
×
  • Create New...