Jump to content
SAU Community

Recommended Posts

Hey guys , thought id share my 2 pak painting experience to possibly help any others wanting to give it a go that are a little less informed.

so after purchasing my body kit i was up and down weather to get it proffesionally sprayed or to do it myself . after enough searching and and hearing the same price figures i thought id give it a go myself .

i have had previous experience spraying with acrylic with a few of my cars , but i thought i really want to step it up with this car and get the best finish possible , hearing enough talk about how 2 pak is obviously a more harder , stronger finish , i thought it was time to see it for my own eyes. spraying acylic in the past , i wasnt very happy with how easy it can dry out or even if you get petrol on it when filling it up , it could take off the shine.

i purchased all my paint , sand paper , and all neccesary items . as everyone has said , its all in the prep . i spent 2 full days fitting the kit , and preping all the panels for spray . i must say my fingers have seen better days with all the sanding , being in the furniture trade sanding is my worst enemy .

from this experience and other past journeys with spraying , i did definitly put a lot more effort in prep , and i can definitly say , spraying a guide coat / dust coat on the panels in black for the final wet sand was the best thing iv done, as it really shows up all the potential marks or spots you may have missed , which iv definitly learnt gives the best spraying surface , which is probably why my fingers are pretty sore .

i primed everything that was in gel coat , then wet sanded to 800 grit . sprayed 3 coats of base , followed by 3 coats of clear. i sprayed everything at home in the shed , even though your ment to use a spray booth , i feel i had everything set up pretty well.

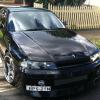
i sprayed my front bar , skirts , rear lip , spoiler , rear bumper and bonnet on the way. here are my results , i know pictures can only show so much , but i was pretty damn impressed with how glossy it came out off the gun - and very hard , i havent cut anything back yet which i will do in a weeks time when its cured . i wiped the whole car down with wax and grease remover , so the shell does look dry at the moment until i cut it back and wax

any questions , please shoot , willing to shed the light for any others wanting to do it :)

post-32277-0-80560700-1334478667_thumb.jpg

post-32277-0-66868800-1334478676_thumb.jpg

post-32277-0-27525800-1334478682_thumb.jpg

post-32277-0-99092700-1334478687_thumb.jpg

post-32277-0-64743300-1334478694_thumb.jpg

post-32277-0-41529800-1334478700_thumb.jpg

cheers man , i like how the clear just really seams to water out once it sprayed . i did notice it will hide any ripples if you had them , as you build the clear up it seams to become more uniform during each coat.

i never wore anything when i sprayed arylic . but yeah i wore a full body suit to cover up and a propper respirator , i didnt want to take any chances . the stuff smells so strong .

Great work, well done for having a crack! It amazing what you can pull by getting in and having a crack!

I need inspiration like what you've done as I'm in the process of having my first go at fibreglassing up my cracked front and rear bars. Next step is obviously painting so thanks for the motivation! Only problem is you made it sound a lot bloody easier than it is!

i find confidence is the key , i used to be so worried when i used to spray acrylic , thinking oh damn i hope i dont ruin it etc....

a positive approach goes a long way . if you have everything correct , mix your paint to the right ratios , correct air pressure , and just test your gun settings on an old panel , you shouldnt have any trouble.

i did my bonnet yesterday , and i must say it came out great , no tiger strips either which i would usually get with acrylic in the past..

a little more motivational pics for those out there :)

post-32277-0-00644800-1334653027_thumb.jpg

post-32277-0-05929600-1334653036_thumb.jpg

post-32277-0-57521600-1334653574_thumb.jpg

Edited by sky017

You did end up doing it yourself!! That looks awesome mate!! I fixed up that front bar I got off you, and it's a bit rough but looks good! Just gotta figure out the mounting of it to fit as its not 100% perfect fit, ironically I destroyed my factory bar last night along with my fog light, ( guardrails hurt) but damn! Ur cars making mine look like a piece of shit! Looks really really good! Congrats!!

oh hey mate , yes ended up DIY , which was the best decision .

yeah how did you go with the fibreglassing ? did you end up tackling it your self. geez mate what did you do to your front bar and fog lights.

hehe yeah shes definitly an eye catcher now :) if you need a hand with the front bar fitting hit me up mate.

looks sweet man, ive done a few shed jobs with acrylic before and have always been pretty happy with the turnout.

DIY best thing u can do, worst case is u stuff it up and you start sanding again lol

haha , well i can definitly say i will never be touching acrylic ever again :P . practice makes perfect , but in saying that its hard to visualise the end product when you have to sand for a few good hours , hate it lol the skin on my fingers are just recovering.

Create an account or sign in to comment

You need to be a member in order to leave a comment

Create an account

Sign up for a new account in our community. It's easy!

Register a new account

Sign in

Already have an account? Sign in here.

Sign In Now


  • Similar Content

  • Latest Posts

    • Hi, is the HKS  Tower Bar still available ? negotiable ? 🤔
    • From there, it is really just test and assemble. Plug the adapter cables from the unit into the back of the screen, then the other side to the car harness. Don't forget all the other plugs too! Run the cables behind the unit and screw it back into place (4 screws) and you should now have 3 cables to run from the top screen to the android unit. I ran them along the DS of the other AV units in the gap between their backets and the console, and used some corrugated tubing on the sharp edges of the bracket so the wires were safe. Plug the centre console and lower screen in temporarily and turn the car to ACC, the AV should fire up as normal. Hold the back button for 3 sec and Android should appear on the top screen. You need to set the input to Aux for audio (more on that later). I put the unit under the AC duct in the centre console, with the wifi antenna on top of the AC duct near the shifter, the bluetooth antenna on the AC duct under the centre console The GPS unit on top of the DS to AC duct; they all seem to work OK there are are out of the way. Neat cable routing is a pain. For the drive recorder I mounted it near the rear view mirror and run the cable in the headlining, across the a pillar and then down the inside of the a pillar seal to the DS lower dash. From there it goes across and to one USB input for the unit. The second USB input is attached to the ECUtec OBD dongle and the 3rd goes to the USB bulkhead connected I added in the centre console. This is how the centre console looks "tidied" up Note I didn't install the provided speaker, didn't use the 2.5mm IPod in line or the piggyback loom for the Ipod or change any DIP switches; they seem to only be required if you need to use the Ipod input rather than the AUX input. That's it, install done, I'll follow up with a separate post on how the unit works, but in summary it retains all factory functions and inputs (so I still use my phone to the car for calls), reverse still works like factory etc.
    • Place the new daughterboard in the case and mount it using the 3 small black rivets provided, and reconnect the 3 factory ribbon cables to the new board Then, use the 3 piggyback cables from the daughterboard into the factory board on top (there are stand offs in the case to keep them apart. and remember to reconnect the antenna and rear cover fan wires. 1 screw to hold the motherboard in place. Before closing the case, make a hole in the sticker covering a hole in the case and run the cable for the android unit into the plug there. The video forgot this step, so did I, so will you probably. Then redo the 4 screws on back, 2 each top and bottom, 3 each side and put the 2 brackets back on.....all ready to go and not that tricky really.      
    • Onto the android unit. You need to remove the top screen because there is a daughterboard to put inside the case. Each side vent pops out from clips; start at the bottom and carefully remove upwards (use a trim remover tool to avoid breaking anything). Then the lower screen and controls come out, 4 screws, a couple of clips (including 3 flimsy ones at the top) and 3 plugs on the rear. Then the upper screen, 4 screws and a bunch of plugs and she is out. From there, remove the mounting brackets (2 screws each), 4 screws on the rear, 2 screws top and bottom and 3 screws holding in the small plates on each side. When you remove the back cover (tight fit), watch out for the power cable for the fan, I removed it so I could put the back aside. The mainboard is held in by 1 screw in the middle, 1 aerial at the top and 3 ribbon cables. If you've ever done any laptop stuff the ribbon cables are OK to work with, just pop up the retainer and they slide out. If you are not familiar just grab a 12 year old from an iphone factory, they will know how it works The case should now look like this:
    • Switching the console was tricky. First there were 6 screws to remove, and also the little adapter loom and its screws had to come out. Also don't forget to remove the 2 screws holding the central locking receiver. Then there are 4 clips on either side....these were very tight in this case and needed careful persuading with a long flat screw driver....some force required but not enough to break them...this was probably the fiddliest part of the whole job. In my case I needed both the wiring loom and the central locking receiver module to swap across to the new one. That was it for the console, so "assembly is the reverse of disassembly"
×
×
  • Create New...