Jump to content
SAU Community

Recommended Posts

Use the newspaper method of creating the clearance required.

Shamelessly stolen from the 300 forum. I used this to get my rears to fit and it works a treat!

First of all, you're going to want to jack up the rear by the tow hook, and remove he rear wheel. The you're going to want to disconnect the lower mount of the rear shock.

2011-09-08_21-04-39_179.jpg

Remove the nut and bolt, and swing the lower mount out of the way.

2011-09-08_21-05-01_813.jpg

2011-09-08_21-05-12_673.jpg

Make sure the lower mount is clear of everything. You do not want it to catch on anything.

With the car in the air, and the wheel at full droop, this is what it looks like:

2011-09-08_21-07-01_7.jpg

Not too bad, but remember it will camber in a bit, like so:

2011-09-08_21-09-35_748.jpg

The fender just catches the tire, so rubbing will occur.

Next, you're going to want to heat up the fender, from where I'm point at, and to the right. Use either a heat gun, or if you're brave, a propane torch, lol

2011-09-08_21-07-23_731.jpg

You want to hit the fender from the bottom and up, to heat up the lip of the fender on both sides.

2011-09-08_21-07-57_624.jpg

Next, grab about less than a thumb's width of newspaper for the initial treatment.

2011-09-08_21-09-18_240.jpg

Again, I'm using mechanic's paper floor mats. It works just as well.

With the fender heated, stuff the newspaper into the wheel arch, between the fender and tire. Make sure to have the newspaper span the whole area you heated up, or else you'll pull one section more than the other.

2011-09-08_21-10-09_127.jpg

Then you're going to drop the car slowly, until the tire touches the floor, and the wheel begins to tuck itself inside the fender.

2011-09-08_21-10-26_708.jpg

Now, it will make some noise it is just the sound of the fender sliding over the newspaper. Let it sit for couple of minutes, to give the fender time to cool off and take shape. You're going to want to then raise the car and remove the paper. Drop it back down to where you're tucking tire, like so:

2011-09-08_21-11-48_615.jpg

You're going to want to check for rubbing issues. What I do is take some thin paper, and slide it between the tire and fender:

2011-09-08_21-12-10_552.jpg

2011-09-08_21-12-16_224.jpg

If the paper snags, then you still need to pull more. The tire was touching the fender in the area between where the paper is placers in the two pics.

Again, heat up the fender, and grab more paper.

2011-09-08_21-12-56_607.jpg

Rinse and repeat as needed.

2011-09-08_21-14-52_349.jpg

You can see the fender slowly taking a flat flared look

2011-09-08_21-15-08_905.jpg

Just as a warning, the driver side fender will require more effort to pull, due to the gas cap there reinforcing the fender. So don't freak out if you need significantly more newspaper on the driver side than on the passenger side.

Keep repeating the process by adding a slight amount more newspaper at every pass. My passenger side took 2 passes. Driver side took 4. Again, this is normal. And here are the results:

2011-09-08_22-01-35_565.jpg

2011-09-08_22-19-51_204.jpg

2011-09-08_22-19-58_166.jpg

Hope this helps everyone.

Michael - thanks for the writeup mate. Unfortunately, I don't have the b*lls to do it myself but I am sure alot of people will use it. The clearance you have at the rears is crazy lol.

I took off the wheels off yesterday and it seems like I have done some substantial damage to the lip on the guards :mad: .

This is a pic of the rear guards...

guardliprear.jpg

Picture of the front guards...

guardlipfront.jpg

It may be the case that I need to flare the rears out abit (due to the extent of the rubbing compared to the fronts).

I have also removed the front inner plasticguard as per the recommendations but the wires (for the headlights) are exposed to potential water and dirt. Is it safe to have the inner plastic guard removed? I don't want to encounter the problems of my car shortcircuting lol. I can see why removing it would partially stop the rubbing though.

PhillB to the rescue tomorrow. I'll definintely get some good before and after photos for everyone =). I just hope the the pre-existing damage on the rear guard lip won't be a problem.

Edited by newbatplay

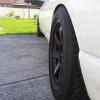
So Phill from <http://www.phillbenterprises.com/guard-rolling-service/> came to work on the guards on Saturday morning and I'm glad to say that my dream wheels finally fit with NO SCRUBBING OR SCRAPING WHATSOEVER! ! :woot:

All that was required was a good flat roll on all corners. The front inner guard plastic was shifted abit higher and locked into place by the lipped guards (refer to photos). I have also spent today re-patching the damaged inner guards with some primer and touch-up paint.

We realised that the previous owner tried to do a DIY job rolling the rear guards (possibly with a pole) which caused the damage. The front guards were not previously rolled.

Thanks Phill.

As promised, here are the photos...

2012-06-09105638.jpg

2012-06-09111750.jpg

2012-06-09111817.jpg

2012-06-09112426.jpg

2012-06-09113403.jpg

Create an account or sign in to comment

You need to be a member in order to leave a comment

Create an account

Sign up for a new account in our community. It's easy!

Register a new account

Sign in

Already have an account? Sign in here.

Sign In Now


  • Similar Content

  • Latest Posts

    • After using a protractor for an actually accurate assessment of what is required,  and by NOT using my uncalibrated eyeball I worked out I need a 25° silicone bend from the TB ro the MAF, but, my choice was either a 30° or a 23° (23° is a weird spec), so I grabbed the 23° one from Raceworks I also grabbed 1mtr of 3" straight from Just Jap, I needed 350mm, but they only had 300mm, or 1mtr lengths....meh Also ordered a 1/2" hose bulkhead fitting from fleabay, this has a smoothish mushroom looking head (they are designed for below the water line of boats) that will fit inside the bend, the hose bit and threaded bit looks to long, but nothing that a hacksaw cannot fix if required, the hose will then just get jamed on the threaded bit up to the retaining nut Fingers crossed and the unsightly amount of hose clamps will be reduced down to 4 once all the parts arrive 
    • Oil change does not trigger code 21. Code 21 is for coilpacks primary side connection. You can try to clear the code with a battery disconnect, hold down the brake pedal to drain capacitors through the brake lights with the ignition on for 10-15 seconds before you reconnect the battery. I have seen R35 coil conversion permanently cause this code with no ill effects so it might be the resistance it wants to see isn't quite right on one or more coilpacks. Could be inside the ECU, could be the harness, could be a coil. You can test it all if you want or just ignore until the car actually starts misfiring.
    • I forgot you have a Nistune ECU. Use Nistune to do all the tests I mentioned instead of faffing with 30+ year old electrical connectors. You can read MAF volts off that too, there are reference values in the service manual to tell you roughly what it should be in different conditions.
    • No. I think it might be the AFM. Hence the use of the terms "swaptronics", which implies the use of swapping out electronics for the purpose of diagnosis. It's about the only way to prove that a small/niggling/whatever problem with an AFM or a CAS or similar is actually caused by that AFM/CAS/whatever. A known good item swapped in that still gives the same problem is likely to be caused somewhere else. They're all the same. Spraying AFMs with cleaner is an each way bet between cleaning it and f**king it.
    • Oh wow! This might actually work amazingly. Do you know the ratio of the diff? I was told the only thing you need to make sure of is if the front & rear diff ratios are the same. Ours is a 4.083 Thanks!
×
×
  • Create New...