Jump to content
SAU Community

Recommended Posts

Hey All,

Due to unforeseen circumstances time has come for me to sell me pride and joy, this is not an easy decision on my behalf, but my missus assures me I will thank her later for this - how many houses does 2 people need???

Anyway back to the car:

As some of you guys may know I was meant to have bought myself a vspec2 nur s1, but due to myself being to trusting (like I only knew the bloke for like 16 odd years), I was duped of my money and my friend thought Burswood needed my hard earned more than I needed my dream car, Anyhow after finding out this shattering news after 6 months off waiting for something that I thought I'd payed for, I was itching even more to get my dream car.

It was only by chance that wen talking to Denzo from JPC that he knew of some one with an immaculately kept Bayside blue(originally the color I was looking for) VSpec2 gtr34, he t'd up a meeting with Chris for me and wen I finally got around to check it out , well let say I paid the asking price no haggling at all-(I'm Asian-hagglings in my blood- if my mum only knew I think I would be disowned!, ha), it was perfect , exactly wat I was looking for with all the basic mods already done, all the things u dont really want to spend money on after u just bought a car- ie, Ti exhaust, I/c, filters, greddy front brakes, genuine cf z-tune bonnet+boot, matter of fact Denzo reckons approx $30k just been spent on it and hardly any hard driving ,

Link to comment
https://www.sau.com.au/forums/topic/403167-fsvspec2-bayside-blue/
Share on other sites

Some wimmen. There's a reason they want you to be succesful and have possesions like houses.

You'll find out why during the break up. A person who loves you will support and encourage your passion.

If my GF asked me to choose then I'd drive her to her mum's in my GTR.

oh yeah, dont drink and post.

Girls dont understand cars and men dont understand shoes.

.........Anyway back to the topic and finish of this add- surprisingly ive had 3 pretty genuine interest with the incomplete ad. ok down to the all important spec sheet!!

CAR:

* 08/2002 BAYSIDE BLUE BNR34 GTR VSPEC2

* ENGINE # RB26-702636X

* VIN# 6U9000BNR34404314

* NO MONEY OWING ON IT

* NO ACCIDENT OR CRASH HISTORY

BODY/CHASSIS:

* NISMO Z-TUNE FRONT BAR

* NISMO Z-TUNE FENDERS/WINGS

* NISMO Z-TUNE CARBON FIBER BONNET

* NISMO Z-TUNE SIDE SKIRTS

* NISMO Z-TUNE REAR PODS

* NISMO Z-TUNE REAR FENDER WHEEL ARCHES

* NISMO CARBON B-PILLAR ADD-ONS

* NISMO SMOKED FRONTBAR INDICATORS

* NISMO SMOKED WING/SIDE INDICATORS

* NISMO LED TAIL LIGHTS

* NISMO LED REVERSE LIGHTS (L&R-VERY BRIGHT)

* NISMO LED TRUNK BRAKE LIGHT

* V-SPEC2 CARBON REAR DIFFUSER

* V-SPEC2 FRONT DIFFUSER

* SUPERIOR CARBON FRONT LIP

* SUPERIOR CARBON EXTENDED REAR SPOILER MOUNTS

* SUPERIOR CARBON SPOILER BLADE

* GANADOR CARBON MIRRORS

* MOONFACE RACING REAR WIPER DELETE BUNG

* GENUINE NISSAN WEATHERSHIELDS

* GENUINE GTR35 FRONT BADGE

INTERIOR/STEREO:

* ALL FACTORY VSPEC2 SEATS AND TRIMMINGS

* NISMO 500 GEAR KNOB

* NISMO FLOOR MATS

* SUPERIOR CARBON REARVIEW MIRROR COVER

* SUPERIOR CARBON DASH MAT- CUSTOM MADE - SUPER SUPER RARE!!

* LEGAL WINDOW TINTS ALL ROUND

STEREO:

* ALPINE W900 DOUBLE DIN HEADUNIT,-WITH SAT NAV AND BLUETOOTH AND REVERSE CAMERA, IPOD ETC ETC

* ALPINE PDX150 4 CHANNEL AMP X2

* ALPINE PDX1000 MONO BLOCK X2 ......4 AMPS IN TOTAL

* MB QUART Q-LINE SPLITS UP FRONT-SUPER RARE AND EXPENSIVE

* MB QUART REFERENCE SPLITS OUT BACK

* ROCKFORD FOSGATE T2 12INCH SUB X2......BULLSHIT LOUD

* STINGER CAPACITOR

* OPTIMA YELLOW TOP BATTERY

* AUTO WATCH ALARM

BRAKES/SUSPENSION/CLUTCH:

* TIEN MONO FLEX COILOVERS

* NISMO FRONT CASTOR RODS

* NISMO FRONT LOWER CONTROL ARMS

* NISMO REAR LOWER A-ARMS

* NISMO REAR TRACTION ARMS

* NISMO REAR TOE ARMS

* NISMO REAR REAR LINK BRACE SET

* IKEYA FORMULA FRONT ADJUSTABLE CAMBER ARMS

* IKEYA FORMULA REAR ADJUSTABLE CAMBER ARMS

* MOONFACE RACING TIE RODS

* MOONFACE RACING TIE ROD ENDS

* MOONFACE RACING FRONT INNER AND OUTTER ROLL CENTER BUSHES ETC

***PRETTY MUCH EVER ARM AND BUSH HAS BEEN REPLACED WITH EITHER NISMO,IKEYA FORMULA OR MOONFACE RACING PRODUCTS***

* MIDORI RACING TITAINIUM STRUT BRACE WITH BUILT IN BMS

BRAKES/CLUTCH:

* ENDLESS 6 POT FRONT CALIPERS & PADS

* ENDLESS 370X32mm 2PIECE FRONT ROTORS

* ENDLESS 4 POT REAR CALIPERS & PADS

* ENDLESS 332X30mm 2PIECE REAR ROTORS

* ENDLESS BRAIDED BRAKE LINES ALL ROUND

* AUTO SELECT EXTRA CAPACITY BRAKE MASTER CYLINDER-THE BEST AND MOST OVERLOOKED UPGRADE EVER!!!!

* NISMO BRAIDED CLUTCH LINE

* NISMO EXTENDED CLUTCH SLAVE CYLINDER

* EXEDY TWIN PLATE CLUTCH

* PROJECT MU BRAKE & CLUTCH MASTER SOKS

WHEELS:

* NISMO EXTENDED WHEEL STUDS

* 19 X 10.5 +12 SSR PROFESSORS F&R

* 5MM WHEEL SPACER/SHIMS......WASNT HAPPY ABOUT RUNNING THESE BUT HAD TO AS THE WHEELS NEVER CLEARED BRAKES.

* WORKS WHEEL NUTS

* 275/30/19 ARCHILLES

ENGINE/EXHAUST:

* TRUST/GREDDY T517'S 8cm REARS

* TRUST/GREDDY HARD PIPE KIT

* TRUST/GREDDY I/C LOWER KIT

* TRUST/GREDDY FRONT MOUNT

* TRUST/GREDDY OIL RELOCATER

* TRUST/GREDDY OIL COOLER

* HKS RACING BOV

* HKS RACING CHAMBER KIT

* HKS FUEL RAIL

* HKS DUMP PIPES

* TOMEI FPR

* TOMEI OIL CAP

* NISMO 660CC (I THINK) INJECTORS

* NISMO RADIATOR

* NISMO OIL COOLER FRONT BUMPER MOUNTS/DUCT

* BILLION RADIATOR HOSES

* SUPERIOR CARBON RADIATOR DIVERSION PANEL

* CUSTOM OIL CATCH/WIPER FLUID CAN

* TOMEI Ti DECAT PIPE

* TOMEI Ti EXPREME CAT BACK

* TOP SECRET BONNET STRUTS

THATS ALL I CAN THINK OF FOR NOW IM SURE THERES A FEW MORE BITS I HAVE FORGOTTEN, CAR HAS JUST BEEN DYNOED AT ASG LAST WEEK, ILL POST UP THE PRINT OUT SOON AS I GET HOME, CAR CAN COME WITH ALL REMOVED PARTS IF REQUIRED-INCLUDING COMPLETE FRONT END ( VSPEC2 FRONT,FENDERS,LIPS, CARBON BONNET ETC ETC-ALL UP ABOUT $10K'S WORTH),

CAN REDUCE PRICE FOR SOME PARTS REMOVED/REPLACE WITH STOCK ITEMS- STEREO REPLACED ETC ETC

ALSO THOSE OF U MAY HAVE SEEN MY OTHER FORSALE AD, I HAVE RIPS MOTOR AND MANY OTHER EXHAUST/TURBO SET UPS- ALSO HAVE A AMUSE TITAINIUM FRONT PIPE FOR TWIN SET UP, THAT I CAN INCLUDE IF REQUIRED

PRETTY MUCH I AM QUITE FLEXIBLE AND NEGOTIABLE WITH WAT THE NEW BUYER MAY REQUIRE- AS IN THE NEW BUYER MAY WANT A GENUINE STOCKISH- VSPEC2 IN ORIGINAL CONDITION AS I BELIEVE IT WOULD BE WORTH MORE IN THE LONG RUN IN ORIGINAL FORM OR HE/SHE MAY WANT A FIRE BREATHING FLAME SPITTING 1000HP VSPEC2 WITH ALL THE FRUIT TO MATCH, - EITHER WAY IS EASY ENOUGH.

AT THE END OF THE DAY I DONT WANT TO SELL HER BUT I MUST, I LOVE DRIVING THIS THING, LIKE LOVE LOVE DRIVING THIS , ITS AN EXPERIENCE IN IT SELF, THE POWER THE SPEED THE LOOKS ON PEOPLES FACES WEN IT COMES ON SONG IS INDESCRIBABLE, I HAVNT DONE MANY KM's IN IT SINCE OWNING IT, THAT IS WHY I NEVER GOT AROUND TO PUTTING THE RIPS MOTOR IN, I KNOW MANY PEOPLE SAY IM NUTS 1, FOR SELLING IT AND 2, FOR BUYING A $30+K MOTOR AND LEAVING IT IN THE CORNER OF THE WORKSHOP BUT IN ALL HONESTY I AM STILL ENJOYING AND LEARNING/GETTING USED TO THE MOTOR AND CAR WITH 500 ODD HP AND I AM QUITE HAPPY WITH IT THE WAY IT IS FOR NOW.

PRICE FOR CAR AS IT IS IN CURRENT SET UP IS $70K

BIT PRICEY? THOSE OF U WHO KNOW ME AND KNOW THE CAR WILL KNOW Y!!

and those who dont will have to come have a look for urself if u are genuinely interested and have the funds

more pics wen i get home

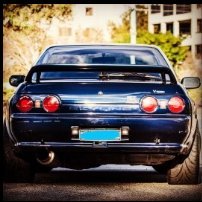
post-51436-0-43192700-1340425099_thumb.jpgpost-51436-0-73029000-1340425135_thumb.jpg

Wow this is definitely worth a flight over to perth to look at. Goodluck with the sale mate, whoever snaps this up will be very happy.

sorry for all that have requested for engine bay pic's and interior pic's, i have been real busy with work , i will try get down to where the car is stored during the day time to take some pic's, below are some older pic's:

before the new bits:post-51436-0-69676800-1340818301_thumb.jpgpost-51436-0-41898800-1340818356_thumb.jpg

post-51436-0-42209500-1340818518_thumb.jpgpost-51436-0-74183500-1340818550_thumb.jpg

the new bits:

http://www.skylinesa...-lots-of-boxes/

most of the new its on:post-51436-0-82791500-1340818641_thumb.jpgpost-51436-0-05060300-1340818675_thumb.jpgpost-51436-0-47865800-1340818728_thumb.jpg

post-51436-0-84945200-1340818799_thumb.jpgpost-51436-0-74487300-1340818887_thumb.jpgpost-51436-0-06881100-1340818999_thumb.jpg

post-51436-0-75640800-1340819084_thumb.jpg

  • 2 weeks later...

Create an account or sign in to comment

You need to be a member in order to leave a comment

Create an account

Sign up for a new account in our community. It's easy!

Register a new account

Sign in

Already have an account? Sign in here.

Sign In Now


  • Similar Content

  • Latest Posts

    • Did this end up working? Did you take some pictures?
    • And finally, the front lower mount. It was doubly weird. Firstly, the lower mount is held in with a bracket that has 3 bolts (it also acts as the steering lock stop), and then a nut on the shock lower mount itself. So, remove the 3x 14mm head bolts , then the 17mm nut that holds the shock in. From there, you can't actually remove the shock from the lower mount bolt (took me a while to work that out....) Sadly I don't have a pic of the other side, but the swaybar mounts to the same bolt that holds the shock in. You need to push that swaybar mount/bolt back so the shock can be pulled out past the lower control arm.  In this pic you can see the bolt partly pushed back, but it had to go further than that to release the shock. Once the shock is out, putting the new one in is "reverse of disassembly". Put the top of the shock through at least one hole and put a nut on loosely to hold it in place. Put the lower end in place and push the swaybar mount / shock bolt back in place, then loosely attach the other 2 top nuts. Bolt the bracket back in place with the 14mm head bolts and finally put the nut onto the lower bolt. Done....you have new suspension on your v37!
    • And now to the front.  No pics of the 3 nuts holding the front struts on, they are easy to spot. Undo 2 and leave the closest one on loosely. Underneath we have to deal with the wiring again, but this time its worse because the plug is behind the guard liner. You'll have to decide how much of the guard liner to remove, I undid the lower liner's top, inside and lower clips, but didn't pull it full off the guard. Same issue undoing the plug as at the rear, you need to firmly push the release clip from below while equally firmly gripping the plug body and pulling it out of  the socket. I used my fancy electrical disconnect pliers to get in there There is also one clip for the wiring, unlike at the rear I could not get behind it so just had to lever it up and out.....not in great condition to re-use in future.
    • Onto the rear lower shock mount. It's worth starting with a decent degrease to remove 10+ years of road grime, and perhaps also spray a penetrating oil on the shock lower nut. Don't forget to include the shock wiring and plug in the clean.... Deal with the wiring first; you need to release 2 clips where the wiring goes into the bracket (use long nose pliers behind the bracket to compress the clip so you can reuse it), and the rubber mount slides out, then release the plug.  I found it very hard to unplug, from underneath you can compress the tab with a screwdriver or similar, and gently but firmly pull the plug out of the socket (regular pliers may help but don't put too much pressure on the plastic. The lower mount is straightforward, 17mm nut and you can pull the shock out. As I wasn't putting a standard shock back in, I gave the car side wiring socket a generous gob of dialectric grease to keep crap out in the future. Putting the new shock in is straightforward, feed it into at least 1 of the bolt holes at the top and reach around to put a nut on it to hold it up. Then put on the other 2 top nuts loosely and put the shock onto the lower mounting bolt (you may need to lift the hub a little if the new shock is shorter). Tighten the lower nut and 3 upper nuts and you are done. In my case the BC Racing shocks came assembled for the fronts, but the rears needed to re-use the factory strut tops. For that you need spring compressors to take the pressure off the top nut (they are compressed enough when the spring can move between the top and bottom spring seats. Then a 17mm ring spanner to undo the nut while using an 8mm open spanner to stop the shaft turning (or, if you are really lucky you might get it off with a rattle gun).
    • You will now be able to lift the parcel shelf trim enough to get to the shock cover bolts; if you need to full remove the parcel shelf trim for some reason you also remove the escutcheons around the rear seat release and you will have to unplug the high stop light wiring from the boot. Next up is removal of the bracket; 6 nuts and a bolt Good news, you've finally got to the strut top! Remove the dust cover and the 3 shock mount nuts (perhaps leave 1 on lightly for now....) Same on the other side, but easier now you've done it all before
×
×
  • Create New...