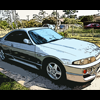
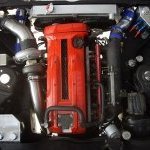
Jump to content
SAU Community

Recommended Posts

Here we have a rare genuine HKS intake kit to suit any R33 gtst. May also fit R34 with mods.

Kit replaces stock IC pipes with light weight aluminium that offers less restriction and smoother bends.

The hard intake pipe has less bends than stock, and won't suck in/restrict flow. Feels like a real quality pipe.

Inlet IC and intake pipe both have threaded holes for a temp sensor (useful for eg if you want to see how well your ic is cooling the intake air)

The 2 lines that connect to the intake pipe (bov and some other one) will need to be modified to line up.

Selling because I was hoping to use the stock airbox with these pipes, but that isn't possible. I started spraying parts black cos I prefer the stealth look, however they could do with a respray.

Kit pretty much comes with everything you would get out of the box:

-Hard Intake Pipe

-Aluminium IC Pipes

-HKS pod with afm adaptor

-All necessary quality silicon joiners and clamps

$200 ono + postage

Be quick to grab this rare item! Think of the hectic spooling sounds of this low restriction setup!!!

Richard - 0421 202 823

post-85393-0-71949800-1349761914_thumb.jpg

No I don't unfortunately. I got as far as putting the IC pipes in then realised the airbox wasn't going to fit. This is because the IC pipes replace the two rubber 90 degree joiners, and bolt up directly to the smic (or return flow cooler), so its metal all the way. The bends are less sharp than the stock rubber joiners which is good for less restriction, but also means the pipes come up higher and hit the stock airbox.

Also, scoured the web but can't find pics of this kit let alone of it installed. Apparently it was purchased a while back through a HKS catalogue, which in themselves are hard to find. I'll grab a pic of the catalogue page this is in for anyone interested.

Here is the page from the catalogue from which it was originally purchased. I hope your Japanese is up to scratch

$180 ono go!

post-85393-0-68789100-1350301546_thumb.jpg

Edited by Richard GTST

OK so I know the intake pipes are the same fitment on r33/34 and that the SMICs are interchangeable.

Having done some googling it would appear that the IC pipes are very similar if not identical, but alas I cannot say for certain.

Perhaps somebody knowledgeable would be kind enough to shed some light on the subject

Create an account or sign in to comment

You need to be a member in order to leave a comment

Create an account

Sign up for a new account in our community. It's easy!

Register a new account

Sign in

Already have an account? Sign in here.

Sign In Now


  • Similar Content

  • Latest Posts

    • Wheel alignment immediately. Not "when I get around to it". And further to what Duncan said - you cannot just put camber arms on and shorten them. You will introduce bump steer far in excess of what the car had with stock arms. You need adjustable tension arms and they need to be shortened also. The simplest approach is to shorten them the same % as the stock ones. This will not be correct or optimal, but it will be better than any other guess. The correct way to set the lengths of both arms is to use a properly built/set up bump steer gauge and trial and error the adjustments until you hit the camber you need and want and have minimum bump steer in the range of motion that the wheel is expected to travel. And what Duncan said about toe is also very true. And you cannot change the camber arm without also affecting toe. So when you have adjustable arms on the back of a Skyline, the car either needs to go to a talented wheel aligner (not your local tyre shop dropout), or you need to be able to do this stuff yourself at home. Guess which approach I have taken? I have built my own gear for camber, toe and bump steer measurement and I do all this on the flattest bit of concrete I have, with some shims under the tyres on one side to level the car.
    • Thought I would get some advice from others on this situation.    Relevant info: R33 GTS25t Link G4x ECU Walbro 255LPH w/ OEM FP Relay (No relay mod) Scenario: I accidentally messed up my old AVS S5 (rev.1) at the start of the year and the cars been immobilised. Also the siren BBU has completely failed; so I decided to upgrade it.  I got a newer AVS S5 (rev.2?) installed on Friday. The guy removed the old one and its immobilisers. Tried to start it; the car cranks but doesnt start.  The new one was installed and all the alarm functions seem to be working as they should; still wouldn't start Went to bed; got up on Friday morning and decided to have a look into the no start problem. Found the car completely dead.  Charged the battery; plugged it back in and found the brake lights were stuck on.  Unplugging the brake pedal switch the lights turn off. Plug it back in and theyre stuck on again. I tested the switch (continuity test and resistance); all looks good (0-1kohm).  On talking to AVS; found its because of the rubber stopper on the brake pedal; sure enough the middle of it is missing so have ordered a new one. One of those wear items; which was confusing what was going on However when I try unplugging the STOP Light fuses (under the dash and under the hood) the brake light still stays on. Should those fuses not cut the brake light circuit?  I then checked the ECU; FP Speed Error.  Testing the pump again; I can hear the relay clicking every time I switch it to ON. I unplugged the pump and put the multimeter across the plug. No continuity; im seeing 0.6V (ECU signal?) and when it switches the relay I think its like 20mA or 200mA). Not seeing 12.4V / 7-9A. As far as I know; the Fuel Pump was wired through one of the immobiliser relays on the old alarm.  He pulled some thick gauged harness out with the old alarm wiring; which looks to me like it was to bridge connections into the immobilisers? Before it got immobilised it was running just fine.  Im at a loss to why the FP is getting no voltage; I thought maybe the FP was faulty (even though I havent even done 50km on the new pump) but no voltage at the harness plug.  Questions: Could it be he didnt reconnect the fuel pump when testing it after the old alarm removal (before installing the new alarm)?  Is this a case of bridging to the brake lights instead of the fuel pump circuit? It's a bit beyond me as I dont do a lot with electrical; so have tried my best to diagnose what I think seems to make sense.  Seeking advice if theres for sure an issue with the alarm install to get him back here; or if I do infact, need an auto electrician to diagnose it. 
    • Then, shorten them by 1cm, drop the car back down and have a visual look (or even better, use a spirit level across the wheel to see if you have less camber than before. You still want something like 1.5 for road use. Alternatively, if you have adjustable rear ride height (I assume you do if you have extreme camber wear), raise the suspension back to standard height until you can get it all aligned properly. Finally, keep in mind that wear on the inside of the tyre can be for incorrect toe, not just camber
    • I know I have to get a wheel alignment but until then I just need to bring the rear tyres in a bit they're wearing to the belt on the inside and brand new on the outside edge. I did shorten the arms a bit but got it wrong now after a few klms the Slip and VDC lights come on. I'd just like to get it to a point where I can drive for another week or two before getting an alignment. I've had to pay a lot of other stuff recently so doing it myself is my only option 
    • You just need a wheel alignment after, so just set them to the same as current and drive to the shop. As there are 2 upper links it may also be worth adding adjustable upper front links at the same time; these reduce bump steer when you move the camber (note that setting those correctly takes a lot longer as you have to recheck the camber at each length of the toe arm, through a range of movement, so you could just ignore that unless the handling becomes unpredictable)
×
×
  • Create New...