Jump to content
SAU Community

Recommended Posts

I hahe had a little time to mod my car lately so i added a water spray kit to my front mount.

Bits used:

supercheap auto windscreen washer kit. it comes with bottle, wiper motor, tubing, and all stuff to mount it. it cost $28

6 micro garden spray nozzles and i bit of spray hose the length of the intercooler cost $5

switch cost $2

I mounted the spray bottle in my engine bay next to the battery and ran the hose thru the headlight hole to the intercooler using cable ties to make it secure. I attached to to a section of irigation pvc hose 620mm long with a stop in the other end. i then mounted this hose in the top lip of the front bumper so you cant see it (below the numberplate) then i put 6 spray nozzles in facing the intercooler so they spray all over the core.

Then i ran wires to power and the swithc on the footrest next to the clutch so you can spray between gears or at the lights. and presto, done!

the bottle i used is only 1.5 lt so in only lasts for about 2 hours of hard work spraying every 3 min for a couple of seconds.

I tested inlet temps with the temp probe i have already mounted in the bit of hose just before the throttle body.

The results are i am getting BELOW AMBIENT temps! on a 24deg day after a good spray my intake temps were 22deg! and i am getting full use out of my intercooler. best $35 performance upgrade ever!

it could use a bigger spray bottle tho.

the water syphons out of the jets to so i have to make a little pressure valve to stop the water from draining off when the pump is not on.

Link to comment
https://www.sau.com.au/forums/topic/52484-water-spray-results/
Share on other sites

yes that definately right. You will be looking at around $500 for the hr31 struts and hubs. I was fortunate enough to pick mine up for $250. You can use r32 gts-t or gt-r rotors and calipers which are bolt on and i've seen them sell for round 200-250 mark for just the front..

Yeah my mate did the same on his corolla front mount, worked a treat.

But out of interest has anyone done this to the stock cooler???  Is it even worth it?

it will work great on a stock cooler, as its more affected by heat soak then a front mount would be, so if your not planning on a FMIC anytime soon, its a worthwhile upgrade, which you can later re-adjust to suit a FMIC if you decide to get one

by the way, if the water your using is at room temp, then by the law of physics its impossible to get lower then ambient temps ;) ... what were the actual figures ?

I wouldn't say impossible. Wind chill factor and the evaporation of water will do this.

I used a 50/50 mix with metho in my bottle and the temp's go even lower, as metho starts to freeze when it evaporates.. Something along the lines of refridgeration..

Try placing some metho on your hand and feel the temp change as it dries off!

That is why our bodys sweat. So the water then gets evaporated, and therefore cools us, basically a primitive form of air conditioning (hey, even if its not right sure as hell sounded cool!)

I might look at hooking one up eventually tho. What about legalities of them???

or just lick your hand and blow on it ;)

:confused: :confused: i' wont go there ...

........

Nice work ... pics would be handy.... .. this same setup could double as a water injection setup on the turbo side too ...use soda water .. double oxygen content.

Matt

sorry i have been a biAutch and not posted photos i have been busy installing a new turbo. these things always start out as a "bolt on project" but always get harder as soon as u have the car apart.

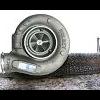
I have gone for this spec turbo

Garrett T3/T04E Hybrid 57-Trim

0.50 A/R compressor housing

0.63 A/R turbine housing

57 Trim compressor wheel.

Stage III turbine wheel.

i have also gone with a 40mm hks style gate.

i had to get a custom flange made on the standard manifold to accomodate the wastegate and i also had to get custom dump pipe made. also had braided oil lines made by pirtek and replaced all gaskets and bolts with stainless items.

should spool up at 3700 and be at 1bar by 4200. i will be running 1 bar and putting out a theoretical 220-235rwkw more if i up the boost.

but the car is for drift so not more than 1bar is needed. it should be a

fairly quick when its finished.

it was a bitch of a job to get the turbo in there as its about twice the size of the stocker.

i swear i am not going to mod the car any more...

lol lol.

go make me a wicker basket :P

sounds cool man you comin to the cruise? I'd love to checkout other engine bays.[/quote

me be there with turboz on and no make your own damn wicker basket!!! my cheap sweatshop labour is for love... only love

CEF11E: I too was gonna go that way (Garrett T3/T04E Hybrid) but after sitting in a mates r32 with the same setup. Found it spooled up way too long for practicality in drift. Also full boost its way too mentle. :P

Im leaning more towards the 2530 series. They seem to have more responsiveness and spool up much more earlier with full boost by 3500. I found this more easier to drift in/race track in.

yeah i wanted the 2530 but it was too $$$ so i guess i will have to tune the wastegate and learn throttle control. shouldnt be to bad with external wastegate tho.

got the car back on the road and into the fine tuning stages. my calculations were a bit off. spools at 4000 full boost by 4600 and it goes WHACK!!! tyre frying in 1st 2nd and third... at 1 bat i estimate by seat of the pants dyno lol... its at about 210rwkw at 1 bar. I wont push it past this till it goes on the dyno.

The wastegate Screams too! the guy who tuned it for me says easy 250rwkw at 1.5bar hehe me got fast car now...

  • 4 weeks later...

Create an account or sign in to comment

You need to be a member in order to leave a comment

Create an account

Sign up for a new account in our community. It's easy!

Register a new account

Sign in

Already have an account? Sign in here.

Sign In Now


  • Similar Content

  • Latest Posts

    • Surely somebody has one in VIC. Have you asked at any shops?  Is this the yearly inspection or did you get a canary?
    • This is where I share pain with you, @Duncan. The move to change so many cooling system pieces to plastic is a killer! Plastic end tanks and a few plastic hose flanges on my car's fail after so little time.  Curious about the need for a bigger rad, is that just for long sessions in the summer or because the car generally needs more cooling?
    • So, that is it! It is a pretty expensive process with the ATF costing 50-100 per 5 litres, and a mechanic will probably charge plenty because they don't want to do it. Still, considering how dirty my fluid was at 120,000klm I think it would be worth doing more like every 80,000 to keep the trans happy, they are very expensive to replace. The job is not that hard if you have the specialist tools so you can save a bit of money and do it yourself!
    • OK, onto filling. So I don't really have any pics, but will describe the process as best I can. The USDM workshop manual also covers it from TM-285 onwards. First, make sure the drain plug (17mm) is snug. Not too tight yet because it is coming off again. Note it does have a copper washer that you could replace or anneal (heat up with a blow torch) to seal nicely. Remove the fill plug, which has an inhex (I think it was 6mm but didn't check). Then, screw in the fill fitting, making sure it has a suitable o-ring (mine came without but I think it is meant to be supplied). It is important that you only screw it in hand tight. I didn't get a good pic of it, but the fill plug leads to a tube about 70mm long inside the transmission. This sets the factory level for fluid in the trans (above the join line for the pan!) and will take about 3l to fill. You then need to connect your fluid pump to the fitting via a hose, and pump in whatever amount of fluid you removed (maybe 3 litres, in my case 7 litres). If you put in more than 3l, it will spill out when you remove the fitting, so do quickly and with a drain pan underneath. Once you have pumped in the required amount of clean ATF, you start the engine and run it for 3 minutes to let the fluid circulate. Don't run it longer and if possible check the fluid temp is under 40oC (Ecutek shows Auto Trans Fluid temp now, or you could use an infrared temp gun on the bottom of the pan). The manual stresses the bit about fluid temperature because it expands when hot an might result in an underfil. So from here, the factory manual says to do the "spill and fill" again, and I did. That is, put an oil pan under the drain plug and undo it with a 17mm spanner, then watch your expensive fluid fall back out again, you should get about 3 litres.  Then, put the drain plug back in, pump 3 litres back in through the fill plug with the fitting and pump, disconnect the fill fitting and replace the fill plug, start the car and run for another 3 minutes (making sure the temp is still under 40oC). The manual then asks for a 3rd "spill and fill" just like above. I also did that and so had put 13l in by now.  This time they want you to keep the engine running and run the transmission through R and D (I hope the wheels are still off the ground!) for a while, and allow the trans temp to get to 40oC, then engine off. Finally, back under the car and undo the fill plug to let the overfill drain out; it will stop running when fluid is at the top of the levelling tube. According to the factory, that is job done! Post that, I reconnected the fill fitting and pumped in an extra 0.5l. AMS says 1.5l overfill is safe, but I started with less to see how it goes, I will add another 1.0 litres later if I'm still not happy with the hot shifts.
    • OK, so regardless of whether you did Step 1 - Spill Step 2 - Trans pan removal Step 3 - TCM removal we are on to the clean and refill. First, have a good look at the oil pan. While you might see dirty oil and some carbony build up (I did), what you don't want to see is any metal particles on the magnets, or sparkles in the oil (thankfully not). Give it all a good clean, particularly the magnets, and put the new gasket on if you have one (or, just cross your fingers) Replacement of the Valve body (if you removed it) is the "reverse of assembly". Thread the electrical socket back up through the trans case, hold the valve body up and put in the bolts you removed, with the correct lengths in the correct locations Torque for the bolts in 8Nm only so I hope you have that torque wrench handy (it feels really loose). Plug the output speed sensor back in and clip the wiring into the 2 clips, replace the spring clip on the TCM socket and plug it back into the car loom. For the pan, the workshop manual states the following order: Again, the torque is 8Nm only.
×
×
  • Create New...