Jump to content
SAU Community

Recommended Posts

star date: 6 hours past beer o'clock

captains log:

hello fellow aventurers..

i have chosen to path of the flush boot lid, as opposed to the ever popular drift wing, reason being the increasing popularity, and and i want to try something different. the only flush lids i could come across as buying, was either $600 + postage + paint for an offical Do Luck one, direct from USA, or $900ish for a carbon fibre one in perth, and CF bootlid doesnt look too flash on white car, especially as i dont have a CF bonnet.

so, i thought what the hell and im going to make my own. after having a look at GT N1K's flush bootlid on his lovely wide R33, and general ideas in my head, i want to come up with a bootlid that sits with a curvature much like the stock Series 1 R33 wing, but flush with the rear quarter panels.

the project started at about 10:47pm on this lovely cold friday night, and here is pictures thus far.

post-15551-1124464286.jpgpost-15551-1124464317.jpg

now i was lucky enough to get a bootlid that already had some form of lip on it (has nissan written on small in the middle of the bottom, stock lip perhaps???) which will aid in making a back support for the raising, and also gives me a perfect mounting position for something i will reveal further into the project.

tomorrow will consist of building up the raised section with foam, being able to give the bootlid shape without adding to the wieght.

if that proves to be successful, layers of fibres and resin will then be placed ontop to give it the raised shape i desire, smoothed back, and a bit of bog will fill in the gaps the fibreglass has.

at this stage i tossing up a few different ideas about having 'S K Y L I N E' embossed into the bootlid, and wether or not i want to keep the nissan lock, or go totally flush and remove it. i also have the issue(legaily issue too) of replacing the high level brake light, probably have an in-the-window job until i can sort something else out.

for now i bid farewall, and will give more pictures and updates tomorrow on the progress.

mitch.

Link to comment
https://www.sau.com.au/forums/topic/84677-the-quest-for-a-flush-33-bootlid/
Share on other sites

as promised here is the next update...

i ended up catching the bus to bunnings, and grabbed the much needed catalyst, and soldiered on with my project..

i then proceeded to fill in the hole in the bootlid where the nissan logo/boot opener once lived... relatively easy job, applied a bit of tape over the hole, and bogged it up.. let it dry, sand and gave it one more bogging to make sure all gaps were filled, left for 30 mins then sanded the grap ot of it with a medium, then light grit sand paper.

it turned out like so..

post-15551-1124523768.jpgpost-15551-1124523784.jpg

mmm, smooth!

i then got to the real task at hand, leveling off the bootlid..

this one had me a little stumped at first, but i thought of a few ideas.

i started by taping up all the original spoiler holes, and over where the lip joined the bootlid and put some foam onto the boot as a base for the raise. then i stretched a bit of plastic drop sheet accross the bootlid, and taped it to the quarter panels, that gave me the desired hieght.

i then put down the first layer of resin, followed by a few small sheets of fibreglass. i let that sit to dry for a little while, then laid some cardboard over it to give it a bit more raise, and give it all flat, more resin, more fibreglass sheets, and more resin again.

i also bought a small 'strip' of fibreglass that i used to cover the back of the lip, and make the upwards part of the bootlid appear to be all as one.

now it is all sitting in the garage drying overnight, preparing me for a solid base to continue on with tomorrow.

here are pictures so far..

post-15551-1124524129.jpgpost-15551-1124524154.jpgpost-15551-1124524176.jpgpost-15551-1124524202.jpg

all the pictures can be found at : project pictures

Edited by mitchy_

so far its successful, ive done a bulk of the raising..

tomorrow will hopefully just be getting it all to approx. one hieght, then bogging and sanding the gaps in the fibreglass, and pending how that turns out, i may get the painters to do a final touch to get it all perfect and level, and get it painted, leveled, and badgeless! \o/

day 2 commences..

got most of the vertical part of the bootlid somewhat in shape today, it was much easier having a lip already there, i basically just bogged up the back of the lip to make it look like a continuation of the bootlid.

post-15551-1124591669.jpg

did a bit more fibreglassing on the top, not much though as i ran out of resin :(

that said i think i might give it a couple of days to set. even after leaving it overnight it wasn't completely dried, so if i leave it untill say wednesday, then thurs/fri ill sand the putty and fibreglass a bit, that gives me the weekend again with a nice smooth, solid surface to hopefully finish the project with. :D

post-15551-1124591344.jpgpost-15551-1124591362.jpgpost-15551-1124591421.jpg

again, all the photos are at project pics :)

Edited by mitchy_

cheers hazerb30 :(

i like it cause it gives it a more 'sleek' coupe look :)

i was looking at putting a R34 style wing, or a GT wing on it, but after seeing it how it is, i think ill keep it like that, im even considering *not* selling the car now aswell..

Ive seen a couple of these "fill in" jobs done here.

Give it 6 months and see the cracks in the bog and the sagging.

I want this look real bad and due to my job, I have spoken to many panel beaters about doing this, and filling it in certainly does not achieve good results.

For best results it needs to have new sheet metal grafted on.

Ive seen a couple of these "fill in" jobs done here.

Give it 6 months and see the cracks in the bog and the sagging.

I want this look real bad and due to my job, I have spoken to many panel beaters about doing this, and filling it in certainly does not achieve good results.

You're a fag. What would happen to all teh fibreglass bonnets on cars these days?

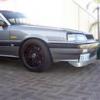
is that a m-sports style front bar? looks nice

its a bit hard to see it being black, it all blends in, but its a trust style bar made by fibrevision in welshpool :D

Edited by mitchy_
Ive seen a couple of these "fill in" jobs done here.

Give it 6 months and see the cracks in the bog and the sagging.

I want this look real bad and due to my job, I have spoken to many panel beaters about doing this, and filling it in certainly does not achieve good results.

For best results it needs to have new sheet metal grafted on.

this seems a bit negative... considering the quality you can get out of glassing these days i cant see sagging as a problem nor can i see cracks... he isnt going to be suporting weight on it and it has been done before by GT NIK and he has a wing on his also... why would this be any different?

Create an account or sign in to comment

You need to be a member in order to leave a comment

Create an account

Sign up for a new account in our community. It's easy!

Register a new account

Sign in

Already have an account? Sign in here.

Sign In Now


  • Similar Content

  • Latest Posts

    • Yeah, this is one of the most annoying things about nissan part numbers... I've got an unrelated example... Image is of the AT output shaft ~ they have the same part#, but clearly the shaft on the left is beefier design to that on the right ...the difference (essentially) is the 'lighter' shaft on the right, is for engines up to RB25DE (this includes RB20 variants) : the shaft on the left is for RB25/26DET(T)....are they interchangeable? Yes...but obviously one shaft is going to be stronger than the other...and, the lighter shaft is around USD115, but the heavier shaft closer to USD150...same part#... ...epc-data usually tells a tale ~ the amayama listing for 39100-23U60 has a note "Longest side is between 60 and 105 cm" ; no such info is there for 39100-23U70 ...and given the great disparity in price between the 2 parts, it makes me at least curious (to the point of caution) where the 'extra money' went? ...ie; these 2 parts have a cost difference that (to myself at least) isn't explained by 'plastic boot'...ie; with amayama there's AUD700 price difference ...plastic versus rubber?...I'm not seeing it like that...and 60cm ~ 105cm...??...that's a huge disparity....something hinky going on here... I'd try searching by VIN, not model... /2cents
    • I don't know for sure, but I'd expect them all to be interchangeable given the diff end and hub end don't move/change between any C34 series. Often Nissan will change part numbers and the aftermarket follows those year ranges; but the original part number change doesn't mean other parts won't fit. The change could be a change in material, internal parts or even just supplier. For example, all the RB gearbox to engine bolts are no longer available and there is a new part number instead. The only change is they went from cadmium plated bolts to zinc plated due to the issues manufacturing with Cadmium. They look different but work the same.
    • One year is a bit concerning. Did you try contacting GSP? It says 5 year warranty on the box if I remember correctly. I'm also running their driveshafts on my S2 Stagea.   You could check the part numbers on Amayama for your year. Here's the link for my 1998 which gives the 39100-23U60 part number. Well, that and 39100-23U70. https://www.amayama.com/en/genuine-catalogs/epc/nissan-japan/stagea/wgnc34/6649-rb25det/trans/391 What does it say for yours?
    • I ordered a GSP Front R/H Axle from here - https://justjap.com/products/gsp-premium-front-driveshaft-r-h-nissan-r32-r33-r34-skyline-gtr-stagea-4wd#description It lasted around a year before one of the boots blew out. I'm lowered, but I have GKTech roll center adjusters. One year seems a little premature. I think I'm going to spend the extra money on an OEM cv axle this time. This website - https://tfaspeed.com/collections/nissan-stagea-wgnc34-x-four-parts/products/nissan-stagea-awc34-260rs-rb26-right-front-axle-drive-assembly Makes it sound like the readily available OEM CV axle will only fit 11.1999 Stagea and up (mine is a 2.1997 S1). The JustJap listing didn't mention any years or anything for the GSP axle. Amayama shows '11.1999' and up as well for that part number. As well as 'plastic boot type'. See attached picture. So I guess my question is, does that axle (39100-23U60) really only fit S2 Stagea? It's the front driver side. If it does, I'd love to buy that instead of rolling the dice on another GSP. I've found that OEM one cheaper here: https://www.partsfornissans.com/oem-parts/nismo-jdm-r32-r33-r34-skyline-gtr-r32-gts4-right-front-axle-3910023u60 and here https://www.nissanparts.cc/oem-parts/nismo-shaft-ft-drive-3910023u60 Just a little confused because the JapSpeed listing for the GSP front driver axle doesn't mention any specific years or anything and it fit my S1 Stagea fine. So will 39100-23U60 fit my S1 Stagea even though technically it says '11.1999' and up? What would have changed? Thanks.  
    • Thanks for the info. The only "Issue" I've had with the shifter is I always found the throw between 4th and 6th gear too close. I'm always worried to shift into 4th accidently and sending my motor to the moon. Adam LZ recently came out with a video and stated Serialnine revised their shifters to correct this and will change all the revised parts for 150$. Strangely enough, I contacted Serialnine right after and they denied it and said it's bullshit. I found that strange as he's a distributer. I'll keep this forum post updated on that saga.
×
×
  • Create New...