

Announcements
-
Similar Content
-
-
Latest Posts
-
 Yeah the rule of thumb with an LS is 7psi per 1000rpm. That is decidedly not enough at 6800rpm. I mainly looked for the scenarios where knock started to be picked up and it was later in the session when things were hotter, and oil was thinner, and the pressure was lower than it should be. (i.e very horrible). I am hoping with thicker oil (I was running Penrite ten tenths 10-40, the manual specifies 10-30) that does not leak that it's much improved at that time!!! I am using Project Mu Club Racer CR pads. I'm also using the Project Mu 335C fluid. The symptoms imply that it was fluid that boiled, but no bubbles seemed pretty weird to me when I bled it today. I want to try Castrol SRF as it has a much higher wet temp but, well, I have new Project Mu fluid lol... so I should at least use that. The pedal on track was really noticable. It went from basically normal feeling to instantly near-floor. The car did pull up as before, it was just very much nearly at the floor before the brakes engaged. At that point I pretty much decided the day was very done, it did *kinda* come back during that very slow cooldown lap into the pits. Felt perfectly fine driving home.
 -

-
-
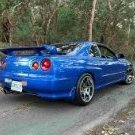
 Then today, I went to visit a man with an r33 hat Peter and Road and Race sorted the alignment. As it is being set up for general track/hillclimbs etc it has a heap of caster (7o), less camber than I am used to (1o front and 2o rear, as the caster looks after that in turns without the braking downsides), 3mm front toe out and 0 toe rear. Will see how that goes and track tyre wear to see if it does need more camber, but adjsustment is also limited with nismo arms and adjustable bushes at only 1 end. It does have a bent inner tie rod on the driver's side front but as it came up within spec I'll just leave that as is. So, that is getting close to my chapter of this story....could of tidy ups then a shakedown in early October before it finds a new home.
 -
So, it went to Unigroup for a run in and tune on Friday, everything went (generally) well. In terms of fixes, the engine was good and there were no leaks. It needed plugs (I hadn't checked them because the coil pack cover was on a new engine and I couldn't imagine they weren't new.....but turns out the temporary plugs to just keep it sealed up were in there.....new plugs gapped to 0.8 and it was fine from there. Also, there was a little preload on the clutch slave which caused some slip. I haven't had the box off so I don't know what the clutch looks like; my guess it is brand new and the pedal had not been adjusted....backed that off a bit and it held fine. Last thing will have Dose crying....the idle especially when cold is a bit difficult between the cams, forward plenum, atmo blow off valve and an 80s air management system. It is fine when hot but a little uneven when cold, will see if I can sort or at least improve that one cold morning. Other than that, tuning went fine. It made 245 but was pulled back to 227 which 2 opportunities to improve in future. 1. The factory CAS is not great and was jumping around at high RPM, so Mark took 2 degrees out up top (that is why it stops making power and lost 20kw). Very safe this way and the extra power is available but will require a more modern ECU and better cam (or even better crank) sensor 2. The 2871 in factory housings is very big for a low mount, and the internal wastegate is too small, so it was creeping from mid range all the way to redline....the duty cycle on the boost controller is turned down a little for safety. That is much harder to fix, it would need a large external gate and that would require a whole bunch of other changes, so it will go as it is for now. It feels nice and healthy and safe, so should be good for about a billion laps like this.
-


Recommended Posts
Create an account or sign in to comment
You need to be a member in order to leave a comment
Create an account
Sign up for a new account in our community. It's easy!
Register a new accountSign in
Already have an account? Sign in here.
Sign In Now