

GTRPSI
-
Posts
1,355 -
Joined
-
Last visited
-
Feedback
100%
Content Type
Profiles
Forums
Events
Gallery
Media Demo
Store
Everything posted by GTRPSI
-
Certainly, one of the cheapest things to fit which can adjust where and how the power is laid down.
-
Brand New Nitto 2.8 Short Block
GTRPSI replied to Tyranus's topic in For Sale (Private Car Parts and Accessories)
I can vouch for it, i know the engine builder, know the engine (seen it a few times while it was being built) and know the machinist. Same engine machinist did my work, hes a machinist precision nazi....engine builder is the same and has a number of well over 1000Hp engine to his name without issues (that Supra only got to 1400Hp because the dyno couldnt take it), i know many of the owners of the vehicles these engines were built for also. Probably best to see the engine and talk to the engine builder in person..... -
Just dont boost it, keep the boost down to a managable level for the ECU and setup.
-
The idea is more to cover for those times when your high G forcing or had a extended high rpm run where oil may have temporaraly pooled in the head and your pickup is exposed. Once you have lost all oil in the sump or oil pressure for a extended time your screwed regardless, its just a startup and momentary loss of oil pressure backup. Dont plan on driving with no oil and just a accusump.......
-
Anyone Good With Insurance Particulars?
GTRPSI replied to nicr4wks's topic in Engines & Forced Induction
Some policies have a clause if you have mods that were not reported, that they can void your policy. I had a customer over about 3 months ago who recently bought a late model hilux with a lift kit, he had a kangaroo run into the side of a door, called the insurance and as soon as the assosor saw the lift kit he told him he had zero cover as he did not report the mod. Owner told his insurance he bought it that way and didnt know it was a mod, besides how does a lift kit effect if a kangaroo runs into it, insurance told him where to go, its in the policy. Got his balance of his $1200 policy back and had a panel shop fix the door for $900.......life went on. -
Anyone Good With Insurance Particulars?
GTRPSI replied to nicr4wks's topic in Engines & Forced Induction
Nick, did you post this over at Austech in general chat? If so, ive replied over there...... Find a repairer with a lawyer, dont go through your insurance, ive done it this way a few times, last time the guy who hit me was with the same insurance company as i had, my panel beaters lawyer took on the insurance and they paid (and were spewing i didnt go through them so they could get out of a few things and negotiate the claim) You dont have to go through your insurance if its not your fault and the other guy is covered, you just need a panel beater who has a lawyer to handle things, lawyer costs are washed into the cost of repairs (for us anyway). -
My 94 R32 Gt-R Build Diary
GTRPSI replied to Tyranus's topic in Members Cars, Project Overhauls & Restorations
Remind me to talk to you about strokers, rod stroke ratios and side loads on the pistons and bores when you come over. In a nutshell make sure you anti friction coat your pistons like we did on our 26/30 when you go 3.2L, the latest 2.8 and 3.4 big power stroker tear downs are showing high side loads on cylinder walls and pistons at a few workshops, James's 3.4L 2JZ got coated on the freshen up after Barry found excessive loads on the bores. I think its the rod stroke ratio thats not helping as its half way down the bore when the rods at its max angle.....pistons were coated to help reduce the wear pattern on rebuild. The ideally rod stroke ratio is around 1.75:1, the lower you go down from that ratio, the more side loading, the higher you go the more chance of detonation as the piston stays up top for too long. The lower the ratio, the faster you can safely rev the engine as the piston is traveling slower down the bore, hence why 2.8L like to rev and do so safely, higher ratios get the same piston speeds at lower revs, hence why you dont reed to rev a RB30 (yet RIPS takes them to over 10,000Rpm). RB26 rod stroke ratio is 1.65:1 RB28 rod stroke ratio is 1.56:1 RB30 rod stroke ratio is 1.77:1 RB32 rod stroke ratio is 1.68:1 RB34 rod stroke ratio is 1.62:1 3.2L is not far off the mark........ Bring your camera to get shots of our catch can. -
Centerline suspension in Thomastown. http://www.centrelinesuspension.com.au/ Most people who do track days or have track cars go there.
-
Dont stress or rush as ive already worked out my shape on the head im using, however the information would be good for others and my other backup head i have for future work. Thanks for taking the time to share the info, its these things that help everyone.
-
Cyl 5 95% done on the exhaust side, others are roughed in, looking to buy a bigger house so house hunting ATM and the head work can wait till i find time and energy between that and running a business. Took me 8-10 hours of touching and looking one exhaust port to bring it where i wanted it to, now will be replicating it across the other 5.
-
My 94 R32 Gt-R Build Diary
GTRPSI replied to Tyranus's topic in Members Cars, Project Overhauls & Restorations
Swing past on Sunday afternoons and evenings. its the time and day/evening that im sort of free to slack off and talk (supposed to be working on ours), Monday to Saturday im under the pump with work. Yes i heard about the turbo, best move you made, could never work out why you were building around a T51R dinosaurous (was going to be your turbos nick name), now your talking about some good shit. Still planning a dirty 30 next? 3.2L stroker.....DO IT!!!!!!! (if you can afford it) -
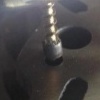
Get some of the divider in the exhaust port if you can please, there is a jacket that goes through the middle in there, you can see a tiny hole from the head gasket side going through the middle of it. Also some pics of the sides of the ports to see the design on thickness of the water jacket areas on the sides. Or in other words cuts made the other way...... Lucky you, i tried to find a cracked or damaged head locally to cut up but everyone wanted top $ for something only worth its weight in alloy.
-
My 94 R32 Gt-R Build Diary
GTRPSI replied to Tyranus's topic in Members Cars, Project Overhauls & Restorations
Hi Sedat, i dont know if Barry metioned to you, i was over there a few Saturdyas ago to compare our head to a few of his race heads and we laid yours out on the table as it was the best ported there to look at and compared to mine. I spent 8 to 10 hours the weekend before working on 1 exhaust port (i use to port a lot of heads between the late 70's to early 80's before Stefan was born and i had to put the die grider away and actually work for a living), taking my time, studying the casting and port shape getting it to 95% of where i wanted it, i had not done the other 5 so it was time for me to sit down and look at some others professionally done and take some detailed measurements, study them and to see if my theory/direction was wrong or right. End conclusion is our exhaust ports are virtually identical, most areas are indentical to the exact 0.01mm in size, i have a few areas that are no more than 0.5mm larger (nothing), my flange outlet is around 1mm larger (you have a reversion step from the head to mainifold join which is good, my gas reversion step im building into the 6boost manifold which explains the 1mm port outlet diffrence) , i took a different approch (slightly) on the short side radius near the valve, i pushed our exhaust divider wall back 2mm more as i felt there was a restriction there which is a minor diffrence, i could be wrong that it was a restriction, my ideas VS a professional porters. All i can say is your head was very, very well done. Looking at what it cost to get yours done and the time im putting into ours, im questioning if its just wiser to hand it to Brendan to get done and just sit back and enjoy life. Our combustion chamber shape will be different to yours (spoke to Brendan about it last time i was there and he said its something that could work out surprising for E85 but its untested on a RB), looks like i will be the guinea pig with the idea. They did a great job on that head, you will do well with it....should push out some great numbers.... Whats this i heard from Barry that you and a mate almost knocked out the 6 foot something window guy a few doors down after he mouthed off? I heard he ran off inside to hide like a little bitch when you 2 went over. Good because a few weeks earlier i also had a run in with him. Edit, forgot to mention, you will need to wipe down that inlet mainifold, i was drooling all over it, its a work of art, take lots of pics of the inside, once its on you wont get to see the craftmanship inside again. -
Its in the factory instructions you posted. Is there water in the Radiator firstly? Cap was removed? For water to come out, air needs to be able to go back in from the Rad cap. Did you have the bleeder open far enough? You can even do the final bleed with the Radiator cap on with a little heat in the engine which will pressurize the system a little and help push whatever (air or water) is sitting under the bleed nipple.
-
Tomie pump is externally pressure adjustable, this is the reason i only like to run them, they are only a little bit more in price to the other brand name full pumps. There is a plug on one side, on the outside that can be removed and you can adjust the oil pressure as needed. Other pumps have it hanging on the inside of the sump, if you want to play with it you need to get the sump off which in most cases is a engine out job. I did my oil returns to 10.5mm in the block and head, i also added breathers to my sump and used a gated baffel 9lt sump extension and built my own tomie style windage tray to direct returning oil to the pickup area.
-
Its about having the water run through the heater core and getting the air out of there too, if you felt hot air come out when runing the engine with the heater on when at temp then water must have flowed through to push any air out of the core and lines. Yes open it again today to see if any extra air come out that may have been trapped in air pockets in the engine after you warmed and reved it a few times with the thermotsate open.
-
Usually you have the heater on and pour the coolant in very slowly with the breather on the manifold open, when you see coolant coming out without air you close it. Then you start the car up and get it to temp, rev it a few times to circulate the coolant and to move any air to the highest point. Then when cool i usually open the bleeder again to pull out any air that was trapped from the first bleed.
-
Oil Control In Rb's For Circuit Drag Or Drift
GTRPSI replied to Sydneykid's topic in Engines & Forced Induction
I think he meant top of the sump..... -
Cannot Rewind Brake Pistons
GTRPSI replied to SargeRX8's topic in Suspension, braking, tyres and drivetrain
Yep S2000 rear wind back, yes have a cross in the middle of the piston to drive them back with and for the pads pin to lock into, R32, R33 and R32 have the handbrake in the drum part of the rear discs so its a straight push backwards, pistons are flush with no cross. Usually the windback type calipers are the ones with the handbrake working the pads in the caliper, not from a seperate pair of shoes inside the discs drum section. -
Cannot Rewind Brake Pistons
GTRPSI replied to SargeRX8's topic in Suspension, braking, tyres and drivetrain
Use a g clamp or a proper piston push back tool. Sounds like rust or dirt on the pistons or they are going in at an angle and stuck. The last time i had a difficult piston, i dissembled it and found it was rusting in the caliper bore, changed the piston and seals and all was good. -
Removing Bolts From Top Mounts
GTRPSI replied to AMR33's topic in Suspension, braking, tyres and drivetrain
Yeah, steal a car of the same model and strip it for parts, but be nice and return it to them with your bent shockers. -
Removing Bolts From Top Mounts
GTRPSI replied to AMR33's topic in Suspension, braking, tyres and drivetrain
Im sure you can work that one out. -
Is there a lip on the bore? If not it may just need a light hone and standard sized rings. Get a machine shop to measure the bores and more importantly check for ovalarity, especially if your boosting it, if they are badly worn oval it may be wiser to go up a piston size and rings to match. Also check the crank for scoring, if its not deep a linish could clean it up, otherwise you need to go undersied and the cranks have a hardened coating on them that you will be removing.
-
Removing Bolts From Top Mounts
GTRPSI replied to AMR33's topic in Suspension, braking, tyres and drivetrain
Is it the coil spring thats sagged and bowed or the shaft of the shocker thats bent? Actually on second look, looks like the shaft of the shocker as the whole assembly looks off center. Take it to a motorbike place where they straighten forks, they may be able to straighten it (hopefully) -
Removing Bolts From Top Mounts
GTRPSI replied to AMR33's topic in Suspension, braking, tyres and drivetrain
This. Use a solid punch that covers the whole stud face that you cut and use a heavyier hammer so you have some force behind it. I wouldnt have cut the studs..... Edit, i just noticed your using a nail punch NOooooo......use a pin punch thats a similar or slightly smaller diameter than your stud. http://en.wikipedia.org/wiki/Punch_%28tool%29

