Jump to content
SAU Community

Recommended Posts

  • Replies 112
  • Created
  • Last Reply

Top Posters In This Topic

Top Posters In This Topic

Posted Images

um compared to my old hi flow stock turbo, boost comes on neally the same, not much lag at all an when boost comes on, it comes on strong and just spins... 1,2,3rd are a waste of time ahhaha..we went with the smallest ex housing for the gt35r think its .64 , \dont know how long a internaly stock engine would last if you wound one right up..

um compared to my old hi flow stock turbo, boost comes on neally the same, not much lag at all an when boost comes on, it comes on strong and just spins... 1,2,3rd are a waste of time ahhaha..we went with the smallest ex housing for the gt35r think its .64 , \dont know how long a internaly stock engine would last if you wound one right up..

Yeah I am hoping the stock internals will last a little while. Ken is going for a safe tune with it to make it last...will be looking at rebuilding with stronger internals at some point...but hopefully later than sooner :P

I have the .82 ex housing on the GT3540R so cant wait to see how it goes in just over a week :(

Yeah I am hoping the stock internals will last a little while. Ken is going for a safe tune with it to make it last...will be looking at rebuilding with stronger internals at some point...but hopefully later than sooner :P

I have the .82 ex housing on the GT3540R so cant wait to see how it goes in just over a week :P

Sounds similar to the tune done on mine by Steve, and I'm running a safe boost as well. Can't go wrong with only needing 12-13psi to get 350 :P That's the lowest he could get it because of the wastegate spring I think it was, when it can get changed I will have 250 on one setting 350 on the other, wet weather spec & fun spec.

Once upon a time I said cars were a way to go from A to B.......then I said a mildly modified R33 would keep me happy.......then I said 300rwhp would be more than enough..........I'm not going to say what I think now. :(

Yeah I am hoping the stock internals will last a little while. Ken is going for a safe tune with it to make it last...will be looking at rebuilding with stronger internals at some point...but hopefully later than sooner :P

I have the .82 ex housing on the GT3540R so cant wait to see how it goes in just over a week :D

Many SAU guys Stock 25s have lasted well at 350-380rwhp if tuned right inc Missinglink, Welky(Bout 4 years)Ossie21 etc so yeh their a good engine.Your Turbo will be on boost a lot later than these guys and Smiddys tho but will putout when it does come on.

Once upon a time I said cars were a way to go from A to B.......then I said a mildly modified R33 would keep me happy.......then I said 300rwhp would be more than enough..........I'm not going to say what I think now. ;)

hahaha tell me about it.. i went from 270hp to 450odd on the low setting, haaha god knows what we will get when i replace the coils, cat,diff. f*&k knows what els.. then i will prob still want more :)

Many SAU guys Stock 25s have lasted well at 350-380rwhp if tuned right inc Missinglink, Welky(Bout 4 years)Ossie21 etc so yeh their a good engine.Your Turbo will be on boost a lot later than these guys and Smiddys tho but will putout when it does come on.

Thats good to know :) I will only be able to drive it for a week (hopefully the motor, clutch etc can hold out that long hehe), then back to London for another 5 months :) Hopefully all you guys are going to the cruise on 23rd April...coz that coincides with me being home. Set to pick the car up on the 21st.

Can't wait to see how hard it pulls on boost

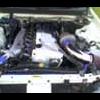
P.S. Shmiddy...your engine bay looks awesome :) Love those high mounts...I will probably spend more time with my bonnet up staring at the GT35 than driving the thing ;) hehe

Once upon a time I said cars were a way to go from A to B.......then I said a mildly modified R33 would keep me happy.......then I said 300rwhp would be more than enough..........I'm not going to say what I think now. ;)

haha yeah it gets like that...when I got the 33 I went a lot harder than my S15 (totally stock) but then it felt slow...so the search for power started along with some $$$ (not in Shmiddy's category yet though but working on it :)). Then I am sure it will end up feeling slow again, so will need the rebuild and more $$$ to keep me happy :)

Might have to go wider than the 265's on it to get anywhere...or potter around at 3k rpm so boost doesnt hit :)

hey shmiddy i bet ya wish ya had 4wd now with that power haha, my rb26 in my old car (2wd) with 360rwhp was an absolute animal to control and smoked tyres from any speed, and ended up getting frustrating if ya tryin to race someone and they cain u with half the power cause im busy laying strips behind me :P thats the main reason i got the stagea, because its 4wd. now ill blow gearboxes instead :)

u will be spending more on tyres than fuel :)

hope to check it out in person in the future

cheers

Brad

Create an account or sign in to comment

You need to be a member in order to leave a comment

Create an account

Sign up for a new account in our community. It's easy!

Register a new account

Sign in

Already have an account? Sign in here.

Sign In Now


  • Similar Content

  • Latest Posts

    • Hi, is the HKS  Tower Bar still available ? negotiable ? 🤔
    • From there, it is really just test and assemble. Plug the adapter cables from the unit into the back of the screen, then the other side to the car harness. Don't forget all the other plugs too! Run the cables behind the unit and screw it back into place (4 screws) and you should now have 3 cables to run from the top screen to the android unit. I ran them along the DS of the other AV units in the gap between their backets and the console, and used some corrugated tubing on the sharp edges of the bracket so the wires were safe. Plug the centre console and lower screen in temporarily and turn the car to ACC, the AV should fire up as normal. Hold the back button for 3 sec and Android should appear on the top screen. You need to set the input to Aux for audio (more on that later). I put the unit under the AC duct in the centre console, with the wifi antenna on top of the AC duct near the shifter, the bluetooth antenna on the AC duct under the centre console The GPS unit on top of the DS to AC duct; they all seem to work OK there are are out of the way. Neat cable routing is a pain. For the drive recorder I mounted it near the rear view mirror and run the cable in the headlining, across the a pillar and then down the inside of the a pillar seal to the DS lower dash. From there it goes across and to one USB input for the unit. The second USB input is attached to the ECUtec OBD dongle and the 3rd goes to the USB bulkhead connected I added in the centre console. This is how the centre console looks "tidied" up Note I didn't install the provided speaker, didn't use the 2.5mm IPod in line or the piggyback loom for the Ipod or change any DIP switches; they seem to only be required if you need to use the Ipod input rather than the AUX input. That's it, install done, I'll follow up with a separate post on how the unit works, but in summary it retains all factory functions and inputs (so I still use my phone to the car for calls), reverse still works like factory etc.
    • Place the new daughterboard in the case and mount it using the 3 small black rivets provided, and reconnect the 3 factory ribbon cables to the new board Then, use the 3 piggyback cables from the daughterboard into the factory board on top (there are stand offs in the case to keep them apart. and remember to reconnect the antenna and rear cover fan wires. 1 screw to hold the motherboard in place. Before closing the case, make a hole in the sticker covering a hole in the case and run the cable for the android unit into the plug there. The video forgot this step, so did I, so will you probably. Then redo the 4 screws on back, 2 each top and bottom, 3 each side and put the 2 brackets back on.....all ready to go and not that tricky really.      
    • Onto the android unit. You need to remove the top screen because there is a daughterboard to put inside the case. Each side vent pops out from clips; start at the bottom and carefully remove upwards (use a trim remover tool to avoid breaking anything). Then the lower screen and controls come out, 4 screws, a couple of clips (including 3 flimsy ones at the top) and 3 plugs on the rear. Then the upper screen, 4 screws and a bunch of plugs and she is out. From there, remove the mounting brackets (2 screws each), 4 screws on the rear, 2 screws top and bottom and 3 screws holding in the small plates on each side. When you remove the back cover (tight fit), watch out for the power cable for the fan, I removed it so I could put the back aside. The mainboard is held in by 1 screw in the middle, 1 aerial at the top and 3 ribbon cables. If you've ever done any laptop stuff the ribbon cables are OK to work with, just pop up the retainer and they slide out. If you are not familiar just grab a 12 year old from an iphone factory, they will know how it works The case should now look like this:
    • Switching the console was tricky. First there were 6 screws to remove, and also the little adapter loom and its screws had to come out. Also don't forget to remove the 2 screws holding the central locking receiver. Then there are 4 clips on either side....these were very tight in this case and needed careful persuading with a long flat screw driver....some force required but not enough to break them...this was probably the fiddliest part of the whole job. In my case I needed both the wiring loom and the central locking receiver module to swap across to the new one. That was it for the console, so "assembly is the reverse of disassembly"
×
×
  • Create New...