Jump to content
SAU Community

Recommended Posts

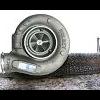
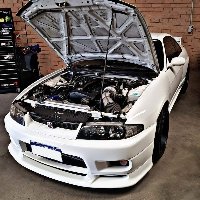
wasnt able to get to the dyno today, so i had Jeff from The Speed Lab put my cefiro remap that was suited to the KKR 430 onto my r32, while not perfect its still better then running the stock map with this turbo.

the ceffy remap was tuned for 16-17 psi, but for safety until i get the car onto the duyno, im running 1 bar.

Im getting full boost at over 4000 rpm but before 4500. from then on it pulls extremally hard,

Comparing to my cefiro, which had 200 rwkw, this feels slightly quicker.

The downside is that offboost and while its trying to build boost down low in the rpm range its bloody slow lol.

u did a big mistake getting a kkr430,they r da laggiest turbos iv seen around lol mate..my mate got 1 on his r32,boost dsnt kik in till bot 4000revsn he regrest it lolll,i got gt28r,which is a jdm t28 s15 turboon my R32and its heapz better,very responsive...getting it dynoed next weekend....anyways gud luck wit da turbo mate

  • Replies 231
  • Created
  • Last Reply

Top Posters In This Topic

BUT... I really am getting tired of driving a car that has a decent motor but crap turbo on it so it very well may see a vg30 max oversize slide turbo thrown on the side. See how things go. :(

I fail to see how you could go wrong.

Itd be a beast Im sure...... and Im positive itd be well worth the money and effort.

u did a big mistake getting a kkr430,they r da laggiest turbos iv seen around lol mate..my mate got 1 on his r32,boost dsnt kik in till bot 4000revsn he regrest it lolll,i got gt28r,which is a jdm t28 s15 turboon my R32and its heapz better,very responsive...getting it dynoed next weekend....anyways gud luck wit da turbo mate

english please...

the KKR 430 is fine.. and if ytou read the above posts you'll see that at 200 rwkw the Slide turbo and the KKR are very similar in performance.. its over 200 rwkw that the Slide turbo starts to really shine. I didnt find the KKR430 very laggy once my car was tunned. Maybe your mate forgot this crutial part when he chucked the turbo on his car.

Tangles, let us know what your results are. Dont be suprised if it feels a bit sluggish at 12psi. it really comes on at about 1 bar.

I would say the efficancy range is between 14 and 18psi.

possibly Aaron can confirm this. Also I am measuring boost pressure 6" from the turbine housing as opposed to the intake manifold.

Aaron if you read this can you confirm where the turbos rated pressure is to be measured at? intake manifold or right after the turbo. and it 18psi right?

Cheers :P

Aggghhh.... Irratic pissed typing :dry:

Edited by CEF11E

if you are really keen hook up a boost gauge at the turbo and at the manifold to find out what sort of efficency your running in your cooler and pipe arrangement.

ive only got a 1 psi drop overall. so my cooler and pipes are doing not too bad!.

Tangles, let us know what your results are. Dont be suprised if it feels a bit sluggish at 12psi. it really comes on at about 1 bar.

I would say the efficancy range is between 14 and 18psi.

possibly Aaron can confirm this. Also I am measuring boost pressure 6" from the turbine housing as opposed to the intake manifold.

Aaron if you read this can you confirm where the turbos rated pressure is to be measured at? intake manifold or right after the turbo. and it 18psi right?

Cheers :dry:

Aggghhh.... Irratic pissed typing :)

The max efficiency and best overall boost pressure to run is 17-18psi.

The most reliable place to read boost from is the compressor housing however it is not accurate boost pressure as there will be pressure drop in the intercooler and pipework.

Having the boost reading just before before the cast alloy bend that goes over the cam covers is the best place to get the boost pressure from.

:P Aaron

interesting to see that you guys are getting decent results with these highflow turbos.

as far as the rom editing is concerned ive tuned a few rb20's via flash chips and they work well...for real time tuning i have a motes ostrich emulator which is a steal at 175$usd for a good robust emulator that is usb driven not the old serial.

coupled with a software that monitors changes to a file and uploads them to the romulator on the fly, using romedit and having a wideband at hand we pulled substantial fuel out of my friends bpu'ed rb20 and it was a night and day diffrence.

on a stock rb20 fuel map the afr's would dive into the 10's, it was amazing the car ignited the mix as my personal car has problems when afrs get that low (but then again i run a MUCH larger turbo and lots more boost).

Nice little emulator there. I am guessing it doesn't have the real time trace though?

I had a good look around that site and I saw the sst 27SF512 chips. I 've been using those for ages. Great to not have to use the UV earasor anymore.

You have to be really careful using those chips. The ECU is capable of delivering voltage spike that is enough to flash certain parts of the map. This happened and I couldn't find the problem till I looked at the .rom and it was FF in parts of the VQ table and the fuelmap :0

Are you using 2 tunes on the one chip and a pull up resistor to switch? I am running this setup with a mechanic/wife/valet tune that only revs to 4000rpm. At the flick of a switch it becomes a 93rwkw shopping kart :huh:

You have to be really careful using those chips. The ECU is capable of delivering voltage spike that is enough to flash certain parts of the map. This happened and I couldn't find the problem till I looked at the .rom and it was FF in parts of the VQ table and the fuelmap :0

Are you using 2 tunes on the one chip and a pull up resistor to switch? I am running this setup with a mechanic/wife/valet tune that only revs to 4000rpm. At the flick of a switch it becomes a 93rwkw shopping kart :)

Nah. If the 27fm256 chips were still being made I would have used them instead. My mates old R31 had the switch setup though and yeah he used it for the eact same thing you do.

I didn't realise how many people tune the stock ecu's these days. Its good to see.

Maybe we should all start a new thread for just eccs chip tuning? :)

That is a really good idea :) and put all the information in one place. I think there are about 20 users that tune stock ecu's

Really keen for this! perhaps we could even get a mini section on SAU to hold all the info and some .bin files?

i'm keen on that as well.... i don't think i can justify forking out $1500 for an AP Engineering PFC, when the stock computer will do the same thing when socketed/chipped/tuned

(Mine has been chipped and tuned by DrDrift in the past, so would be interested to look into getting the equipment to do it, and how easy it is to do... not so much for myself, but if i rocked up at a tuner's workshop with the equipment and said "can you tune this" if they'd be able to do it?)

Yeah I'm the same mate.Not that the PFC is a bad ro anything but to me PFC route for the R32 is going to the dark side. :)

The stock ecu is a very good peice of gear if you know how to use it.

I have a few bins..

Also have an R32 RB25de one. :)

The PFC is just so easy to tune on road via its knock readout. I paid 1k for mine with h/c so not so bad. :)

The PFC is nothing more than an rb25 powerfc pro with a different flashed chip. Being an rb25 ecu you can see the mods they have done to make it suitable for the r32's wiring loom.

However.. I have been thinking about fiddling with a stock ecu.

OK. I will start thread tonight and we can all go from there?

I would love to talk to a few of you guys and see if I can fill in a few gaps that I am unsure on yet and of course visa-versa.

Cubes I did read that thread you had on the PFC for the Rb20, very interesting and its a worry that the minor changes they made are worth so much more than a normal unit.

The RB30 would work very well with the stock ecu I would think so yeah have a fiddle.

Edited by RedDrifter

Top stuff. I will be subscribing. :)

Yes the stock ecu will work well with the 3ltr.

Airflow is airflow.. The Rb30 does nothing more than shift a greater amount of airflow to a lower rpm.

not much from me, im trying to track down some injectors before i wind up the boost for more power.

I just wired a power feed + relay from the battery to the fuel pump also as reccommended by a few people as i was having lean out issues at high rpm on 205 rwkw on stock injectors, the injectors should be good for another 10-15 rwkw so not sure why the lean out there. Thought the walbro might be taxing a bit much power from the stock fuel pump wiring.

Plan is injectors, boost controller of somesort, Z32 afm and dyno, want around 230 rwkw.

Create an account or sign in to comment

You need to be a member in order to leave a comment

Create an account

Sign up for a new account in our community. It's easy!

Register a new account

Sign in

Already have an account? Sign in here.

Sign In Now


  • Similar Content

  • Latest Posts

    • From there, it is really just test and assemble. Plug the adapter cables from the unit into the back of the screen, then the other side to the car harness. Don't forget all the other plugs too! Run the cables behind the unit and screw it back into place (4 screws) and you should now have 3 cables to run from the top screen to the android unit. I ran them along the DS of the other AV units in the gap between their backets and the console, and used some corrugated tubing on the sharp edges of the bracket so the wires were safe. Plug the centre console and lower screen in temporarily and turn the car to ACC, the AV should fire up as normal. Hold the back button for 3 sec and Android should appear on the top screen. You need to set the input to Aux for audio (more on that later). I put the unit under the AC duct in the centre console, with the wifi antenna on top of the AC duct near the shifter, the bluetooth antenna on the AC duct under the centre console The GPS unit on top of the DS to AC duct; they all seem to work OK there are are out of the way. Neat cable routing is a pain. For the drive recorder I mounted it near the rear view mirror and run the cable in the headlining, across the a pillar and then down the inside of the a pillar seal to the DS lower dash. From there it goes across and to one USB input for the unit. The second USB input is attached to the ECUtec OBD dongle and the 3rd goes to the USB bulkhead connected I added in the centre console. This is how the centre console looks "tidied" up Note I didn't install the provided speaker, didn't use the 2.5mm IPod in line or the piggyback loom for the Ipod or change any DIP switches; they seem to only be required if you need to use the Ipod input rather than the AUX input. That's it, install done, I'll follow up with a separate post on how the unit works, but in summary it retains all factory functions and inputs (so I still use my phone to the car for calls), reverse still works like factory etc.
    • Place the new daughterboard in the case and mount it using the 3 small black rivets provided, and reconnect the 3 factory ribbon cables to the new board Then, use the 3 piggyback cables from the daughterboard into the factory board on top (there are stand offs in the case to keep them apart. and remember to reconnect the antenna and rear cover fan wires. 1 screw to hold the motherboard in place. Before closing the case, make a hole in the sticker covering a hole in the case and run the cable for the android unit into the plug there. The video forgot this step, so did I, so will you probably. Then redo the 4 screws on back, 2 each top and bottom, 3 each side and put the 2 brackets back on.....all ready to go and not that tricky really.      
    • Onto the android unit. You need to remove the top screen because there is a daughterboard to put inside the case. Each side vent pops out from clips; start at the bottom and carefully remove upwards (use a trim remover tool to avoid breaking anything). Then the lower screen and controls come out, 4 screws, a couple of clips (including 3 flimsy ones at the top) and 3 plugs on the rear. Then the upper screen, 4 screws and a bunch of plugs and she is out. From there, remove the mounting brackets (2 screws each), 4 screws on the rear, 2 screws top and bottom and 3 screws holding in the small plates on each side. When you remove the back cover (tight fit), watch out for the power cable for the fan, I removed it so I could put the back aside. The mainboard is held in by 1 screw in the middle, 1 aerial at the top and 3 ribbon cables. If you've ever done any laptop stuff the ribbon cables are OK to work with, just pop up the retainer and they slide out. If you are not familiar just grab a 12 year old from an iphone factory, they will know how it works The case should now look like this:
    • Switching the console was tricky. First there were 6 screws to remove, and also the little adapter loom and its screws had to come out. Also don't forget to remove the 2 screws holding the central locking receiver. Then there are 4 clips on either side....these were very tight in this case and needed careful persuading with a long flat screw driver....some force required but not enough to break them...this was probably the fiddliest part of the whole job. In my case I needed both the wiring loom and the central locking receiver module to swap across to the new one. That was it for the console, so "assembly is the reverse of disassembly"
    • But first....while I was there, I also swapped across the centre console box for the other style where the AV inputs don't intrude into the (very limited !) space.  Part# was 96926-4GA0A, 284H3-4GA0B, 284H3-4GA0A. (I've already swapped the top 12v socket for a USB bulkhead in this pic, it fit the hole without modification:) Comparison of the 2: Basically to do the console you need to remove the DS and PS side console trim (they slide up and back, held in by clips only) Then remove the back half of the console top trim with the cupholders, pops up, all clips again but be careful at the front as it is pretty flimsy. Then slide the shifter boot down, remove the spring clip, loose it forever somewhere in the car the pull the shift knob off. Remove the tiny plastic piece on DS near "P" and use something thin and long (most screwdrivers won't fit) to push down the interlock and put the shifter down in D for space. There is one screw at the front, then the shifter surround and ashtray lift up. There are 3 or 4 plugs underneath and it is off. Next is the rear cover of the centre console; you need to open the console lid, pop off the trim covering the lid hinge and undo the 2rd screw from the driver's side (the rest all need to come out later so you can do them all now and remove the lid) Then the rear cover unclips (6 clips), start at the top with a trim tool pulling backwards. Once it is off there are 2 screws facing rearwards to remove (need a short phillips for these) and you are done with the rear of the console. There are 4 plugs at the A/V box to unclip Then there are 2 screws at the front of the console, and 2 clips (pull up and back) and the console will come out.
×
×
  • Create New...