Jump to content
SAU Community

Recommended Posts

  • Replies 701
  • Created
  • Last Reply

Top Posters In This Topic

Top Posters In This Topic

Posted Images

Anyone got pics of the slow white r33 gts series 2? (lol i know there was like 4 of them on the day) but the one with Black rims and white hks sticker across the windscreen?

Man you where not that slow I reckon you over took Stephen in the R32 GTST and also SAM in the White R33 GTST and I would of been the guy spining at every turn in the Grey R32 GTR

But sorry No pics of the day

SLIM should have some

HAhah i wish Andrew.. Stephen hand timed me.. and i was going SLOWER then i usually am and slower then STEPHEN as well.. think i should stick to the drag strip, me think i'm getting too pussy for corners.

Everytime i go back to wakefield i get slower and slower <sigh>

As long as fun was had by all that is all that matters

Exactly,

And you have to remember for at least the first half of the day the track was damp aswell, so if your going as fast as you have before and not faster you have still improved.. I know I for one was having major traction issues, I think the rear wheels were spinning out of almost every corner all day long (until I was forced to retire anyway)!

Well I'm finally home.

Thanks for the thanks everyone. I couldn't have done it without all my helpers though. Kel, Duncan, Neil, Steve, Anna, Corinne, (this space left blank for the person I will have inevitably forgotten).

Cheers also to Greg for the loan of the jack and Snap-On penis polisher. Thanks Shaun for giving my mate a lift home. Thanks Andrew(?) for helping me bleed my brakes for the second time and the japanese translation service. ;)

I had brake problems most of the day which culminated in a rotor cracked to the hub. Also found out what happens if you run semi slicks for 3 more track days than advised by pretty much everyone. Bits come off them and it's kind of like driving on butter. Even so, I'm told I was timed doing 1:11's several times so that's a pb for me. I was short shifting all day as well so with a bit more practice driving a manual around the track of those speeds and I should get where I want.

I still have a few track day shirts left over if anyone missed out.

Very funny and scary for us organisers how many people spun out in the first sessions but thankfully no problems created there.

3 of my 4 tyres are holding up. the other one.... not soo good...

That's what an open wheeling diff will do to you. I wrecked a semi slick at Eastern Creek the same way.

I'm a bit worried about the contents of that video Anna. Brad, very sorry for the megaphone at midnight routine. The others made me do it. :dry:

My only problem with the cold temps was that by the time my tyres were up to temp my brakes were overheating, (dam standard brakes!)

Those tyres are a very soft compound Raul so your brakes must have been really bad. What pads are you using?

What happened to you Adam towards the end not much track time?

Delaminated tyres and cracked rotor. Glad you enjoyed.

My car had no intercooler pipe problems on the track but on the way down I blew one off. I was lying on the ground seeing what the problem was when I see some guy walking across the highway towards me. Turned out to be 2rismo who just happened to be driving the other way and his help was greatly appreciated in getting the car back together. It's quite a big bang and a little scary first time it happens to you. I remember Anthony's face when we got up to him after his did it. Without words it said something like "holy crap I just killed my R34 GTR". haha. But we were all pretty sure what had happened.

Awesome day, thanx to all the organisers ! Special one to the Wakie guy that told us to Shut Up and scared the f$%k out of us noobies before the start !

Yeah apparently he was in a good mood that day too. :w00t::P

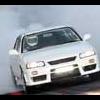
grey GTR

The Grey GTR is actually mine =)

Check out Greg's face in that pic. hahah.

Finally, thanks to all the participants. I'm glad you had a good time. I think we are on to a winner with regards to format. It was a fun and relaxing day. Heaps of laps available to all. I am personally happy with hand timed laps as we're not in it for sheep stations. With official lap timing comes more regulations and no passengers. All of you who took out an experienced driver now know the benefits of instruction. All in all, a good social SAU event and to my mind a total winner!

shaun - did a pair of jumper leads finally disappear or do we need to take a trailer back down there next weekend?

the site maintenence dude had a battery booster pack

everyone else- your help was unvaluable :D


  • Similar Content

  • Latest Posts

    • Did this end up working? Did you take some pictures?
    • And finally, the front lower mount. It was doubly weird. Firstly, the lower mount is held in with a bracket that has 3 bolts (it also acts as the steering lock stop), and then a nut on the shock lower mount itself. So, remove the 3x 14mm head bolts , then the 17mm nut that holds the shock in. From there, you can't actually remove the shock from the lower mount bolt (took me a while to work that out....) Sadly I don't have a pic of the other side, but the swaybar mounts to the same bolt that holds the shock in. You need to push that swaybar mount/bolt back so the shock can be pulled out past the lower control arm.  In this pic you can see the bolt partly pushed back, but it had to go further than that to release the shock. Once the shock is out, putting the new one in is "reverse of disassembly". Put the top of the shock through at least one hole and put a nut on loosely to hold it in place. Put the lower end in place and push the swaybar mount / shock bolt back in place, then loosely attach the other 2 top nuts. Bolt the bracket back in place with the 14mm head bolts and finally put the nut onto the lower bolt. Done....you have new suspension on your v37!
    • And now to the front.  No pics of the 3 nuts holding the front struts on, they are easy to spot. Undo 2 and leave the closest one on loosely. Underneath we have to deal with the wiring again, but this time its worse because the plug is behind the guard liner. You'll have to decide how much of the guard liner to remove, I undid the lower liner's top, inside and lower clips, but didn't pull it full off the guard. Same issue undoing the plug as at the rear, you need to firmly push the release clip from below while equally firmly gripping the plug body and pulling it out of  the socket. I used my fancy electrical disconnect pliers to get in there There is also one clip for the wiring, unlike at the rear I could not get behind it so just had to lever it up and out.....not in great condition to re-use in future.
    • Onto the rear lower shock mount. It's worth starting with a decent degrease to remove 10+ years of road grime, and perhaps also spray a penetrating oil on the shock lower nut. Don't forget to include the shock wiring and plug in the clean.... Deal with the wiring first; you need to release 2 clips where the wiring goes into the bracket (use long nose pliers behind the bracket to compress the clip so you can reuse it), and the rubber mount slides out, then release the plug.  I found it very hard to unplug, from underneath you can compress the tab with a screwdriver or similar, and gently but firmly pull the plug out of the socket (regular pliers may help but don't put too much pressure on the plastic. The lower mount is straightforward, 17mm nut and you can pull the shock out. As I wasn't putting a standard shock back in, I gave the car side wiring socket a generous gob of dialectric grease to keep crap out in the future. Putting the new shock in is straightforward, feed it into at least 1 of the bolt holes at the top and reach around to put a nut on it to hold it up. Then put on the other 2 top nuts loosely and put the shock onto the lower mounting bolt (you may need to lift the hub a little if the new shock is shorter). Tighten the lower nut and 3 upper nuts and you are done. In my case the BC Racing shocks came assembled for the fronts, but the rears needed to re-use the factory strut tops. For that you need spring compressors to take the pressure off the top nut (they are compressed enough when the spring can move between the top and bottom spring seats. Then a 17mm ring spanner to undo the nut while using an 8mm open spanner to stop the shaft turning (or, if you are really lucky you might get it off with a rattle gun).
    • You will now be able to lift the parcel shelf trim enough to get to the shock cover bolts; if you need to full remove the parcel shelf trim for some reason you also remove the escutcheons around the rear seat release and you will have to unplug the high stop light wiring from the boot. Next up is removal of the bracket; 6 nuts and a bolt Good news, you've finally got to the strut top! Remove the dust cover and the 3 shock mount nuts (perhaps leave 1 on lightly for now....) Same on the other side, but easier now you've done it all before
×
×
  • Create New...