Jump to content
SAU Community

Recommended Posts

Err I am talking about intercoolers what did you think i mean.

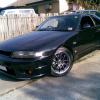
Well i am thinking of going to a FMIC but i dont really want a huge massive thing. I am hoping to get a thin type of cooler prob round 50mm thick if i can find it. ie something like 600x300x50. The reason being is that i dont really want to hack at my front bumper to get one in as its a fairly unique bumper i think. Well i havent seen any other skylines around with the same type plus its a factory option plastic type.

I had a look in there and i recon a thiner type might be the go. It would how ever have to be on a slight lean forward (top leaning towards fron of car) to fit nicely.

So well prob getting bit off track but i dont feel that i need the normal 76mm thick types cos i dont intend on going nuts with the power. only few things in mind such as safc, dump, k&n air filter, boost controller (prob 10psi max).

I already got cat back 3" and modded ecu.

Link to comment
https://www.sau.com.au/forums/topic/165713-is-bigger-reallly-better/
Share on other sites

bigger is deffinately not better. The perfect intercooler is matched to the car considering the size of the turbo and the power the car is making. A big intercooler will only cause lag... Its similiar to having a 800hp turbo on a car making 300rwhp. All you have achieved is unneccessay lag and undrivability. Similiar to that effect with intercoolers. There is no point in having a intercooler designed to flow and cool for a 1000hp engine when you are only going to run 200rwkw. It will just creates lag.

I put went back to my arc sidemount after driving my car with a just jap cooler because i was unhappy with the difference in responce. It was to big for my application.

Interesting.... I went from a r34 smic to just jap fmic and my response improved 10 fold (exaggeration). Weird.

Interesting.... I went from a r34 smic to just jap fmic and my response improved 10 fold (exaggeration). Weird.

Not having a go but that isnt really possible i feel that the improvement you were thinking you felt was in your head. Unless ofcourse the intercooler was a retriction to the power you were making.

Look at it like this, with the sidemount the volume that has to be filled before making boost is very small. The standard return pipes and the intercooler itself. Then compare that to all the piping and the 600x300 intercooler that needs to be filled before you will achieve boost after installing a front mount intercooler. Low down response will deffinately suffer as a result. It may not be a huge decrease in response but there will deffinately be a decrease.

Either way, I'm happy the way it turned out. For me it was a change for the better.

you're probably actually better with a smaller surface area, yet fatter..

I've got a 450x300x75 on mine, one of the reasons is I just didn't feel the need for a massive one unless I was chasing 300rwkw+ and I wanted as much response as possible .. does the trick fine

it would make his car run better if the smic was to small causing it to not work efficiently, then going fmic it was actualy doing the job, hence it improved.

Which is why i said unless the sidemount was a restriction. For this to be the case seeming he was using a r34 sidemount he would have had to be in the facinity of 200+rwkw. But before this intercooler would become a restriction you would be experiencing detonation and heatsoak once you tried to push it past its capabilities. So i think it would be unlikely that it was causing an issue regarding response on his car.

Just cut your front bar.

You won't care after 2 weeks of having the cooler in.

Just make sure you shape the cut well to fit the cooler.

I cut my front plastic bar with a hacksaw blade removed.

Chalked the approx line i wanted and cut roughly, then smoothed the edges with a half moon file.

Came out sweet ! Look in my signature

Yeah i might trim a bit but this bumer i have is meant to be a series 3 bumper that was a factory option. Looks similar to 400r bumper but i think it looks nicer. Might try find a pic of it and post it up. If i shave the aircon fan it should be no dramas getting a 50mm or so thick cooler in. I am also going to get a cooler type that has the outlets on the same side as i want to hook it back into the factory piping and save hasstles of cutting holes in metal work and getting owned my popo.

I was under the impression that a thicker cooler was not alway better since the time the air reaches the back of the cooler its significantly warmer and leaving little cooling capacity for the radiator and aircon radiator.

Since i am not after rediculas power increases i think i will just go with what fits nicely with minimal fuss.

Thanks for the input.

Create an account or sign in to comment

You need to be a member in order to leave a comment

Create an account

Sign up for a new account in our community. It's easy!

Register a new account

Sign in

Already have an account? Sign in here.

Sign In Now


  • Similar Content

  • Latest Posts

    • Hi, is the HKS  Tower Bar still available ? negotiable ? 🤔
    • From there, it is really just test and assemble. Plug the adapter cables from the unit into the back of the screen, then the other side to the car harness. Don't forget all the other plugs too! Run the cables behind the unit and screw it back into place (4 screws) and you should now have 3 cables to run from the top screen to the android unit. I ran them along the DS of the other AV units in the gap between their backets and the console, and used some corrugated tubing on the sharp edges of the bracket so the wires were safe. Plug the centre console and lower screen in temporarily and turn the car to ACC, the AV should fire up as normal. Hold the back button for 3 sec and Android should appear on the top screen. You need to set the input to Aux for audio (more on that later). I put the unit under the AC duct in the centre console, with the wifi antenna on top of the AC duct near the shifter, the bluetooth antenna on the AC duct under the centre console The GPS unit on top of the DS to AC duct; they all seem to work OK there are are out of the way. Neat cable routing is a pain. For the drive recorder I mounted it near the rear view mirror and run the cable in the headlining, across the a pillar and then down the inside of the a pillar seal to the DS lower dash. From there it goes across and to one USB input for the unit. The second USB input is attached to the ECUtec OBD dongle and the 3rd goes to the USB bulkhead connected I added in the centre console. This is how the centre console looks "tidied" up Note I didn't install the provided speaker, didn't use the 2.5mm IPod in line or the piggyback loom for the Ipod or change any DIP switches; they seem to only be required if you need to use the Ipod input rather than the AUX input. That's it, install done, I'll follow up with a separate post on how the unit works, but in summary it retains all factory functions and inputs (so I still use my phone to the car for calls), reverse still works like factory etc.
    • Place the new daughterboard in the case and mount it using the 3 small black rivets provided, and reconnect the 3 factory ribbon cables to the new board Then, use the 3 piggyback cables from the daughterboard into the factory board on top (there are stand offs in the case to keep them apart. and remember to reconnect the antenna and rear cover fan wires. 1 screw to hold the motherboard in place. Before closing the case, make a hole in the sticker covering a hole in the case and run the cable for the android unit into the plug there. The video forgot this step, so did I, so will you probably. Then redo the 4 screws on back, 2 each top and bottom, 3 each side and put the 2 brackets back on.....all ready to go and not that tricky really.      
    • Onto the android unit. You need to remove the top screen because there is a daughterboard to put inside the case. Each side vent pops out from clips; start at the bottom and carefully remove upwards (use a trim remover tool to avoid breaking anything). Then the lower screen and controls come out, 4 screws, a couple of clips (including 3 flimsy ones at the top) and 3 plugs on the rear. Then the upper screen, 4 screws and a bunch of plugs and she is out. From there, remove the mounting brackets (2 screws each), 4 screws on the rear, 2 screws top and bottom and 3 screws holding in the small plates on each side. When you remove the back cover (tight fit), watch out for the power cable for the fan, I removed it so I could put the back aside. The mainboard is held in by 1 screw in the middle, 1 aerial at the top and 3 ribbon cables. If you've ever done any laptop stuff the ribbon cables are OK to work with, just pop up the retainer and they slide out. If you are not familiar just grab a 12 year old from an iphone factory, they will know how it works The case should now look like this:
    • Switching the console was tricky. First there were 6 screws to remove, and also the little adapter loom and its screws had to come out. Also don't forget to remove the 2 screws holding the central locking receiver. Then there are 4 clips on either side....these were very tight in this case and needed careful persuading with a long flat screw driver....some force required but not enough to break them...this was probably the fiddliest part of the whole job. In my case I needed both the wiring loom and the central locking receiver module to swap across to the new one. That was it for the console, so "assembly is the reverse of disassembly"
×
×
  • Create New...