Jump to content
SAU Community

Recommended Posts

Well for those who wanted to know how the K5-660R with a dual exit 47mm blitz gate stacks up.... here you go. I am pretty happy with the results and it would be interesting to see how it directly compares to the T04Z with the equivalent 0.81 housing instead of the 0.61 it now has...

Remmeber we use it for drift so we are looking at low and mid range...top end is nearly useless to us so i choose two housings, the #7 (10cm ish) and a #9 (12cm ish)

This graph is running the smallest rear housing the #7... and 16psi, we will try the bigger housing after tassie just to run a back to back comparo on response differrences vs top end gain.. We are happy with the #7 housings response and peak power considering how low the boost is. I reckon with some cam timing adjustment it can be further improved on... atm engine is 100% stock internally apart from a 1.2mm head gasket which was already fitted when i bought the front cut.....

Peak torque @ 4200rpm

peak power @ 7000rpm

all run at 16psi.

post-34927-1203850074_thumb.jpg

post-34927-1203850160_thumb.jpg

post-34927-1203850669_thumb.jpg

Not bad, nice work!

Scuze for stupid question, but is the RPM scale accurate?

Stopped rev'ing before 8, is that done for preservation??

yeah the engine is a "kinder suprise" and has done well over 150k (NISMO dash in front cut so probaly closer to 250k) and a full DA season :( the limiter is set at 8000 but power increased only minimally from 7500-8000 so its tuned up to 8000rpm.. subsequently pulled the runs short to around 7200-7600 this run just happens to finish a bit earlier hence the pronounced drop off after 7000.

RPM scale is 100% accurate.

mmmm wheelspin on the dyno in the midrange sounds like fun times on the track then :( q

we did a circuit practice friday arvo at winton.... thing seems ok.. wednesday at calder will be the real test.

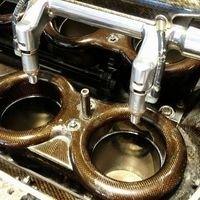
Any pictures of the wastegate off the car? Cool to see a different turbo being tried

just this one.

i will interesting to see it with the bigger housings, to compare with other twin setups. At the moment the thing is hardy working at 16psi either.

post-34927-1203855580_thumb.jpg

Cheers Trent, as a 26 single owner, ill be keeping an eye on your Nazi built single setup.

Makes the monkey on my shoulder sigh with some relief, knowing the K's Kats motor has done... hard K's too I would imagine :(

Scuze my ignorance, but what numbers was the setup doing with the Trust 517 (?) twins before?

Edited by GeeTR
Well for those who wanted to know how the K5-660R with a dual exit 47mm blitz gate stacks up.... here you go. I am pretty happy with the results and it would be interesting to see how it directly compares to the T04Z with the equivalent 0.81 housing instead of the 0.61 it now has...

Remmeber we use it for drift so we are looking at low and mid range...top end is nearly useless to us so i choose two housings, the #7 (10cm ish) and a #9 (12cm ish)

This graph is running the smallest rear housing the #7... and 16psi, we will try the bigger housing after tassie just to run a back to back comparo on response differrences vs top end gain.. We are happy with the #7 housings response and peak power considering how low the boost is. I reckon with some cam timing adjustment it can be further improved on... atm engine is 100% stock internally apart from a 1.2mm head gasket which was already fitted when i bought the front cut.....

Peak torque @ 4200rpm

peak power @ 7000rpm

all run at 16psi.

t04z @ 16.5psi 515rwhp

k5-660r @ 16 psi 415rwhp

blitz has a little bit more better response than t04z but 100rwhp is a lot more power, i think a 35r would be a better comparison

im with simon the comparison would be more along the lines of a gt3582r, my best mates rb26 made 440rwhp@ 18psi with an identical power and tractive effort curve to that last week (metal gasket,tomei pistons,head ported but std cams/no adg gears)

nice work Trent :)

t04z @ 16.5psi 515rwhp

k5-660r @ 16 psi 415rwhp

blitz has a little bit more better response than t04z but 100rwhp is a lot more power, i think a 35r would be a better comparison

Yeah but that is with a .82 on the to4z, the K5 is currentley running .6ish housing... with the .85 i have seen 560rwhp (418rwkw) quite easily with the #11 housing (using #7 atm) @ 1.3bar, i havent played with the big number 13 housing though, it it is very comparable.

im with simon the comparison would be more along the lines of a gt3582r, my best mates rb26 made 440rwhp@ 18psi with an identical power and tractive effort curve to that last week (metal gasket,tomei pistons,head ported but std cams/no adg gears)

nice work Trent :)

yeah ive used them alot, they are quite a bit smaller (61.3mm vs 65.5mm wheels) and not as responsive as the K5... similar top end per psi though (0.82), but the blitz is running a way smaller housing (0.6ish) to match the GT3582r's power which is quite impressive.... hence my intrigue to fit the big housing on the 'built engine' if this one ever expires :)

  • 1 month later...
ive made 585rwhp on 18psi with t04z 0.81 on a very very low reading dyno before (that dyno reads 45hp lower than brand new dyno dynamic dynos around here), motor isnt stock though so hard to compare back to back

Yeah but that is with a .82 on the to4z, the K5 is currentley running .6ish housing... with the .85 i have seen 560rwhp.

i under stand it is smaller and wont match it for out and out i just want to compare area under the graph... if it comes close to the top end but has more mid and low i know what to use on my next few builds instead of the To4Z...

just put the new built engine in too;

only a simple build..

ARP heads, mains, cam caps

H-Beam rods

GREDDY pistons (had JE but wasnt happy with crown design so used them in the spare eng :down: )

1.2mm GREDDY Head gasket

GIZZMO phenolic isolator intake gasket

King bearings

Greddy Oil pump

Tomei sump Baffle

1mm srew in Oil restrictor

-10 Head to Sump drain.

New valves, Buckets etc

GREDDY valve springs

New profile greddy procams only babies 264 IN / EX with small 9.7mm lift

Cam Gears

my new dynapack arrives next week so cant wait to wind her up a bit :P will do back t back with the 3 housings i have here :D

Create an account or sign in to comment

You need to be a member in order to leave a comment

Create an account

Sign up for a new account in our community. It's easy!

Register a new account

Sign in

Already have an account? Sign in here.

Sign In Now


  • Similar Content

  • Latest Posts

    • Hi, is the HKS  Tower Bar still available ? negotiable ? 🤔
    • From there, it is really just test and assemble. Plug the adapter cables from the unit into the back of the screen, then the other side to the car harness. Don't forget all the other plugs too! Run the cables behind the unit and screw it back into place (4 screws) and you should now have 3 cables to run from the top screen to the android unit. I ran them along the DS of the other AV units in the gap between their backets and the console, and used some corrugated tubing on the sharp edges of the bracket so the wires were safe. Plug the centre console and lower screen in temporarily and turn the car to ACC, the AV should fire up as normal. Hold the back button for 3 sec and Android should appear on the top screen. You need to set the input to Aux for audio (more on that later). I put the unit under the AC duct in the centre console, with the wifi antenna on top of the AC duct near the shifter, the bluetooth antenna on the AC duct under the centre console The GPS unit on top of the DS to AC duct; they all seem to work OK there are are out of the way. Neat cable routing is a pain. For the drive recorder I mounted it near the rear view mirror and run the cable in the headlining, across the a pillar and then down the inside of the a pillar seal to the DS lower dash. From there it goes across and to one USB input for the unit. The second USB input is attached to the ECUtec OBD dongle and the 3rd goes to the USB bulkhead connected I added in the centre console. This is how the centre console looks "tidied" up Note I didn't install the provided speaker, didn't use the 2.5mm IPod in line or the piggyback loom for the Ipod or change any DIP switches; they seem to only be required if you need to use the Ipod input rather than the AUX input. That's it, install done, I'll follow up with a separate post on how the unit works, but in summary it retains all factory functions and inputs (so I still use my phone to the car for calls), reverse still works like factory etc.
    • Place the new daughterboard in the case and mount it using the 3 small black rivets provided, and reconnect the 3 factory ribbon cables to the new board Then, use the 3 piggyback cables from the daughterboard into the factory board on top (there are stand offs in the case to keep them apart. and remember to reconnect the antenna and rear cover fan wires. 1 screw to hold the motherboard in place. Before closing the case, make a hole in the sticker covering a hole in the case and run the cable for the android unit into the plug there. The video forgot this step, so did I, so will you probably. Then redo the 4 screws on back, 2 each top and bottom, 3 each side and put the 2 brackets back on.....all ready to go and not that tricky really.      
    • Onto the android unit. You need to remove the top screen because there is a daughterboard to put inside the case. Each side vent pops out from clips; start at the bottom and carefully remove upwards (use a trim remover tool to avoid breaking anything). Then the lower screen and controls come out, 4 screws, a couple of clips (including 3 flimsy ones at the top) and 3 plugs on the rear. Then the upper screen, 4 screws and a bunch of plugs and she is out. From there, remove the mounting brackets (2 screws each), 4 screws on the rear, 2 screws top and bottom and 3 screws holding in the small plates on each side. When you remove the back cover (tight fit), watch out for the power cable for the fan, I removed it so I could put the back aside. The mainboard is held in by 1 screw in the middle, 1 aerial at the top and 3 ribbon cables. If you've ever done any laptop stuff the ribbon cables are OK to work with, just pop up the retainer and they slide out. If you are not familiar just grab a 12 year old from an iphone factory, they will know how it works The case should now look like this:
    • Switching the console was tricky. First there were 6 screws to remove, and also the little adapter loom and its screws had to come out. Also don't forget to remove the 2 screws holding the central locking receiver. Then there are 4 clips on either side....these were very tight in this case and needed careful persuading with a long flat screw driver....some force required but not enough to break them...this was probably the fiddliest part of the whole job. In my case I needed both the wiring loom and the central locking receiver module to swap across to the new one. That was it for the console, so "assembly is the reverse of disassembly"
×
×
  • Create New...