Jump to content
SAU Community

Recommended Posts

I allready have posted this in Anthony's post but it will be better if new thread will be posted here, Let me post here few word what the problem i had before, got R33 two years ago it was absolutly stock, i made next modification on it

FMIC INTERCOOLER 600X300X100

GREDDY STYLE front mount plenum

KKR 480 boost at 16 PSI

AFR stock

Fuel Pump Stock

INJECTORs Stock

KAKIMOTO RACING HIGHT FLOW EXHAUST

EXEDY CLUTCH

APEXI FC

so as we dont have Dyno here in Georgia we haveto find other ways i have bought GTECH RR cant say its shows exaclty HP but its quit near results and main is that 402 meter shows exactly best run was 12.303 and max HP 335 at rears, but main is that i have lots of detonation i have tryed to contact in Russia and even was in the sphincter of the universe hope to find person who could help to tune FC because have lots of knocking it was near 90 at one runup, so somehow guilt toy advise to try it ower the net :worship: after two weeks waiting i got FC DATALOGIT, conection was via 3G cellphone ower the internet, it was not fast but acceptable, so yesterday was first Georgian FC tuning day :D i will post some pictures have lots of videos and will try upload them to youtube

post-34904-1217164012_thumb.jpg

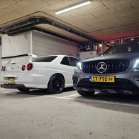
so this is my R33 and my friend RX7 he was sitting near me and chatting with anthony:)

post-34904-1217164098_thumb.jpg

this is how all this looks like :D connection fc to leptop and then to cell phone over the internet :)

post-34904-1217164172_thumb.jpg

post-34904-1217164261_thumb.jpg

firs problem appeared with sparks anthony suggest to make them 0.7 it was hard to do this because of hot day it was 42c \, secon problem was with intake :) boost was too hight and turbo was sucking the tube after afm and clothing it at all:)

finaly we have finished to tune it but it was backfire when accelerating and anthiny suggest to change spark plugs and gap at 0.6, now car drives perfect cant say power is same but there is absolutly no detonation engine light fleshing or knocking so antony made all in perfect way and thanks again !

now you can try the same if any of you have same problem :))) you just need datalogit laptop and 3G cellphone

HAPPY END :)

post-34904-1217164644_thumb.jpg

Edited by guricha
Link to comment
https://www.sau.com.au/forums/topic/229894-tuning-fc-over-the-sea/
Share on other sites

  • Replies 50
  • Created
  • Last Reply

Top Posters In This Topic

i took some screen shots while tuning this car, the car has stock pump and inj so i had to make do with what we had

had to run injectors at 100% and turn off afm warning and inj warning because we knew they were maxed out.

Really need a new fuel pump and reg and injectors to make more power mate, but it will go much better. a new afm would be good too.

Connection was OK, bit slow but i have other ways to connect for next time which will be much faster

Here are pics (no comments about the tune please, yes i know its not perfect and when im in the car tuning or on the dyno the tune is heaps cleaner)

post-1240-1217200094_thumb.jpgpost-1240-1217200167_thumb.jpg

post-1240-1217200231_thumb.jpgpost-1240-1217200266_thumb.jpg

post-1240-1217200328_thumb.jpgpost-1240-1217200367_thumb.jpg

post-1240-1217200406_thumb.jpg

good to see such results as i am about to aquire a kkr80 turbo with the same modifications you have there, i havnt fitted the turbo before is it hard on a r33 gtst? also will be fitting the greddy style plenum. h

Gary

guricha just got the datalogit brand new last week so i would think it would be the latest version. I still have my datalogit in my car.

I asked him to buy everything needed to tune it thinking he wouldnt go for it but he did lol

Looking at the pics the version is 5.01

whys that?

good to see such results as i am about to aquire a kkr80 turbo with the same modifications you have there, i havnt fitted the turbo before is it hard on a r33 gtst? also will be fitting the greddy style plenum. h

ITS really easy to install it and works quit well compare with price, am runing on more than year, finaly get tuned:) greddy style plenum is not easy to install you should check manual it was somwhere here you should close lots of pipes and need some modification

Anthony i was driving today morning at cold map at seems like power is back i have to check:) could it be the after few days driving it comes better?

This is quite amazing to be honest, very well done Anthony :wave:

Hope you're happy with it Guricha, Anthony is one of the most understated tuners I know. I don't know how he does what he does, but he does it well :/

Have you replaced that intake pipe yet? the intake pipe is probly cold and its not sucking in! you will be suprised how much they suck in when comming onto boost.

Also today was probly not 42deg like it was when we were tuning, so it will feel like its got more power when its colder, when winter comes i will send you a map with more ignition advance so you get even more power again.

There is a thread on here how to do a mod on the intake pipe to stop it from sucking shut, i think 2rismo made it or rev.. i cant remember. il try find it.

Hows your fuel economy going ?

***edit***

found the thread from Rev210

http://www.skylinesaustralia.com/forums/Re...l&hl=intake

ITS really easy to install it and works quit well compare with price, am runing on more than year, finaly get tuned:) greddy style plenum is not easy to install you should check manual it was somwhere here you should close lots of pipes and need some modification

Anthony i was driving today morning at cold map at seems like power is back i have to check:) could it be the after few days driving it comes better?

Have you replaced that intake pipe yet? the intake pipe is probly cold and its not sucking in! you will be suprised how much they suck in when comming onto boost.

Also today was probly not 42deg like it was when we were tuning, so it will feel like its got more power when its colder, when winter comes i will send you a map with more ignition advance so you get even more power again.

There is a thread on here how to do a mod on the intake pipe to stop it from sucking shut, i think 2rismo made it or rev.. i cant remember. il try find it.

Hows your fuel economy going ?

Yeah it could be great if you can do that:) am going to make new intake from SS steel from cooler piping so i will chekc what will be results and anyway the stock pipe for KKR is too small because of diameter... (can you link me regarding pipe?)

i have lots of videos and will try upload them somwhere

\regarding fuel am not sure before it was opening at 5000 RPM now from 3.500 so could be little bit more but need to check:)

Have you replaced that intake pipe yet? the intake pipe is probly cold and its not sucking in! you will be suprised how much they suck in when comming onto boost.

Also today was probly not 42deg like it was when we were tuning, so it will feel like its got more power when its colder, when winter comes i will send you a map with more ignition advance so you get even more power again.

There is a thread on here how to do a mod on the intake pipe to stop it from sucking shut, i think 2rismo made it or rev.. i cant remember. il try find it.

Hows your fuel economy going ?

***edit***

found the thread from Rev210

http://www.skylinesaustralia.com/forums/Re...l&hl=intake

well done

Fuel economy means how many KM's you get from a tank of gas, so how much fuel the engine is using, your setup should get 400 - 450 km's to a tank.

I think i forgot to turn on closed loop mode, i can send you a updated map and fix this if the car uses too much fuel.

Remember that heat takes away lots and lots of horse power!! you shouldnt even be boosting a turbo car in 42deg heat (i don't like to hit boost in mine anything over 30) but thats just me.

anyways upload mode photos! and i want to see the videos :wave:

Yeah it could be great if you can do that:) am going to make new intake from SS steel from cooler piping so i will chekc what will be results and anyway the stock pipe for KKR is too small because of diameter... (can you link me regarding pipe?)

i have lots of videos and will try upload them somwhere

\regarding fuel am not sure before it was opening at 5000 RPM now from 3.500 so could be little bit more but need to check:)

Fuel economy means how many KM's you get from a tank of gas, so how much fuel the engine is using, your setup should get 400 - 450 km's to a tank.

I think i forgot to turn on closed loop mode, i can send you a updated map and fix this if the car uses too much fuel.

Remember that heat takes away lots and lots of horse power!! you shouldnt even be boosting a turbo car in 42deg heat (i don't like to hit boost in mine anything over 30) but thats just me.

anyways upload mode photos! and i want to see the videos :wave:

what was reason loosing of HP ? I was expecting that after tune might be more ? at the moment for me main is that car is runing propertly and without risk but i was wondering ebaut loosing of HPs

today am going to make new pipe so after that i will test the car and post all results here...

next step is to change injectors pump and afm

Well before the engine was running lean and it was running way to much timing on load, so it was making lots of power but it was detonating at the same time which will cause the engine to explode if you do it for long enough.

When we tuned it i had to add fuel and decrease the timing so the engine will not detonate or ping or knock whatever you want to call it.

Doing this is like de-tuning the engine but it also is running properly and there is no knocking or pinging.

Also remember you were driving the car hard on a 42deg day, that takes away alot of horse power as well. If you take the car for a drive at night with the cold ignition map i gave you it will run much much better.

Make a intake pipe out of stainless, that is a good idea. dont worry about the thread i sent you if your going to make your own pipe.

Yeap mate have some idea so i will post after, going to make completly from SS it can be good results after it because i think stock pipe is closing air to turbo inlet at hight boost and maybe is reason for loosing power

Does it makes for me sence to change BOV? am still using stock one...

and have install new sparks BCPR7ES-11 with 0.6 gap

Edited by guricha

sorry for stealing thread,

but anthony, has also tuned my car,

and the results are awesome, car is a

1995 nissan skyline r33 gtst

rb30/25 gt3540r turbo

massive long list of mods,

made 265kw at 14psi, and bucket loads of torque,

if anyone whats more details pm me,

but anythony did a fantastic job and he will be doing all my tuning in the future

more details regarding car pls :)

Create an account or sign in to comment

You need to be a member in order to leave a comment

Create an account

Sign up for a new account in our community. It's easy!

Register a new account

Sign in

Already have an account? Sign in here.

Sign In Now


  • Similar Content

  • Latest Posts

    • Did this end up working? Did you take some pictures?
    • And finally, the front lower mount. It was doubly weird. Firstly, the lower mount is held in with a bracket that has 3 bolts (it also acts as the steering lock stop), and then a nut on the shock lower mount itself. So, remove the 3x 14mm head bolts , then the 17mm nut that holds the shock in. From there, you can't actually remove the shock from the lower mount bolt (took me a while to work that out....) Sadly I don't have a pic of the other side, but the swaybar mounts to the same bolt that holds the shock in. You need to push that swaybar mount/bolt back so the shock can be pulled out past the lower control arm.  In this pic you can see the bolt partly pushed back, but it had to go further than that to release the shock. Once the shock is out, putting the new one in is "reverse of disassembly". Put the top of the shock through at least one hole and put a nut on loosely to hold it in place. Put the lower end in place and push the swaybar mount / shock bolt back in place, then loosely attach the other 2 top nuts. Bolt the bracket back in place with the 14mm head bolts and finally put the nut onto the lower bolt. Done....you have new suspension on your v37!
    • And now to the front.  No pics of the 3 nuts holding the front struts on, they are easy to spot. Undo 2 and leave the closest one on loosely. Underneath we have to deal with the wiring again, but this time its worse because the plug is behind the guard liner. You'll have to decide how much of the guard liner to remove, I undid the lower liner's top, inside and lower clips, but didn't pull it full off the guard. Same issue undoing the plug as at the rear, you need to firmly push the release clip from below while equally firmly gripping the plug body and pulling it out of  the socket. I used my fancy electrical disconnect pliers to get in there There is also one clip for the wiring, unlike at the rear I could not get behind it so just had to lever it up and out.....not in great condition to re-use in future.
    • Onto the rear lower shock mount. It's worth starting with a decent degrease to remove 10+ years of road grime, and perhaps also spray a penetrating oil on the shock lower nut. Don't forget to include the shock wiring and plug in the clean.... Deal with the wiring first; you need to release 2 clips where the wiring goes into the bracket (use long nose pliers behind the bracket to compress the clip so you can reuse it), and the rubber mount slides out, then release the plug.  I found it very hard to unplug, from underneath you can compress the tab with a screwdriver or similar, and gently but firmly pull the plug out of the socket (regular pliers may help but don't put too much pressure on the plastic. The lower mount is straightforward, 17mm nut and you can pull the shock out. As I wasn't putting a standard shock back in, I gave the car side wiring socket a generous gob of dialectric grease to keep crap out in the future. Putting the new shock in is straightforward, feed it into at least 1 of the bolt holes at the top and reach around to put a nut on it to hold it up. Then put on the other 2 top nuts loosely and put the shock onto the lower mounting bolt (you may need to lift the hub a little if the new shock is shorter). Tighten the lower nut and 3 upper nuts and you are done. In my case the BC Racing shocks came assembled for the fronts, but the rears needed to re-use the factory strut tops. For that you need spring compressors to take the pressure off the top nut (they are compressed enough when the spring can move between the top and bottom spring seats. Then a 17mm ring spanner to undo the nut while using an 8mm open spanner to stop the shaft turning (or, if you are really lucky you might get it off with a rattle gun).
    • You will now be able to lift the parcel shelf trim enough to get to the shock cover bolts; if you need to full remove the parcel shelf trim for some reason you also remove the escutcheons around the rear seat release and you will have to unplug the high stop light wiring from the boot. Next up is removal of the bracket; 6 nuts and a bolt Good news, you've finally got to the strut top! Remove the dust cover and the 3 shock mount nuts (perhaps leave 1 on lightly for now....) Same on the other side, but easier now you've done it all before
×
×
  • Create New...