Jump to content
SAU Community

Recommended Posts

  • Replies 245
  • Created
  • Last Reply

Top Posters In This Topic

it was a ross balancer but not the balancers fault. The pump was offset slightly due to the dry sump pump being under it. It was fine at lower revs but anything over 8K and it would try and walk the belt off.

No molly in this car. Im using CDS as the primary material. Weight is not the concern this time around and unlike molly I know in 5 years time the space frame wont be riddled with cracks and weak points.

Its also worth mentioning that there are a fair few people helping me out with this project.

Sam at westend performance has done an awesome job assisting with the engine development and machining. His been helping us out with our engines for 15 years (since I was in karts and motocross) and id never use anyone else for machining.

The boys at bobjane in Campbeltown are great and do heaps for us, I use the alligner last minute, late night before a meeting just about every time without fail!

Nick at racetige in tarren point has been instrumental with the suspension development in the white car and his onboard for this too. Gary Cook has also been a massive help with suspension and sway bar development.

Greg at Autosport engineering of course, who has been having his spares pilfered and modified for years now but lets me keep coming back everyday.

Dean and Joseph at revolution racegear who look after us really well again its always last minute!

Steve and the boys at Just jap. Should have seen daz's face when I asked if he could keep an eye out for some 18x13 inch jap rims.....

Jay helps a massive amount with getting the car ready to race, usually on the dumby grid things are still happening. Its far from over but a massive thanks to you mate!

Liam Hill, riverside racing parts, only meet him a few weeks ago but so far in this build Ive asking him more questions than I thought id ever have to, his always helpful and has great advise. People wouldn't realise just how uptight some people can be about race cars untill you try to get information. It can be painful! Many thanks mate the advise and conversation is invaluable. If I can return the favours you need only ask.

Its a long way from finished but there are sooo many people who help out from local bussiness' to interstate parts suppliers. It would be impossible to build this or anything for that matter without their support.

Edited by Risking

Ill take a few latter on tonight once I have the front chassis rails back on and in position.

I took your advice Liam and have moved them further in remounting the rack up top and so forth.

The body is mounted to the main chassis rails which im pretty happy about. And ive now started the lower control arms after finally settling on a length late this afternoon.

I have found one set of 18 by 13's but they are a pair only so would look funny. I currently have some 18 by 11's and 18 by 10's that im setting it up firstly with.

Edited by Risking

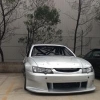
Here is a current photo of it.

The design involved trying to get the lower sill pannels to sit flush with the lower chassis rails. So we angled the outter mounts at 14 degrees and have the body sitting on two outter rails which the main hoop and front legs ect will also become a part of.

I've had to revist pythagoras over the last few days to make sure im getting everything perfectly square.

Im using proper squares but with key bars ill keep measuring the 3/4/5 triangles to be 100% certain.

Tommorrow ill bend up the main hoop and start the front legs. Plan is to get them fitted to I can work out exactly where the upper chassis rails are going to be anchored to. Despite doing multiple drawings and sketches it really is easier to use them as a guide and build it as you go. So far anyways.

I spent a bit of time with the guys who will be doing the body work tonight. Im hoping they can fit something really special into the rules but im yet to clear up what I am and aren't aloud to do.

Glad to hear your interested Pete. So far there has only been one person say its a bad idea, otherwise everyone whos seen or heard about it has had some interest.

Id like to see some Supra's and other jap imports built.

post-20349-1245664532_thumb.jpg

Thanks Andrew,

Im working away an hour or two a day in between Duncan's GTR and Jay's new race engine.

I got the main hoop bent up today and some chassis bracing tacked into position.

Its going to need to be jiged very soon so things dont move around too much.

Somethin like that.

Trying to use as little scrap as possible though

I've got to make a trip over to race tech steel and pick up my order of tubing this week sometime.

I've run out of material which is rather annoying but I havent bought any for some time.

you should make me a half cage while you're at it :)

actually.... those in the know...what would a bolt in half cage be worth?

Go to Bonds in Sydney mate they will do you a full bolt in cage with bolt in side intrusion bars so you can legally street it.

Id agree. Its not even worth fabricating a half cage when they are cheap as a kit.

Extend on it if you wish but you wont find cheaper than those kits to begin with

Fairly sure I settled on a rod end supplier today (rose joints)

Pretty expensive little barstards and need a heap of them so looked around for a good brand at a good price.

Edited by Risking
Go to Bonds in Sydney mate they will do you a full bolt in cage with bolt in side intrusion bars so you can legally street it.
Id agree. Its not even worth fabricating a half cage when they are cheap as a kit.

Extend on it if you wish but you wont find cheaper than those kits to begin with

Fairly sure I settled on a rod end supplier today (rose joints)

Pretty expensive little barstards and need a heap of them so looked around for a good brand at a good price.

Thanks Guys.

What style of arms are you going for? Double A, Wishbone?

I now have officailly done nothing new!!

Shit a brick im slack. Honestly ive been distracted from the project this week but next week ill be back into it.

Main hoop is still being done and finalised.

Jay donated some really nice rims today, good mate hey!

Nothing much to report recently. I have not been very well so havent touched it really.

I did manage to source some parts.

A massive thanks to all the guys at Just jap who came up with a fair few air jacks during the week for me.

Ill even have spares now.

Also got the rest of the cage and space frame material, Loads of rod ends and spacers, and a few other little things Im forgetting cause I currently dont care.

Create an account or sign in to comment

You need to be a member in order to leave a comment

Create an account

Sign up for a new account in our community. It's easy!

Register a new account

Sign in

Already have an account? Sign in here.

Sign In Now


  • Similar Content

  • Latest Posts

    • From there, it is really just test and assemble. Plug the adapter cables from the unit into the back of the screen, then the other side to the car harness. Don't forget all the other plugs too! Run the cables behind the unit and screw it back into place (4 screws) and you should now have 3 cables to run from the top screen to the android unit. I ran them along the DS of the other AV units in the gap between their backets and the console, and used some corrugated tubing on the sharp edges of the bracket so the wires were safe. Plug the centre console and lower screen in temporarily and turn the car to ACC, the AV should fire up as normal. Hold the back button for 3 sec and Android should appear on the top screen. You need to set the input to Aux for audio (more on that later). I put the unit under the AC duct in the centre console, with the wifi antenna on top of the AC duct near the shifter, the bluetooth antenna on the AC duct under the centre console The GPS unit on top of the DS to AC duct; they all seem to work OK there are are out of the way. Neat cable routing is a pain. For the drive recorder I mounted it near the rear view mirror and run the cable in the headlining, across the a pillar and then down the inside of the a pillar seal to the DS lower dash. From there it goes across and to one USB input for the unit. The second USB input is attached to the ECUtec OBD dongle and the 3rd goes to the USB bulkhead connected I added in the centre console. This is how the centre console looks "tidied" up Note I didn't install the provided speaker, didn't use the 2.5mm IPod in line or the piggyback loom for the Ipod or change any DIP switches; they seem to only be required if you need to use the Ipod input rather than the AUX input. That's it, install done, I'll follow up with a separate post on how the unit works, but in summary it retains all factory functions and inputs (so I still use my phone to the car for calls), reverse still works like factory etc.
    • Place the new daughterboard in the case and mount it using the 3 small black rivets provided, and reconnect the 3 factory ribbon cables to the new board Then, use the 3 piggyback cables from the daughterboard into the factory board on top (there are stand offs in the case to keep them apart. and remember to reconnect the antenna and rear cover fan wires. 1 screw to hold the motherboard in place. Before closing the case, make a hole in the sticker covering a hole in the case and run the cable for the android unit into the plug there. The video forgot this step, so did I, so will you probably. Then redo the 4 screws on back, 2 each top and bottom, 3 each side and put the 2 brackets back on.....all ready to go and not that tricky really.      
    • Onto the android unit. You need to remove the top screen because there is a daughterboard to put inside the case. Each side vent pops out from clips; start at the bottom and carefully remove upwards (use a trim remover tool to avoid breaking anything). Then the lower screen and controls come out, 4 screws, a couple of clips (including 3 flimsy ones at the top) and 3 plugs on the rear. Then the upper screen, 4 screws and a bunch of plugs and she is out. From there, remove the mounting brackets (2 screws each), 4 screws on the rear, 2 screws top and bottom and 3 screws holding in the small plates on each side. When you remove the back cover (tight fit), watch out for the power cable for the fan, I removed it so I could put the back aside. The mainboard is held in by 1 screw in the middle, 1 aerial at the top and 3 ribbon cables. If you've ever done any laptop stuff the ribbon cables are OK to work with, just pop up the retainer and they slide out. If you are not familiar just grab a 12 year old from an iphone factory, they will know how it works The case should now look like this:
    • Switching the console was tricky. First there were 6 screws to remove, and also the little adapter loom and its screws had to come out. Also don't forget to remove the 2 screws holding the central locking receiver. Then there are 4 clips on either side....these were very tight in this case and needed careful persuading with a long flat screw driver....some force required but not enough to break them...this was probably the fiddliest part of the whole job. In my case I needed both the wiring loom and the central locking receiver module to swap across to the new one. That was it for the console, so "assembly is the reverse of disassembly"
    • But first....while I was there, I also swapped across the centre console box for the other style where the AV inputs don't intrude into the (very limited !) space.  Part# was 96926-4GA0A, 284H3-4GA0B, 284H3-4GA0A. (I've already swapped the top 12v socket for a USB bulkhead in this pic, it fit the hole without modification:) Comparison of the 2: Basically to do the console you need to remove the DS and PS side console trim (they slide up and back, held in by clips only) Then remove the back half of the console top trim with the cupholders, pops up, all clips again but be careful at the front as it is pretty flimsy. Then slide the shifter boot down, remove the spring clip, loose it forever somewhere in the car the pull the shift knob off. Remove the tiny plastic piece on DS near "P" and use something thin and long (most screwdrivers won't fit) to push down the interlock and put the shifter down in D for space. There is one screw at the front, then the shifter surround and ashtray lift up. There are 3 or 4 plugs underneath and it is off. Next is the rear cover of the centre console; you need to open the console lid, pop off the trim covering the lid hinge and undo the 2rd screw from the driver's side (the rest all need to come out later so you can do them all now and remove the lid) Then the rear cover unclips (6 clips), start at the top with a trim tool pulling backwards. Once it is off there are 2 screws facing rearwards to remove (need a short phillips for these) and you are done with the rear of the console. There are 4 plugs at the A/V box to unclip Then there are 2 screws at the front of the console, and 2 clips (pull up and back) and the console will come out.
×
×
  • Create New...