Jump to content
SAU Community

Recommended Posts

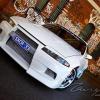
Nissan Skyline R33 GTS-T

Custom Show car

Series 1, 2.5 litre

Manual 5 Speed

VIN # 6U9000ECR33018417

Engine No # RB25082283A

Complete with Road Worthy Certificate (RWC) & Registration with Custom Plates SXC R33

103,000 genuine kilometers. I imported this car in 2002 with 70,000km.

This year I've only driven it half a dozen times, hence the reason for selling. It’s been a beautiful car to own and drive, and a real head turner, but unfortunately I no longer have use for it as I have a very nice company car. Also, priorities have changed with a new mortgage.

This is an extremely well maintained and custom modified for sound, multimedia and show. It’s not built for performance; however it still runs very well. The car is legal and road worthy, and I have been randomly checked by the police on a number of occasions and have no hassles.

The only problem before I sell and get the official RWC Certificate is the car will require new tyres which I’m purchasing soon. The first modification I upgraded was the wheels and tyres and they have not been replaced since. They have plenty of tread left, which proves how much I baby the car and how little I drive it, but the inside wall of one or two of them have started cracking due to just being 7 years old rubber!

During the cars ‘show life’ and years on display, I featured in the ‘Hot 4’s Magazine, and won the following trophies:

2007 Auto Salon Sydney Grand Final BEST MULTIMEDIA AWARD

2008 Auto Salon F1 Grand-Prix BEST GRAPHICS

2008 Auto Salon Melbourne BEST MULTIMEDIA AWARD

Audio & Multimedia

Headunit: Sony XAV-77 AV Unit - 7inch LCD with the works (DVD, MP3, etc)

Front: Alpine X Type 6in splits

Rear: Alpine S Type 6in splits (airbrushed)

Amp: 3 x Alpine PDX

4.150 - runs the two rear splits and boot 6x9's

2.150 - runs purely the front x types

1.100 mono block for the two subs

Subs: 2x 12inch Alpine BASS ZR airbrushed

Dynomat sound deadening throughout entire car

Optima Upgraded Battery

The BOOT of the car had installed:

Computer: Custom Built 12Volt and 24Volt Car Computer with the works, including DVD Burner, 40 gig hard drive, Windows XP with Media Center, full Broadband Mobile Internet

Screens: 2x LG 19" Widescreen LCD's

This was recently pulled out for the use of a functional boot, with a spare tyre, however it would be very easy to re-install and all components are working fine and ready to go. For this to be included, the final sale price would be negotiable.

Exterior

Full Custom Wide Body Kit

Full Custom Respray in White with Blue Pearl

Full Custom Airbrushed Graphics

Custom Vented Bonnet

Custom Side Skirts

Custom Rear Bar

Flat Boot with shaved locks

Wide Body Conversion

Front Flared Vented Guards and Flared Rear Quarter Panels

18” XHP Sabre Machine Finished Rims

New tyres coming soon TBC

6 x underbody Blue Neon’s

Interior

Custom Dash with custom paint

Venom Boost and Volte Gauges

GREDDY Turbo Timer

Viper alarm & Immobilizer, Complies with Australian insurance standards.

Custom Airbrushed and Custom Upholstered Steering Wheel

Leather Gear Knob and custom airbrushed gear and handbrake boots

Darkest legal 35% windscreen tint

Handling/Performance

Cusco fully adjustable Coilovers

Front and Rear Strut Braces

HYBRID Front Mount Intercooler

Front Pipe and Dump Pipe

Custom Duel Exhaust System

Twin 3” muffler

Ferodo DS2500 pads all round

Replaced all belts including Fan Belt

Upgraded Fuel Pump

Triple Plated Clutch

I have owned this car since 2002 as the first owner in Australia. It was purchased stock standard and built it up over the past eight years.

The overhaul of my project is available on DVD with more than 1000 pictures

I am willing to drive to meet potential buyers as this car never gets driven and I would love to take the dust cover off it in the garage. Alternatively, this car will be in Wheelers Hill, South East Victoria for viewing on appointment.

FOR SALE $25,000

You will also receive:

Custom Car Bra

Spare Original Parts

Original Back Seat and Seat Belts

Original Nissan Floor Mats

Original Mirrors

Custom Built 12 Volt and 24 Volt Car Computer

Registered until December 2010

Road Worthy Certificate

Contact Shane: 0407 834 633

Pictures available here:

The Build of the Project available here:

Link to comment
https://www.sau.com.au/forums/topic/323557-r33-gts-t-custom-show-car/
Share on other sites

  • 1 month later...

This will go up on carsales soon as I'm hoping to pay off some debt and renovate the house later in the year.

Price is negotiable, depending on the extras and accessories etc.

It's currently insured for $30K. I spent well over 30 building the project, not including original purchase price so car is worth $50K to me, but will take offers over $23,000

Thought I'd include some pics

Cheers,

Shane

post-44524-1279254645_thumb.jpg

post-44524-1279254651_thumb.jpg

post-44524-1279254656_thumb.jpg

post-44524-1279254662_thumb.jpg

post-44524-1279254668_thumb.jpg

post-44524-1279254687_thumb.jpg

post-44524-1279254698_thumb.jpg

post-44524-1279254707_thumb.jpg

  • 1 month later...

It is definetely different but would only appeal to a select group of people since it differs so much from mainstream Skyline modifications. The back seat audio install is very good I gotta say that.

Hey pimpenr33 I've had some people who say they love it and wish, but these are the people that only want to spend 10 buying a car haha.

I was kinda secretely hoping nobody will take it, cause i love her so much. Back when i first posted if somebody offered me 20'ish i would have probably taken it, but now i'm managing my debts pretty well and i don't want to part with her, so was thinking of taking off the for sale sticker. ;)

  • 2 months later...

I've decided quickly (so I might change my mind) to drop the price and try to sell again as this xmas I wish to be debt free and start renovating my place some more. I'm also going overseas in 2011 so this will help a lot towards that.

I've just purchased this week four BRAND NEW K31 Khumo Tyres so the only thing left to do before I get the RWC will be changing the drivers side seat belt. I've already purchased the belt, but I need to replace it. I cbf'd, so selling with NO RWC and dropping to $19,900 for December only.

If it doesn't sell soon, no worries, I don't mind at all and I'll change the belt when I have time January and continue to enjoy riding her

Shane 0407 834 633

  • 2 weeks later...

The car will be in Wheelers Hill all next week in parts in the garage.

I'm pulling out the back seat install, replacing the drivers seat belt so i can get the RWC, and while it's apart get new tint on the rear window (cause of some scratches and it being too dark currently)

I'll then re-run all the wires and neaten up the boot back to standard, and put the backseat installation back so it's better than ever!

I'm willing to drop the price for a trade of sorts...I'm wanting to renovate my courtyard, get a decking, spa, landscaping, the works, and pay off my debt to other renovations from last year! So if you are interested, and can help me out with what I'm after, the price can definately go lower.

If not, price is still $19K for this final week only until Christmas. I purchased the car standard for $18K 7 years ago omg. By New Years Day, once I get it totally legal and Road Worthy, and feeling like new again, maybe a new head unit.... I wont want to sell it! lol. So it'll probably be too late and it will no longer be for sale, or the price will go up to low 20's again and I just miss out on renovating for another 12 - 18 months.

Cheers

  • 3 months later...

I'm itching to modify my......house, and also I haven't saved any money to go overseas with in May... so I'm gonna have a go at selling this again.

Also, it's been driven only half a dozen times in total since i returned to work late January. I got a lot of use out of her during Jan when I was home, but since then, nothing. So i'm sure somebody else will give her a nice home.

I purchased the car for 18K and the wallet started pouring in. I would love my $18,000 back, but that's selling it how it is, with no extras or RWC right now. If you want all the good stuff, spare parts, RWC etc offer me something higher than this.

New shots thanks to Clarence the wizard http://www.tangcla.com/

Cheers

post-44524-0-13868100-1302596792_thumb.jpg

post-44524-0-01901400-1302596802_thumb.jpg

post-44524-0-19699600-1302596810_thumb.jpg

post-44524-0-04566700-1302596819_thumb.jpg

post-44524-0-61150100-1302596826_thumb.jpg

  • 1 month later...
  • 3 weeks later...
  • 3 months later...

OKKAAAYY I''ve decided to try and sell again.

Every month I change my mind, but I hardly get to drive and enjoy her so its best to let somebody else do so!

Without all the extras, and No Road Worthy Certificate, I'll sell for $16,000

Everything else listed is negotiable

Common guys, this is insured for $30,000 who's keen?

Create an account or sign in to comment

You need to be a member in order to leave a comment

Create an account

Sign up for a new account in our community. It's easy!

Register a new account

Sign in

Already have an account? Sign in here.

Sign In Now


  • Similar Content

  • Latest Posts

    • Hi, is the HKS  Tower Bar still available ? negotiable ? 🤔
    • From there, it is really just test and assemble. Plug the adapter cables from the unit into the back of the screen, then the other side to the car harness. Don't forget all the other plugs too! Run the cables behind the unit and screw it back into place (4 screws) and you should now have 3 cables to run from the top screen to the android unit. I ran them along the DS of the other AV units in the gap between their backets and the console, and used some corrugated tubing on the sharp edges of the bracket so the wires were safe. Plug the centre console and lower screen in temporarily and turn the car to ACC, the AV should fire up as normal. Hold the back button for 3 sec and Android should appear on the top screen. You need to set the input to Aux for audio (more on that later). I put the unit under the AC duct in the centre console, with the wifi antenna on top of the AC duct near the shifter, the bluetooth antenna on the AC duct under the centre console The GPS unit on top of the DS to AC duct; they all seem to work OK there are are out of the way. Neat cable routing is a pain. For the drive recorder I mounted it near the rear view mirror and run the cable in the headlining, across the a pillar and then down the inside of the a pillar seal to the DS lower dash. From there it goes across and to one USB input for the unit. The second USB input is attached to the ECUtec OBD dongle and the 3rd goes to the USB bulkhead connected I added in the centre console. This is how the centre console looks "tidied" up Note I didn't install the provided speaker, didn't use the 2.5mm IPod in line or the piggyback loom for the Ipod or change any DIP switches; they seem to only be required if you need to use the Ipod input rather than the AUX input. That's it, install done, I'll follow up with a separate post on how the unit works, but in summary it retains all factory functions and inputs (so I still use my phone to the car for calls), reverse still works like factory etc.
    • Place the new daughterboard in the case and mount it using the 3 small black rivets provided, and reconnect the 3 factory ribbon cables to the new board Then, use the 3 piggyback cables from the daughterboard into the factory board on top (there are stand offs in the case to keep them apart. and remember to reconnect the antenna and rear cover fan wires. 1 screw to hold the motherboard in place. Before closing the case, make a hole in the sticker covering a hole in the case and run the cable for the android unit into the plug there. The video forgot this step, so did I, so will you probably. Then redo the 4 screws on back, 2 each top and bottom, 3 each side and put the 2 brackets back on.....all ready to go and not that tricky really.      
    • Onto the android unit. You need to remove the top screen because there is a daughterboard to put inside the case. Each side vent pops out from clips; start at the bottom and carefully remove upwards (use a trim remover tool to avoid breaking anything). Then the lower screen and controls come out, 4 screws, a couple of clips (including 3 flimsy ones at the top) and 3 plugs on the rear. Then the upper screen, 4 screws and a bunch of plugs and she is out. From there, remove the mounting brackets (2 screws each), 4 screws on the rear, 2 screws top and bottom and 3 screws holding in the small plates on each side. When you remove the back cover (tight fit), watch out for the power cable for the fan, I removed it so I could put the back aside. The mainboard is held in by 1 screw in the middle, 1 aerial at the top and 3 ribbon cables. If you've ever done any laptop stuff the ribbon cables are OK to work with, just pop up the retainer and they slide out. If you are not familiar just grab a 12 year old from an iphone factory, they will know how it works The case should now look like this:
    • Switching the console was tricky. First there were 6 screws to remove, and also the little adapter loom and its screws had to come out. Also don't forget to remove the 2 screws holding the central locking receiver. Then there are 4 clips on either side....these were very tight in this case and needed careful persuading with a long flat screw driver....some force required but not enough to break them...this was probably the fiddliest part of the whole job. In my case I needed both the wiring loom and the central locking receiver module to swap across to the new one. That was it for the console, so "assembly is the reverse of disassembly"
×
×
  • Create New...