Jump to content
SAU Community

Recommended Posts

hey guys,

things have come up and i need to clear some debts so unfortunately im selling my white evo 7. i've had it for 2 1/2years now with the car been on and off the road because my engine blew up while my tuner was tuning it. he told me a metal flake (showed me a 3x3mm metal flake) got clogged in my injector from dirty fuel (not sure why the fuel filter on the fuel pump missed it?), only recently got it tuned in sydney by micks motorsport. the car has 71 XXXkm on the clock but the engine was fully rebuilt at 64 XXXkm as a 2.3L stroker. i've tried to keep the car as stock looking as possible to avoid problems.

ENGINE:

Ralliart head studs

Mahle forged pistons

Spoon forged rods and bolts

ARD 2.3L forged crank

TD06SL2R 20G turbo

Brian crower valve springs with titanium retainers

bigger hydraulic lifters (stops ticking)

780cc Siemen Deka injectors

Walbro fuel pump

HKS 272 inlet/exhaust cams

HKS timing belt

HKS M40 spark plugs

Ralliart ignition leads

Bigger oil cooler

New bearings

Beatrush cooling panel

Balance shaft kit

Apexi air intake with genuine apexi enclosure

Trust style upper intercooler pipe

Greddy Type S bov on a hks flange (can supply a HKS Racing II for extra)

metal intake pipe

Tomei dump and front pipe

3inch hi flow cat

Xforce catback

Cusco oil catch can

B&M Short shift kit

Heavy duty clutch (installed 9000km ago)

Haltech PS1000 (no afm)

Haltech shift light with custom holder

head serviced, whole engine stripped apart cleaned, full gasket kit.

car was tuned in canberra and made 252kwatw on 20psi with 492Nm of torue (timing was retarded ALOT) but the tune wasnt good as it hesistated on take off, bad cold starts,etc. So i took it to micks (10th of june) who made 248.5kwatw 21psi (forgot to get a print out of the torque) but now the car runs perfectly now. mick made 270+kwatw with 25psi but i asked him to detune it because i didnt need that much power and wanted it to be a safe daily driver.

WHEELS/SUSPENSION/BRAKES:

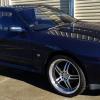
Enkei tarmac rally rims 17x8 with REO1R potenza's with nitrogen

Whiteline front and rear sway bars with whiteline front and rear end-links

DBA 4000 Front and rear rotors

EBC red stuff pads (front and rear)

INTERIOR:

Defi Boost and oil pressure gauge with control unit II, 2 defi warning lights (boost and oil)

Monster dual pillar gauge holder (60mm)

JVC single din head unit 3.5inch colour screen, plays DVD, avi, divx, mp3, etc. with ipod cable so direct control through head deck.

Apline 6x9

Rhino alarm, shock sensor, glass break sensor, boot/bonnet/door triggers, microwave sensor. the alarm is also controlled via sms, lock/unlock, with a fuel cut - so if someone has your keys and has dis-armed the alarm you can sms it and cut fuel. also sms's you if the any one of the triggers has gone off (tells you which one), if no response it will call you. the alarm will be, reprogrammed for new owner.

EXTERIOR:

Genuine evo 9 rear bar (brackets, lights, etc)

Shaved boot lid.

1.jpg

2.jpg

3.jpg

4.jpg

5.jpg

6.jpg

8.jpg

9.jpg

IMG_3306.jpg

IMG_3271.jpg

IMG_3273.jpg

IMG_3272.jpg

IMG_3275.jpg

IMG_3277.jpg

IMG_3278.jpg

IMG_3308.jpg

IMG_3279.jpg

IMG_3280.jpg

IMG_3284.jpg

IMG_3285.jpg

IMG_3309.jpg

i've also got some other parts that i'll sell for cheaper with purchase of vehicle in the for sale section.

Volk GTC 19x8.5 inch on brand new federal 595evo tyres

ganador led mirrors

evo 7 spoiler

evo 7 ecu

arc gear knob

moonface gear knob

car has had all oils changed at 40k with full synthetics (rear dif, gearbox, transfer case), engine oil is always changed at 5000km intervals with K&N oil filters except the last one as they didnt have them in stock. will throw in a bottle of full synthetic with a K&N oil filter with sale (oil change no due for another 4000km). I've put well over 30k on this car which i payed 30k for 2 1/2 years ago, chasing $35k

pm me or contact me on 0401573850

cheers

Edited by Icey_Cold
Link to comment
https://www.sau.com.au/forums/topic/330730-white-lancer-evolution-vii/
Share on other sites

  • 1 month later...
  • 2 weeks later...
  • 2 weeks later...
  • 3 weeks later...
  • 2 weeks later...
  • 4 weeks later...

Nice evo, and nice without the wing too!

Im actually looking for a 33GTR, was orignally looking for another 32, I would actually be pretty keen to have a closer look at this in the new year, pm me contact details

Cheers,

Ben

  • 2 weeks later...

$24,500 without defi gauge/holder/warning lights.

and

$24,000 without the rear bar.

and the stock wing be supplied with car.

email me at [email protected] if interested.

thanks

Edited by Icey_Cold

Create an account or sign in to comment

You need to be a member in order to leave a comment

Create an account

Sign up for a new account in our community. It's easy!

Register a new account

Sign in

Already have an account? Sign in here.

Sign In Now


  • Similar Content

  • Latest Posts

    • OK, next the shroud needs to come off and there are a couple of tricks. Firstly, there is a loom from near the passenger side headlight to the fans, coolant temp sensor etc and there is no plug to undo.  In my case I was OK to leave the shroud on top of the engine so I just undid the passenger side fan plug and about 10 of the clips which gave enough free wire to put it aside. The fan plugs were super tight, the trick I used was a small falt screwdriver to push down on the release tab, then a larger flat screwdriver to lever the plug out of the fan unit....be careful with how much force you apply! If you need to remove the shroud altogether for some reason you will have to deal with all the plugs (tight) and clips (brittle)....good luck. I removed all of the clips and replaced them with cable ties that I will just cut next time. Also, in the Red Sport / 400R at least, the intake heat exchanger reservoir hose is bolted to the shroud in 2 places with 10mm headed bolts; so remove them (the hose stays in the car; no need to undo it at the t fittings down at the radiator lower mount. Once you've dealt with the HX hose and the wiring loom, there are 3x 10mm headed self tappers holding the top of the shroud to the radiator; remove those.   The shroud then lifts out of the bottom mounts where it sits on the radiator, up and onto the engine out of the way. Simples
    • Ok, disregard my “rate them” comment, sorry for my unrealistic input
    • OK, now we are ready to get started. You need to remove the air boxes on each side for clearance. The cover is straightforward, undo the clips on the top and lift the front cover out of the rest of the housing. If it is tight you can remove the air filters first. The rear section of the airbox is trickier. On each side you need to remove the Air flow meter wiring which is held to the airbox with a clip; you need to get behind the clip on 2 sides if you want to remove it without breaking it - unclip the harder side and pull on the clip with medium force, then unclip the easier side and it should pop out The airbox is held onto the intake hose with a spring clamp; you need to get a flat bladed screwdriver behind the spring on both sides and pop them outwards. When you have got them in the right unclipped place they will stay there and the airbox slips out pretty freely. Put a rag in the intake to prevent anything getting dropped in there, and also to prevent you seeing that the turbo seal is leaking oil (as they do). Then. The top of the radiator is held by a steel plate, it is secured by 2x10mm and 2x12mm headed bolts . Remove them and remove the plate Also grab the bushings that hold the radiator to the plate on each side so they are not lost!
    • Next, remove the upper and lower radiator hoses, both are held with a spring clamp. While you are under there, tackle the Auto Trans cooler lines.  Again both are held on with spring clamps, and as mentioned above you should cap them on the radiator side with an 8mm cap, and on the car side loop them with a length of 8mm pipe - this will stop you losing a dangerous amount of AT fluid during the rest of the job If you've been meaning to add a sender for AT trans temp, this is a great time to do it; put a sender fitting into the passenger side line as that is the inlet to the cooler/radiator.
    • Next you need to remove the intake duct (as with pretty much every job on these cars), it is a series of clips you gently remove with a flat bladed screwdriver. They do get brittle with time and can break, and I have not found a decent quality aftermarket one that fits (they are all too soft or flimsy and don't last either) but the nissan ones are a couple of bucks each (ouch).  Once the clips are off (either 8 or 10, I didn't check) you lift the intake duct out and will see the reservoirs Undo the line into the radiator side cap (some bent needle nosed piers are awesome for spring clamps) and then remove the 4x 10m nuts that hold both in place.  I didn't get these pics, but remove the line under the radiator reservoir (spring clamp again) then remove that reservoir. Then you can get at the intake reservoir, same thing, spring clamp underneath then remove it. BTW This is a great time to put in a larger (+70%) combined reservoir that AMS makes..... https://www.amsperformance.com/product/q50-q60-red-alpha-coolant-expansion-tank/ They also make an Infiniti branded and part# version if that is your thing
×
×
  • Create New...