Jump to content
SAU Community

Recommended Posts

Ok my new car, after getting rid of my R31 skyline.

R32 GTST sedan

first dyno run was 136RWKW @ 14psi (stock turbo, auto, 3" exhaust)

2nd dyno run was 138RWKW @ 7psi (r33 turbo, 3" dump added)

fastest dyno run 15.3 @ 90mph (stock turbo, auto)

When i picked up the car in mid 2011, it was pretty stock apart from the following.

front strut brace

RS*R lowered springs

pod filter

3" cat back RS*R exhasut

3" high flow cat.

type m body kit

since then i have added the following,

turbo tech manual boost controller

3" split dump pipe and front pipe (one unit) from CES racing.

drift boost gauge

post-32868-0-21802300-1295952145_thumb.jpg

post-32868-0-35893800-1295952208_thumb.jpg

post-32868-0-80898900-1295952277_thumb.jpg

post-32868-0-82620200-1295952346_thumb.jpg

post-32868-0-56267400-1295952393_thumb.jpg

post-32868-0-50067800-1295952437_thumb.jpg

Link to comment
https://www.sau.com.au/forums/topic/351703-r-tunes-skyline-20/
Share on other sites

  • 2 weeks later...

Ok an update.

the car now sits as a shell waiting to get painted gunmetal grey.

I have brought the following.

2nd set of GTST rims

a set of R33 GTST and GTR rims

blits vented bonet (for GTST)

vertex body kit

rear strut brace

nismo leather gear knob

nismo radiator cap

nismo thermo stat

better condition rubbers (all doors), so the ones on the doors, the cahssie, and the one that runs along the top.

better condition c piller trim

excedy clutch

adj caster arms

cusco zero 2 coil overs

rear cradel pinaples.

better condition manual gear lever surround

manual gear lever cover

better condition blanking plates and demister vent. (the ones at the very front of the dash)

blits SE FMIC

R32 GTR spioler

clear indicators

new hand brake cover

project mu handbrake shoes.

hicas lock bar

new driver window switch as i broke two of the micro switches.

post-32868-0-92857000-1296663791_thumb.jpg

post-32868-0-01859100-1296663850_thumb.jpg

post-32868-0-41646800-1296664063_thumb.jpg

post-32868-0-55044600-1296664357_thumb.jpg

  • 3 weeks later...

Ok brought more parts.

project mu brake shoes (for the hand brake)

white line GTR adj sway bar (also got the front in the deal but may have to get rid of it)

just jap hardend tie rod ends.

4 X r32 gtst rims

4 x R33 gtst rims

Im waiting on pics from my wife so i can put them up

And thanks to the cyclone that hit darwin i will defently be needing a new interior as it got wet and now will get modly as all the windows are out in waiting for paint.

If any one has some R32 GTR or bucket seats please let me know.

Hey guys,

Got the rubbers of the for sale forum from another member who is wrecking his car, had a look at the pics and the rubbers were in better condition then mine. ill pm you the price.

With the side skirt yea thier up for sale, as is the whole body kit. Send me a pm.

Also have some pics not the best but my missus took them.

post-32868-0-86270500-1298209694_thumb.jpg

post-32868-0-21636800-1298209787_thumb.jpg

post-32868-0-86113700-1298209839_thumb.jpg

post-32868-0-53454200-1298209887_thumb.jpg

  • 2 weeks later...
  • 4 weeks later...

Ah k time for a update,

Have brought the follow,

Rear camber arms

alloy 52mm 2 core radiator

the blits FMIC as mentiond above (had to wait for it to arive at just jap)

pair of recaro look alike seats and rails (from just jap) in black cloth

HEL ADR aproved brake lines

New center vents

clear indiactors

catch can

SRI solid bush for stering collom (in one in side eng bay) and got it for $29 inc postage from just jap.

push start button kit

N1 water pump.

Will be able to start building it very soon, so some good pics to come.

  • 2 months later...

Ok update time,

Car has now being painted and body kit fitted, a big thanks to the guys at arafura crash who did the work. and so you know the paint is the factory paint colour, light mertalic grey.

So far pulled the rest of the interor out so i can clean it and get it retrimed.

b piller brace fitted. one question for people that do have one have you use one or two bolts to secure it?

dummy place the driver seat and harnes.

fitted all coil overs

rear strut brace

rear sway bar

rear camber arms

all brake lines

rear hand brake shoes

front sway bar

fitted the blits FMIC

fitted the nismo radiator cap

clear indicators fitted

new center vent and demister vents fitted.

fitted the 33 rims, so i could get it on the truck. they make the front bar sit a 150mm and the stock 16" the front bar was at 100mm

post-32868-0-32065900-1308908932_thumb.jpg

post-32868-0-37357600-1308908995_thumb.jpg

post-32868-0-45640800-1308909064_thumb.jpg

post-32868-0-54076500-1308909125_thumb.jpg

post-32868-0-50350600-1308909200_thumb.jpg

Needs a GTR grill retrofit and align the headlights with the indicators, otherwise it looks kinda unproportioned imo.

fitted the 33 rims, so i could get it on the truck. they make the front bar sit a 150mm and the stock 16" the front bar was at 100mm

The 33 rims are a full 10cm larger then the 32s? that doesn't sound right...

Yep still have to fit the headlights proberly. im running 235/45/17 tyers on the GTRs were the stockies were 205/55/16. diffrent brand tyers are also diffrent sizes. And also not changing the bonnet as it ADR aproved.

Edited by R TUNE
im running 235/45/17 tyers on the GTRs were the stockies were 205/55/16. diffrent brand tyers are also diffrent sizes.

Lol if different brand tyres were different sizes we'd have a huge problem. That's why we have standardised size ratings. 235/45R17 is only 12mm larger then 205/55R16. It would only raise the car 6mm. Hardly 50mm now isn't it!

Edited by TMM
  • 5 months later...

Ok time for a update and i know it's been long.

Car is now on the road and regersted.

power is currently at 160RWKW still with the auto tune.

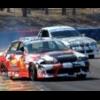
have taken it to a drift day and fark it was awsome but still got to work on the suspention set up.

Do have new pics but having trouble up loading.

Well got the car back from the tuners and managed 160RWKW @ 14psi. not bad considering it;s darwin wet season (temp 28-34 humidity 60%-90%).

ill post the dyno graph when i get a chance.

Im alos removing the ATS 2 way as it sucks for street driving, it fine for track use or weekend use. But for street just shim a stock LSD.

  • 5 months later...

Time for an update, Last update was after RD5 of the burson auto parts drift series up in darwin, at hidden valley raceway.

I cooked the cluctch, enough that i had 3 big cracks in the fly wheel.

The gearbox has said enough with all sycros crunching and bearings been noisy.

So replaced these, new fly wheel, 5 puck cussion button clucth from RPM replacement gear box.

tryed fitten a Z32 afm, as my tunner thought it was the problem with my car not starting, stalling, running like crap. In the end the AFM was dirty and the pod ( a cheap crap one) had cloged (i also found later the intake pipe to the turbo was not on.

My tunner couldn't get the Z32 to work even tho he got it running with the stock AFM and didn't tell me as my aim was to get it running.

I painted the R33 GTR rims black.

Had to replace the rocker cover gaskets as they had been leaking, and also suffed some serious blow by, after competeing in the burson autoparts drift series RD 1 2012.

At that event placed 5

I found that i had understeer in my current set up, and was selecting 5th insted of 3rd on turn 7 due to a worn gear leaver bush.

Also had issues with blow by, and a leaking rocker cover gasket both now fixed. but looks like the turbo seal has gone as im blowing white smoke on back off.

Any way here are some pics

Fitted a fire bottle, painted the rocker cover, painted the GTR rims.

post-32868-0-03649400-1339548405.jpg

post-32868-0-58243000-1339548443.jpg

post-32868-0-86667300-1339548465.jpg

post-32868-0-25713700-1339548511.jpg

post-32868-0-74089100-1339548576.jpg

Create an account or sign in to comment

You need to be a member in order to leave a comment

Create an account

Sign up for a new account in our community. It's easy!

Register a new account

Sign in

Already have an account? Sign in here.

Sign In Now


  • Similar Content

  • Latest Posts

    • Who did you have do the installation? I actually know someone who is VERY familiar with the AVS gear. The main point of contact though would be your installer.   Where are you based in NZ?
    • Look, realistically, those are some fairly chunky connectors and wires so it is a reasonably fair bet that that loom was involved in the redirection of the fuel pump and/or ECU/ignition power for the immobiliser. It's also fair to be that the new immobiliser is essentially the same thing as the old one, and so it probably needs the same stuff done to make it do what it has to do. Given that you are talking about a car that no-one else here is familiar with (I mean your exact car) and an alarm that I've never heard of before and so probably not many others are familiar with, and that some wire monkey has been messing with it out of our sight, it seems reasonable that the wire monkey should be fixing this.
    • Wheel alignment immediately. Not "when I get around to it". And further to what Duncan said - you cannot just put camber arms on and shorten them. You will introduce bump steer far in excess of what the car had with stock arms. You need adjustable tension arms and they need to be shortened also. The simplest approach is to shorten them the same % as the stock ones. This will not be correct or optimal, but it will be better than any other guess. The correct way to set the lengths of both arms is to use a properly built/set up bump steer gauge and trial and error the adjustments until you hit the camber you need and want and have minimum bump steer in the range of motion that the wheel is expected to travel. And what Duncan said about toe is also very true. And you cannot change the camber arm without also affecting toe. So when you have adjustable arms on the back of a Skyline, the car either needs to go to a talented wheel aligner (not your local tyre shop dropout), or you need to be able to do this stuff yourself at home. Guess which approach I have taken? I have built my own gear for camber, toe and bump steer measurement and I do all this on the flattest bit of concrete I have, with some shims under the tyres on one side to level the car.
    • Thought I would get some advice from others on this situation.    Relevant info: R33 GTS25t Link G4x ECU Walbro 255LPH w/ OEM FP Relay (No relay mod) Scenario: I accidentally messed up my old AVS S5 (rev.1) at the start of the year and the cars been immobilised. Also the siren BBU has completely failed; so I decided to upgrade it.  I got a newer AVS S5 (rev.2?) installed on Friday. The guy removed the old one and its immobilisers. Tried to start it; the car cranks but doesnt start.  The new one was installed and all the alarm functions seem to be working as they should; still wouldn't start Went to bed; got up on Friday morning and decided to have a look into the no start problem. Found the car completely dead.  Charged the battery; plugged it back in and found the brake lights were stuck on.  Unplugging the brake pedal switch the lights turn off. Plug it back in and theyre stuck on again. I tested the switch (continuity test and resistance); all looks good (0-1kohm).  On talking to AVS; found its because of the rubber stopper on the brake pedal; sure enough the middle of it is missing so have ordered a new one. One of those wear items; which was confusing what was going on However when I try unplugging the STOP Light fuses (under the dash and under the hood) the brake light still stays on. Should those fuses not cut the brake light circuit?  I then checked the ECU; FP Speed Error.  Testing the pump again; I can hear the relay clicking every time I switch it to ON. I unplugged the pump and put the multimeter across the plug. No continuity; im seeing 0.6V (ECU signal?) and when it switches the relay I think its like 20mA or 200mA). Not seeing 12.4V / 7-9A. As far as I know; the Fuel Pump was wired through one of the immobiliser relays on the old alarm.  He pulled some thick gauged harness out with the old alarm wiring; which looks to me like it was to bridge connections into the immobilisers? Before it got immobilised it was running just fine.  Im at a loss to why the FP is getting no voltage; I thought maybe the FP was faulty (even though I havent even done 50km on the new pump) but no voltage at the harness plug.  Questions: Could it be he didnt reconnect the fuel pump when testing it after the old alarm removal (before installing the new alarm)?  Is this a case of bridging to the brake lights instead of the fuel pump circuit? It's a bit beyond me as I dont do a lot with electrical; so have tried my best to diagnose what I think seems to make sense.  Seeking advice if theres for sure an issue with the alarm install to get him back here; or if I do infact, need an auto electrician to diagnose it. 
    • Then, shorten them by 1cm, drop the car back down and have a visual look (or even better, use a spirit level across the wheel to see if you have less camber than before. You still want something like 1.5 for road use. Alternatively, if you have adjustable rear ride height (I assume you do if you have extreme camber wear), raise the suspension back to standard height until you can get it all aligned properly. Finally, keep in mind that wear on the inside of the tyre can be for incorrect toe, not just camber
×
×
  • Create New...