
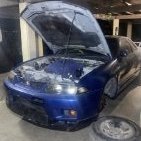
R33 Gtr Sway Bars, Good Upgrade From Stock Stagea

Announcements
-
Similar Content
-
-
Latest Posts
-
 Johnny is sad now... Because you didn't get Bosch Motorsport ABS.
 -
 Hey keep the ideas coming, I'm always keen on projects! But, problem fixed! I got a cheapie ozito scope from Bunnings and had a good look in and around the bearing and sensor hole. I couldn't see a smoking gun but the bearing looked a bit strange, especially when comparing with a new one. I thought the cover had come off the bearing magnets. Sorry for pics of a screen, I didn't have an SD card. Good thing I had the old one to inspect. So, given I'm like a pit crew with wheel bearings and luckily I had a spare bearing because I f**ked up my parts order, I decided to just smash it out. Got the old one out in about an hour. So much easier when the parts haven't had a chance to rust together yet. 😂 And, well, found the problem. In the second pic at about the 8 o'clock position, you'll see what I think is the tip of the old sensor. The new sensor has definitely been rubbing but it's all intact, just a little shiny so I'm hoping it's fine. The car brakes perfectly now and no errors. I think the job took about 2.5h in the end. 👍🏻 I really appreciate the help in here as usual. Thanks guys.
 -
 I was only looking because I saw some drops on the ground but it wasn't alot. Recently had it serviced will ask the mech to confirm. Find it strange that it looks standard though, can see in another photo of a random box
 -
 So...not sure if you know if that has always been there or why you went looking. It could be old damage from a clutch explosion, or even just the gearbox got dropped somewhere along the line. Basically, you should seal it up to stop oil and dust getting into the bellhousing, but it doesn't matter too much and is not structural. I'd suggest something like a glob of JB Weld. BTW what gearbox oil are you running, I would guess the breather has been spewing it everywhere.
 -
Hey Duncan thanks for your reply. Sorry mate I know the photos are shit. Took another photo for reference. Seems the casing does have a hole in it looking on the net, fluid seeping out. Added a photo
-


Recommended Posts
Create an account or sign in to comment
You need to be a member in order to leave a comment
Create an account
Sign up for a new account in our community. It's easy!
Register a new accountSign in
Already have an account? Sign in here.
Sign In Now