Diy Painting Stuff
Announcements
-
Similar Content
-
Latest Posts
-
This looks great! Awesome to have the 5 speed with an LSD in this. The Recaro's look like SR2's or SR3's. It's a shame they've been retrimmed as they would have looked sweet in their original colours. I think I'd want my agent to be a little more up front and informative too. I've never imported but I reckon it would make me a little nervous, so the more info the better.
-
By soviet_merlin · Posted
Thanks for doing that Duncan! Makes you a good person in my books. We don't get kangaroos or wombats here. But we have bats and it's similar. AFAIK it's often the mums with a baby attached that get hit because they drop lower when starting from a tree. If you hit an animal, check on it. https://www.ifaw.org/au/resources/wildlife-rescue-app An app to get the closest wildlife rescue contact. -
By Murray_Calavera · Posted
My dream is also to have a proper hoist, but I don't think it will ever happen. My quickjack is probably as close as I'll ever get, it really is very good though. -
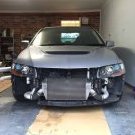
Yeah we keep on in the dailies, it is pretty poor how many animals get hit and the driver leaves without checking....have saved a couple of little ones over the years. Bit of a gruesome job though, pouches generally need to be cut open because they are so tight and often the joey doesn't realise mum is gone so they are still locked onto the teat. I checked the modules in front of the DS wheel where an oil cooler should go.... There is the radar unit - that can go for race use) One of the 2 HX water pumps, the silver cylinder. That needs to be kept but might be able to be relocated But the bad news, the big computer mounted vertically in front of the wheel (blocking any potential air exit) is the electric steering computer. That is required until/unless i do a hydraulic steering conversion, and in CAD based modern car design it is not like I can just pop a big unit like that somewhere else (plus the loom would be too short anywhere else too). So, the passenger side is OK to clear out (just use a smaller washer reservoir, potentially elsewhere), but the DS no beuno
-
Well, all the best with the new camry It was interesting to hear about the UK process, it is generally a lot more streamlined here with a shipping agent looking after all the import side (noting the exact final price can still be a surprise.....) and I've used a few different brokers on the japan (or US) side, and never had any trouble with any of them....luck of the draw I guess. You mentioned you didn't get the auction sheet (understandable since you bought it from a dealer, not auction), but I always try and get hold of that because they are pretty thorough. I've imported 2x R grade vehicles over the years and both were fine, repairs in Japan are pretty thorough compared to here in Oz.
-


1.thumb.png.36afd656b26d55f5d425fc76e21561f2.png)


Recommended Posts
Create an account or sign in to comment
You need to be a member in order to leave a comment
Create an account
Sign up for a new account in our community. It's easy!
Register a new accountSign in
Already have an account? Sign in here.
Sign In Now