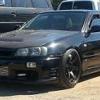
R34 Gtt Injector Question, Query After Install.
Announcements
-
Similar Content
-
Latest Posts
-
ok so if i wanted to go 18's i would go for 8's in front 30+ or 32+ off set at front and the back 9 would be ok? what offset should i aim for.. then can i do some hunting for wheel rim choices.. If i get this - will this fit all around: Size: 18 x 8.5 +37 - n what tyres size tyre should i get for front n back?
-
By GoHashiriya · Posted
Absolute f*cking nightmare. I had to take breaks constantly, and I was always pissed off when I got home. The line split in Italy on day 2 (we drove from the Netherlands), lol. Driving any narrow European town was... well, sh*t. Appreciate it man. Here, I'll just drop a favourite from the load I took on Saturday. I'll update here when things happen with the car, the thing is, with stock power and almost everything chassis-wise taken care of, there really are no problems. 268,000kms now and counting. -
Ah! I actually managed to snag a lightly used set.... that aren't so suitable for me right now. They don't work on a GTT without some cutting or creative heat moulding. I thought about reselling them myself cause I didn't want to murder them, but it looks like I'm probably going to attempt to murder them/melt them because I may as well. @GTSBoy @PranK can somebody close this thread?
-
Hey mate, I have a set, one is slightly damaged but wont be noticable once installed. Shoot me a message if your still after them
-
I couldn't wait But, the black constant tension hose clamps were too thick and there wasn't enough clearance at the T/B and I couldn't get it to seat properly, so I had use a silver one there I also added some 3" silicone over the alloy bit that goes through to hole on the radiator support as it looked like it was sitting on the edge of the hole in the radiator support, I never noticed a rattle or anything, but there was a witness mark It is basicly done, and I can live with the silver hose clamp at the T/B, I will get a black clamp for the head vent though where it is attached to the bulkhead fitting It never stops...LOL, only issue now with the shock tower brace is it slightly touches the under bonnet liner now, if I leave it it will either wear some paint off the brace where it touches, or damage the liner, so I removed the liner to see what I have to work with, with the liner removed I have about 20mm of clearance, but sadly the middle part of the underside of the bonnet is only dusted with paint and looks crap, so I cannot have that, but.... as I have a roll of Carbuilders premium under bonnet insulation in the garage laying around that is only 5.5mm thick (we were going to use it on the boys Patrol, but he crashed the front of it a few months and it was written off, hence why he now drives my old Honda Accord Euro), I'll use the OEM liner as a template and get the Carbuilders stuff fitted up to cover that dusted paint up
-


Recommended Posts
Create an account or sign in to comment
You need to be a member in order to leave a comment
Create an account
Sign up for a new account in our community. It's easy!
Register a new accountSign in
Already have an account? Sign in here.
Sign In Now