Jump to content
SAU Community

Recommended Posts

Hello All,

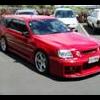
Long time no see. Due to personal reasons I am selling my R32 GTR. It has 70,995 genuine km's on it. The original owner (in Japan) was the chief engine builder for Nismo. The next owner was the ex head mechanic of Nissan. Then me, who proceeded to modify the hell out of it. It's been garaged it's entire life, no accidents etc and is immaculate.

I do not know what the import rules are for Aussie I am afraid (I am in NZ). And yes, the A/C was completely overhauled and works like a freezer :)

Performace:

580.5kW / 789.3HP / 842Nm @ The Wheels

98 RON Pump Gas

580kW was at 1.8 bar.

556kW @ 1.7 bar.

I just had it “detuned” to 540kW @ 1.7 bar after we changed the cam timing to bring everything in 800rpm earlier.

Engine:

RB26DETT (Tomei stroked to 2.8 litre)

Each engine component balanced to 1 milligram

N1 Block

Tomei Forged Crank

Tomei Forged Pistons

Tomei Forged Conrods

ARP Conrod Bolts

Custom Ported and Polished Head

Custom Valve and Valve Seat Design

Tomei Cam Shafts (11mm lift, 270 duration)

Tomei Slide Cam Pulleys

Tomei Valve Springs (Step 2)

Tomei Valve Spring Retainers (Step 2)

Tomei Valve Buckets (Step 2)

Tomei Valve Guides

Nismo Plenum

N1 Oil Pump

Nismo Oil Baffles

HKS T51R KaiBB Turbo

HKS Extractor Manifold

HKS Front Pipe

HKS Drag 60mm External Wastegate

HKS 100mm Dump Pipe

A’PEXi 100mm Exhaust

Custom Electronic Exhaust Bypass System

HKS Air Filter

HKS Map Sensor

HKS Intake Piping Kit

HKS Compressor Outlet Piping

Twin ARC Blow Off Valves

Nismo Engine Mounts

Nismo Gearbox Mount

Nismo Metal Head Gasket

Tomei Metal Throttle Gaskets

Tomei Metal Intake Gaskets

Tomei Oil Restriction

Nismo Main Bearings

Nismo Big End Bearings

Nismo Centre Bearings

Complete Nismo Seal Set

Gates Racing Belts

Blitz 10 Series Racing Platinum Plugs

HKS Metal Exhaust Gaskets

Procoated Piston Crowns

Procoated Piston Walls (Teflon)

Procoated Manifolds

Procoated Dump Pipe

Custom Oil Catch Can

Custom Air Separator

Custom Ignition System

Fuel System:

Nismo Lift Pumps (x2)

Bosch 044 Drive Pumps (x2)

Dual Surge Tanks

Sard 1,000cc Injectors

Sard Fuel Pressure Regulator

Tomei Fuel Rail

Cooling:

ARC 600mm x 300mm x 115mm Core FMIC

ARC Primary Oil Cooler

SETRAB Secondary Oil Cooler

GReddy Oil Filter Relocation Kit

GReddy Hard Piping Kit

GReddy Radiator Piping

Tabata Twin Core Alloy Racing Radiator

Custom Power Steering Cooling System

Suspension:

External Reservoir Suspension

ARC Sway Bars

ARC Twin Rose Joint Adjustable Links

JIC Adjustable Toe Arms - Rear

Ikeya Formula Adjustable Camber Arms – Rear

NAMS HICAS Arms

Midori Adjustable Castor Rods – Front

HKS Kansai Strut Braces (front and rear)

Drivetrain:

Twin Synchro Gearbox

Nismo Super Coppermix Twin Plate Clutch

Nismo Chromium Molybdium Fly Wheel

Nismo Pressure Plate

Nismo Release Bearing

Nismo Slave Cylinder

Cusco Clutch Controller

Brakes:

BIOT JGTC 360mm 2 piece rotors (front) 350mm single piece (rear),, Brembo Calipers front and rear

Project Mu 999 Pads

Tomei Brake Master Cylinder Stopper

Electronics:

HKS F-Con V Pro ECU

HKS EVC V Boost Controller

HKS Launch Control

HKS Anti Lag

GRID TS Dancer

HKS Turbo Timer

Defi BF Boost Gauge

Defi BF Fuel Pressure Gauge

Defi BF Oil Pressure Gauge

Defi BF Exhaust Temp Gauge

Defi BF Oil Temp Gauge

Defi BF Water Temp Gauge

QTP Controller

Exterior:

N1 Bumper

N1 Nostrils

N1 Bonnet Lip

Nismo side skirts

Nismo End Caps

HKS Carbon Air Diversion Plate

Custom Head Lights Modified and fitted with Audi HID projector lenses (thus legally and properly HID converted)

Veilside mirrors

Rear diffuser

Red paint with purple pearl

Interior:

Nismo Instrument Panel

Series 3 R33 GTR Seats

Nismo Gear Knob

Momo Wheel

Nismo Floor Mats

Rolling:

Rays / Volk GTC 18” x 10” 2 piece forged +17 Wheels

265 x 35 R18 tyres

ICE:

Pioneer AVH-P7950DVD Touch Screen DVD

Kicker ZX850.4 Amp

Kicker ZX750.1 Amp

Kicker Remote Bass Control

Kicker Hyper Flex Power Wire

Kicker S8L7 Subs (x2)

Custom In-Door Pods

Removable Sub Enclosure in Boot

Removable Extra Battery

Cooling Fans

Additional:

Custom Radiator Breather Tank

Custom Overflow Tank

Custom PS Reservoir

Custom Oil Catch Can

Custom Stereo Battery Braces

Custom Fuel Reg Brackets

All Oil Lines Braided

All Fuel Lines Braided

All Water Lines Braided

All Vacuum Lines Braided

All Manifold Lines Braided

All Wastegate Lines Braided

There is more, but this is all I can recall immediately. I do know I have spent over $200,000 (the FMIC was $4.5k, sway bars $4.5k, hell, the crank alone was $16k, and I have most of the receipts, and build pic’s.

I want AUD$60,000

Shipping is the buyers responsibility.

As I live at work and have severely limited internet access, people can email me at [email protected] if I am too slow to respond here (apologies in advance).

The car has a Thatcham Standard alarm, and various other security measures. I will send detailed instructions and diagrams of where everything is and how it all works.

The car has not been hacked in to to fit everything. Anything that was custom made was done so utilising factory holes and threads (e.g. the CNC machined solid one-piece aluminium 25mm spacer with 6 arches in the boot to get the 6 -6AN lines though using the factory fuel pump cover hole). The only holes drilled were in the rear bumper to mount the diffuser (6mm diameter, and underneath where you can not see them).

There is also a 6mm floor that sits on top of the aluminium box section in the boot and sits under the sub box (not pictured, but sub box locks over the rear strut bar and sits above the amp you can see in the second to last pic, and is removable in 30 seconds [2 clamps and wiring unplugs with Anderson Clamps]) and carpet for over the floor so you can still use the boot.

Pics:

Magilla_3_zpsd312343a.jpg

DSC08279_zps24afe810.jpg

Magilla2.jpg

DSC08379_zps28af7c5c.jpg

DSC08370_zps3170c08a.jpg

DSC08348_zps2c85bde9.jpg

DSC08333_zps12072cb1.jpg

DSC08346_zpseb718b43.jpg

DSC08337_zps3b5c4ef0.jpg

DSC08328_zps11853d58.jpg

DSC08319_zpsd28ed469.jpg

DSC08314_zpse9df0de0.jpg

DSC08304_zps3b97ce78.jpg

DSC08285_zps20a70a49.jpg

DSC08307_zps43bfb241.jpg

DSC08295_zps8f67a6df.jpg

DSC08341_zps55ba99a9.jpg

IMG_0402.jpg

Brakes_zpsef3fb2a0.jpg

IMG_0391-1.jpg

DSC08275_zpsd8cc7183.jpg

DSC08274_zpsecd1137f.jpg

Link to comment
https://www.sau.com.au/forums/topic/417194-r32-gtr-580kwwheels/
Share on other sites

You guys really know how to make a man feel bad about selling a car...

Don't think it could be registered here but f**k me it's beautiful would make an awesome track car I guess too

I took it to the track. Turns out you can have a lot of 4WD drifting fun in the rain:

DSC06613.jpg

Then I took it out in the dry. Turns out weather makes no difference when the vehicle is in the hands of the same driver:

404778_10150653910184665_1849462913_n_zpsa3be0568.jpg

Create an account or sign in to comment

You need to be a member in order to leave a comment

Create an account

Sign up for a new account in our community. It's easy!

Register a new account

Sign in

Already have an account? Sign in here.

Sign In Now


  • Similar Content

  • Latest Posts

    • Good luck on the weekend mate
    • Must have been an absolute nightmare to drive when the power steer was out, the rack ratio/wheel size/caster is all set up for power assistance
    • Welcome to SAU, what are you looking at buying?
    • I checked the injectors again (1 and 2, since they’re easiest to access) to make sure they weren’t clogged. Even though the entire fuel system had been cleaned, I wanted to be certain. Everything looked clean, so I reinstalled and connected everything. When I started the car to confirm everything was okay, it immediately revved up high, so I shut it off straight away. I checked to see if I’d missed a vacuum hose or something, but everything was connected. On the second attempt, the car ran without the high idle, but I noticed a distinct “compressed air” sound coming from the engine bay. Tracing the sound, I pushed injector #6 forward slightly and the noise stopped — it turned out it wasn’t seated properly, despite the fuel rail being bolted down. While holding it in place, the car idled steadily without stalling and ran for over 5 minutes. At this point, I pulled all six injectors out just in case I hadn’t seated them correctly or dirt had gotten onto the O-rings. Unfortunately, I discovered that I had damaged 3 out of 6 injectors (the OEM 270cc ones) during installation. So yes, this was my fault. Since only the pintle caps were damaged, I’ve ordered a Fuel Injector Service Kit from NZEFI to refurbish them. In the meantime, I reinstalled my new injectors – the car now idles fine for over 15 minutes without stalling. I have not attempted to drive it so far. It’s not perfect yet, as it hesitates when the throttle is pressed, but it’s a big improvement. Unplugging the IACV with the new injectors idles at around 800rpm, even with the IACV screw tightened fully. But this is probably due to tune.
    • I wanted to try and preserve the front bumper as long as possible, they're not cheap and are made to order in Japan. Taking inspiration from my previous K11 Micra build where I made an undertray for the Impul bumper, I did the same for this BN Sports bumper but a little slimmed down.  This time round I only made a 'skid plate' (if that's the correct wording/term) for just the bumper surface area, the Micra version covered the gap like an undertray. Starting off with a sheet of mild steel approx. 0.9mm thick 4ft x 2ft in size. I traced around the bumper, cut it out and cleaned the edges. Luckily I was able to get two halves from one piece of metal In the video I installed it as is, but I've since then I've removed it to spray and add a rubber edging trim. The rubber trim is suitable for 1-2mm and it's a really nice tight fit. The bolts had to be loosened due to the plates being too tight against the bumper, the trim wouldn't push on I used some stainless M6 flat headed bolts for a flusher finish (rather than hex heads poking down), I believe this style fastener is used for furniture too incase you struggle to source some. The corner's are a little wider, but this may be an advantage incase I get close to bumping it  The front grill got some attention, finally getting round to repairing it. Upon removal one fixing pulled itself out of the plastic frame, one side is M8 that fixes inside of the frame, where as the other side is M5. Not knowing I could get replacements, I cut down an M8 bolt, threaded it inside the frame along with a decent amount of JB Weld.  The mesh was replaced to match the bumper. One hole on the bonnet/hood had to be drilled out to 8mm to accommodate the new stud, once the glue had set it could be refitted. I think the reason the grill was double meshed was to hide the horn/bonnet latch (which makes sense) but I much prefer it matching the bumper Bumper refitted and it's looking much better IMO The Youtube video can be seen here: https://www.youtube.com/watch?v=bVZP35io9MA
×
×
  • Create New...