Jump to content
SAU Community

Recommended Posts

i have a r32 gtr, and it keeps ripping the std exhaust side engine mount, i am converting to a rb30 so it will be higher 38mm???, my turbo is already hitting the bonnet (custom manifold) t8834d how can i lower engine (it has a 10mm spacer already) with mounts, and create a stronger mounting setup in the process

any one made ther own mounts? or lowered there engine? from the 4 bolts on block? or via the mount itself

urethane?

other plastics?

alloy? (what are the side effects of a true solid mount)

and how much and a rb30 (4wd with 10mm adaptor) be lowered on a gtr 32 sub fram without contact, i may be able to angle engine on exh side to stop turbo hitting but relise there will be some bonnet mods required,

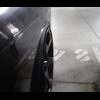
see pic, this gives you a idea how high already (with rb26 engine)

You're screwed. If you try to lower the engine 30 mm and then add a 10 mm adaptor for the 4wd, this means the sump is 40 mm lower, the gearbox is 40 mm lower, the front drive shafts are 40 mm lower etc etc.

About 5 years ago I built an RB30DET (RB30E/25DE) in an R32GTR and it cleared the standard bonnet easily. By enough to have a rather thick strut brace as well. So there is no basic problem wiht fitting an RB30 into an R32. I believe your ONLY answer is to lower the turbo. It is far less complex and less prone to introducing other problems.

As for engine mounts, I suggest an engine brace would be a good idea if you keep ripping LHS mounts. This is not unusual as RB's turn clockwise, consequnetly there are a number of brands of engine braces with shock aborders available . Nismo make rubber hardeness up engne mounts and Noltec have polyurethane mounts.

I have a couple of cars with solid mount engines (Super Tourers) and they vibrate horrendously, stuff is always falling off and cracking. Not something I would recommend.

Hope that helps:cheers:

Noltec have polyurethane mounts.   do they have a web site? yea i think ill just modify my bonnet, manifold looks to well done to hack up, racepro in nz make a bonnet with a vent right above where it hits,

www.noltec.com.au

I have had a closer look at your photo, the turbo doesn't look particularly high. Does it only hit on the bonnet when the engine is flexing? Or is it on it when at rest?:rofl:

You're screwed. If you try to lower the engine 30 mm and then add a 10 mm adaptor for the 4wd, this means the sump is 40 mm lower, the gearbox is 40 mm lower, the front drive shafts are 40 mm lower etc etc.

the gearbox and axel angle shouldnt mater that much, i am more worried about hitting the sub frame, what if i angle the engine more so exh side is lower and intake stays the same? that way only the front driv shafts should be affected, the gearbox will just twist on its mounts, this may give me a little height decrease

www.noltec.com.au

I have had a closer look at your photo, the turbo doesn't look particularly high.  Does it only hit on the bonnet when the engine is flexing? Or is it on it when at rest?:rofl:

idd say only when flexing, but monuts were ok when i removed the 26 engine on saturday, it has a small mark on top of turbo and a small mark on bonnet where they had been rubbing, nothin major, would a bonnet look gay with a hump where the turbo sits? it may look good with a hump and a reverse bonnet scoop tho?

i should of taken a picture side on before i reomved engine, here is a pic with brace insatlled

if you see the manifold picture is it to complex to re weld, if it was just the pictured filter that hit i wouldnt worrie, but since its the comp housing itself i sorta have to, i couls also rase the bonnet at the back for heat flow, this will help a litte , but not 38mm, 38mm is deck height increase with 26 to 30?

i should of taken a picture side on before i reomved engine, here is a pic with brace insatlled

if you see the manifold picture is it to complex to re weld, if it was just the pictured filter that hit i wouldnt worrie, but since its the comp housing itself  i sorta have to, i couls also rase the bonnet at the back for heat flow, this will help a litte , but not 38mm, 38mm is deck height increase with 26 to 30?

Ah, it's not the height of the turbo that is the only problem, it is mounted further forward than usual as well. This is where the bonnet droops down towards the front. Personally I would change the angle of the turbo mount flange on the exhaust manifold. Angle the turbo downwards at the front and rotate it 15 degrees clockwise. Not a particualry difficult job for a competant welder.

RB30 is 85 mm stroke and RB26 is 73.7mm stroke, so that's 11.3 mm longer stroke which = 5.65mm taller block to accommodate the extra stroke. In addition the RB30 conrods are ~30mm longer. Hence the usually accepted number is ~35mm taller.

:cheers:

Ah, it's not the height of the turbo that is the only problem, it is mounted further forward than usual as well.  This is where the bonnet droops down towards the front.  Personally I would change the angle of the turbo mount flange on the exhaust manifold.  Angle the turbo downwards at the front and rotate it 15 degrees clockwise.  Not a particualry difficult job for a competant welder.

although that will mean a new / refitted dump as well then

Create an account or sign in to comment

You need to be a member in order to leave a comment

Create an account

Sign up for a new account in our community. It's easy!

Register a new account

Sign in

Already have an account? Sign in here.

Sign In Now


  • Similar Content

  • Latest Posts

    • God damnit. The only option I actually have in the software is the one that is screenshotted. I am glad that I at least got it right... for those two points. Would it actually change anything if I chose/used 80C and 120C as the two points instead? My brain wants to imagine the formula put into HPtuners would be the same equation, otherwise none of this makes sense to me, unless: 1) The formula you put into VCM Scanner/HPTuners is always linear 2) The two points/input pairs are only arbitrary to choose (as the documentation implies) IF the actual scaling of the sensor is linear. then 3) If the scaling is not linear, the two points you choose matter a great deal, because the formula will draw a line between those two points only.
    • Nah, that is hella wrong. If I do a simple linear between 150°C (0.407v) and 50°C (2.98v) I get the formula Temperature = -38.8651*voltage + 165.8181 It is perfectly correct at 50 and 150, but it is as much as 20° out in the region of 110°C, because the actual data is significantly non-linear there. It is no more than 4° out down at the lowest temperatures, but is is seriously shit almost everywhere. I cannot believe that the instruction is to do a 2 point linear fit. I would say the method I used previously would have to be better.
    • When I said "wiring diagram", I meant the car's wiring diagram. You need to understand how and when 12V appears on certain wires/terminals, when 0V is allowed to appear on certain wires/terminals (which is the difference between supply side switching, and earth side switching), for the way that the car is supposed to work without the immobiliser. Then you start looking for those voltages in the appropriate places at the appropriate times (ie, relay terminals, ECU terminals, fuel pump terminals, at different ignition switch positions, and at times such as "immediately after switching to ON" and "say, 5-10s after switching to ON". You will find that you are not getting what you need when and where you need it, and because you understand what you need and when, from working through the wiring diagram, you can then likely work out why you're not getting it. And that will lead you to the mess that has been made of the associated wires around the immobiliser. But seriously, there is no way that we will be able to find or lead you to the fault from here. You will have to do it at the car, because it will be something f**ked up, and there are a near infinite number of ways for it to be f**ked up. The wiring diagram will give you wire colours and pin numbers and so you can do continuity testing and voltage/time probing and start to work out what is right and what is wrong. I can only close my eyes and imagine a rat's nest of wiring under the dash. You can actually see and touch it.
    • So I found this: https://www.efihardware.com/temperature-sensor-voltage-calculator I didn't know what the pullup resistor is. So I thought if I used my table of known values I could estimate it by putting a value into the pullup resistor, and this should line up with the voltages I had measured. Eventually I got this table out of it by using 210ohms as the pullup resistor. 180C 0.232V - Predicted 175C 0.254V - Predicted 170C 0.278V - Predicted 165C 0.305V - Predicted 160C 0.336V - Predicted 155C 0.369V - Predicted 150C 0.407V - Predicted 145C 0.448V - Predicted 140C 0.494V - Predicted 135C 0.545V - Predicted 130C 0.603V - Predicted 125C 0.668V - Predicted 120C 0.740V - Predicted 115C 0.817V - Predicted 110C 0.914V - Predicted 105C 1.023V - Predicted 100C 1.15V 90C 1.42V - Predicted 85C 1.59V 80C 1.74V 75C 1.94V 70C 2.10V 65C 2.33V 60C 2.56V 58C 2.68V 57C 2.70V 56C 2.74V 55C 2.78V 54C 2.80V 50C 2.98V 49C 3.06V 47C 3.18V 45C 3.23V 43C 3.36V 40C 3.51V 37C 3.67V 35C 3.75V 30C 4.00V As before, the formula in HPTuners is here: https://www.hptuners.com/documentation/files/VCM-Scanner/Content/vcm_scanner/defining_a_transform.htm?Highlight=defining a transform Specifically: In my case I used 50C and 150C, given the sensor is supposedly for that. Input 1 = 2.98V Output 1 = 50C Input 2 = 0.407V Output 2 = 150C (0.407-2.98) / (150-50) -2.573/100 = -0.02573 2.98/-0.02573 + 47.045 = 50 So the corresponding formula should be: (Input / -0.02573) + 47.045 = Output.   If someone can confirm my math it'd be great. Supposedly you can pick any two pairs of the data to make this formula.
×
×
  • Create New...