Jump to content
SAU Community

Recommended Posts

Very good day guys. I've been to just about every single event (except motorbikes) that WSID has run since day 1 and I have to say that today rated easily in the top 3 events i've attended.

The style of the event made it extremely easy to muck around with tyre pressures, work out the best rpm to launch at, watch other peoples techniques etc without having to wait in line 45mins between runs (Wed nite street meets). I'm just kicking myself that I sold my Skyline 3mths ago, certainly would have had time to figure out that elusive 13sec pass today.

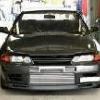
Apart from the PB's of 2rismo, Stacie, Paul etc i'd actually like to mention the efforts of Glen in his Black R33 GTS-t whom I was helping most of the day. The car only has a full exhaust, air filter and 10psi boost and we got it from 14.5@98mph down to a 13.5@100mph. That car can't be pushing more than 170rwkw and for a first days effort at a drag strip I think that's top work. I think a 13sec flat will be on the cards for the next event by the time a PowerFC and FMIC is fitted/tuned.

Apart from Marks very minor fluid spill after lunch it was really good to see a day with no holdups, that is extremely rare at WSID.

p.s. any pics/video of my $hitbox are more than welcome

Mark I have about 5 of your runs/burnouts on the camcorder. It's a neighbours camcorder so hopefully it won't take me too long to get it into a digital format for you.

  • Replies 275
  • Created
  • Last Reply

Top Posters In This Topic

Top Posters In This Topic

Posted Images

Guest DIRTgarage

Thanks to all who organised a great day, and appreciate all the support from the SAU'ers.

Well...10.3@134MPH who would have thought.....A 2530 powered GTR takes 5th place (HPI street drag list) off the T51R SPL powered JPC GTR. Just goes to show that you can run the numbers without a big single. Fixing the transfer case (not transfering enough front drive) and setting up a two-step rev limiter could see TWOOGLE a nine!......stay tuned folks!!

P.S. 2rismo love your stuff bud! Nice numbers.

woohoo, what a day!!! Big ups to the organisers as it was an awesome day :)

I had about 8 runs with a PB of 11.2 at 122mph which Andrea and i are absolutely stoked over. The cars previous best was a 12.0 at 117mph. Was trying to back up the 11.2 so hard i ended up frying the clutch and had to tow it home :( :( she will be back bigger and badder than it is now though so its all good :):(

Congrats to Paul and Stacey, that 10 was to easy for you, now you gotta go chasing that 9 second pass :(:D I am sure with some giggle gas it will happen sooner rather than later :D

Adrian, congrats as well on your new PB :huh: shame you suffered a similar fate as us and your car didnt drive home but thats drag racing i guess.... sometimes you win, some times you lose :(

There were so many cars and so many awesome times run by all and i am happy to see this one go off without any major hitches. I just want to know when we need to have the car fixed by so i can make the next day..... mmmm, a retune with some ET 103 should get us that 10 we are so close to :D :D :D so someone set another date..... please.....

Now for the pics... i am sure Merli got quite a few so where are they :D:D

Gotta love this pic :D

DSC_0105.jpg

Thanks to all who organised a great day, and appreciate all the support from the SAU'ers.

Well...10.3@134MPH who would have thought.....A 2530 powered GTR takes 5th place (HPI street drag list) off the T51R SPL powered JPC GTR. Just goes to show that you can run the numbers without a big single. Fixing the transfer case (not transfering enough front drive) and setting up a two-step rev limiter could see TWOOGLE a nine!......stay tuned folks!!

P.S. 2rismo love your stuff bud! Nice numbers.

Paul mate awesome time and a huge congrats to yourself and Stace but just double check that HPI mag as I'm looking in No56 and it says the APC T51r GTR has ran 9.778 and is in 4th position

You would think that HPI would update its online records before they publish them in the mag ...

http://www.hpi.com.au/drag_records.php

Looks like 10's will be required for almost all turbo categories soon :huh:

Well done to everyone who participated on the day and to those who set a PB!

Huge congrats to Paul with the 10.3. Awesome stuff. Time to rebuild the transfer case and get the front wheels spinning too! Stace, into the 11's right next to me. Well done buddy.

Brad, I told you the tyres were the $hit, I said to flog the burnout hard and look what happens?!?!? 11.2 !!! :) Well done buddy - hope the car's back on the road sooner rather than later.

Thanks Adam for the organisation - day went smoother than any other meet at WSID I've ever attended.

Rotary times? No? No? Didn't think so :huh: Who should be sponsored by Kleenex now biatches!!!

Adrian

Booted it over the line Paul well done. I have some of your runs on vid but left prior to your 10.3 which is a shame but then I guess you don't plan on staying there long? Where are all the other GTR's in NSW as I only saw yours Paul flying the flag?

Slot car had issues on the dyno Sat night finally found out one of the 044 pumps was making noise but no flow and a few other things so unfortunately could not make it.

2rismo maybe I could not see it in this thread what was your best time and yes I have vid of your burnout and a few runs, email me and I can send it to yoiu.

Yep fish tailing down the track got a few and should have mentioned this. I think I just created a lot of work for myself. Lucky I am an enthusiast hey. I can't remember any other cars I captured but will check and let anyone else know. I was not there that long and went home frustrated, I find it hard to watch rathe have a go.

Create an account or sign in to comment

You need to be a member in order to leave a comment

Create an account

Sign up for a new account in our community. It's easy!

Register a new account

Sign in

Already have an account? Sign in here.

Sign In Now


  • Latest Posts

    • Did this end up working? Did you take some pictures?
    • And finally, the front lower mount. It was doubly weird. Firstly, the lower mount is held in with a bracket that has 3 bolts (it also acts as the steering lock stop), and then a nut on the shock lower mount itself. So, remove the 3x 14mm head bolts , then the 17mm nut that holds the shock in. From there, you can't actually remove the shock from the lower mount bolt (took me a while to work that out....) Sadly I don't have a pic of the other side, but the swaybar mounts to the same bolt that holds the shock in. You need to push that swaybar mount/bolt back so the shock can be pulled out past the lower control arm.  In this pic you can see the bolt partly pushed back, but it had to go further than that to release the shock. Once the shock is out, putting the new one in is "reverse of disassembly". Put the top of the shock through at least one hole and put a nut on loosely to hold it in place. Put the lower end in place and push the swaybar mount / shock bolt back in place, then loosely attach the other 2 top nuts. Bolt the bracket back in place with the 14mm head bolts and finally put the nut onto the lower bolt. Done....you have new suspension on your v37!
    • And now to the front.  No pics of the 3 nuts holding the front struts on, they are easy to spot. Undo 2 and leave the closest one on loosely. Underneath we have to deal with the wiring again, but this time its worse because the plug is behind the guard liner. You'll have to decide how much of the guard liner to remove, I undid the lower liner's top, inside and lower clips, but didn't pull it full off the guard. Same issue undoing the plug as at the rear, you need to firmly push the release clip from below while equally firmly gripping the plug body and pulling it out of  the socket. I used my fancy electrical disconnect pliers to get in there There is also one clip for the wiring, unlike at the rear I could not get behind it so just had to lever it up and out.....not in great condition to re-use in future.
    • Onto the rear lower shock mount. It's worth starting with a decent degrease to remove 10+ years of road grime, and perhaps also spray a penetrating oil on the shock lower nut. Don't forget to include the shock wiring and plug in the clean.... Deal with the wiring first; you need to release 2 clips where the wiring goes into the bracket (use long nose pliers behind the bracket to compress the clip so you can reuse it), and the rubber mount slides out, then release the plug.  I found it very hard to unplug, from underneath you can compress the tab with a screwdriver or similar, and gently but firmly pull the plug out of the socket (regular pliers may help but don't put too much pressure on the plastic. The lower mount is straightforward, 17mm nut and you can pull the shock out. As I wasn't putting a standard shock back in, I gave the car side wiring socket a generous gob of dialectric grease to keep crap out in the future. Putting the new shock in is straightforward, feed it into at least 1 of the bolt holes at the top and reach around to put a nut on it to hold it up. Then put on the other 2 top nuts loosely and put the shock onto the lower mounting bolt (you may need to lift the hub a little if the new shock is shorter). Tighten the lower nut and 3 upper nuts and you are done. In my case the BC Racing shocks came assembled for the fronts, but the rears needed to re-use the factory strut tops. For that you need spring compressors to take the pressure off the top nut (they are compressed enough when the spring can move between the top and bottom spring seats. Then a 17mm ring spanner to undo the nut while using an 8mm open spanner to stop the shaft turning (or, if you are really lucky you might get it off with a rattle gun).
    • You will now be able to lift the parcel shelf trim enough to get to the shock cover bolts; if you need to full remove the parcel shelf trim for some reason you also remove the escutcheons around the rear seat release and you will have to unplug the high stop light wiring from the boot. Next up is removal of the bracket; 6 nuts and a bolt Good news, you've finally got to the strut top! Remove the dust cover and the 3 shock mount nuts (perhaps leave 1 on lightly for now....) Same on the other side, but easier now you've done it all before
×
×
  • Create New...