Jump to content
SAU Community

Recommended Posts

i think there was a post like this a while back but i cant find it now.

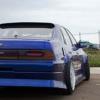
Anyway, my kit has arrived and I want to see how well it fits before I get it painted. My problem is removing the stock bumper. On the rear i have taken out: 1 screw each side closest to the wheel and 2 bolts on each side from the boot. However now I cant see any others. I have a feeling that they are under the lights <_<

Can anyone point out to me where they are roughly, and also how the front is attached (front seem easier than the rear) :D

Thanks people.

Link to comment
https://www.sau.com.au/forums/topic/85333-removing-bumpers/
Share on other sites

hey mate if its stock rear bumper, you do not need to remove the rear taillights.

ok the bolts listed:

- OUTSIDE UNDERNEATH - 3 or 4 Left AND Right (so connecting to wheelarch and rear 1/4)

- INSIDE - 3 running along the inside of the 1/4 panel Left AND Right sides

- INSIDE - 4 BIG BOLTS to metal rear support bar (on right hand side you will need to unscrew metal cover that covers wiring to fuel tank/pump thing)

- OUTSIDE REAR - 1 bolt from number plate bracket to bumper

once all this is done, you should be able to slide the bumper out, but dont do it too much yet. you will need to

- unscrew numberplate lights (2screws on each) and also disconnect.

this should remove this whole assembly...

... NOW - you should be able to remove the bumper from the metal support

- REFIT the metal support ( 4 BIG metal BOLTS )

and your after market bumper should sit ontop of it nicely and screw into 2 or 3 points at the rear of the wheel arch

anymore questions post up of pm me :O

how do i know this? - did it last week when borrowing a rear bumper off another stock ceff... had to remove and refit.

Edited by huddy
Link to comment
https://www.sau.com.au/forums/topic/85333-removing-bumpers/#findComment-1545759
Share on other sites

a bumper u borrowed from

KANSAI AUTOMOTIVE

452 Port Rd, West Hindmarsh, Adelaide, South Australia 5007

Ph 08 83467077, Fax 08 83467085

E-Mail: [email protected]

sorry but a shameless free plug never hurts

he has plenty of a31 bits,give them a call

ask for terry and tell him your a mate of softys,will look after u

Link to comment
https://www.sau.com.au/forums/topic/85333-removing-bumpers/#findComment-1547107
Share on other sites

  • 1 month later...
hey mate if its stock rear bumper, you do not need to remove the rear taillights.

ok the bolts listed:

- OUTSIDE UNDERNEATH - 3 or 4 Left AND Right (so connecting to wheelarch and rear 1/4)

- INSIDE - 3 running along the inside of the 1/4 panel Left AND Right sides

- INSIDE - 4 BIG BOLTS to metal rear support bar (on right hand side you will need to unscrew metal cover that covers wiring to fuel tank/pump thing)

- OUTSIDE REAR - 1 bolt from number plate bracket to bumper

once all this is done, you should be able to slide the bumper out, but dont do it too much yet. you will need to

- unscrew numberplate lights (2screws on each) and also disconnect.

this should remove this whole assembly...

... NOW - you should be able to remove the bumper from the metal support

- REFIT the metal support ( 4 BIG metal BOLTS )

and your after market bumper should sit ontop of it nicely and screw into  2 or 3 points at the rear of the wheel arch

anymore questions post up of pm me :P

how do i know this?  - did it last week when borrowing a rear bumper off another stock ceff... had to remove and refit.

Well I finally got around to taking my bumper off today.

Except i cant find the 4 big bolts for the rear support bar! I have pulled off the trim that covers the inside of the taillights but cant see the bolts ?

Do I need to remove the L Shaped plate that covers the fuel pump etc ?

Thanks.

EDIT: Found the bolts under the rubber things. Too wet to take it off but see how it goes tomoz.

Edited by konect
Link to comment
https://www.sau.com.au/forums/topic/85333-removing-bumpers/#findComment-1629031
Share on other sites

Create an account or sign in to comment

You need to be a member in order to leave a comment

Create an account

Sign up for a new account in our community. It's easy!

Register a new account

Sign in

Already have an account? Sign in here.

Sign In Now


  • Similar Content

  • Latest Posts

    • You very likely need to get it on a dyno and tune it. My assumption is, you've got an RB25DET tune in it, which has a different manifold, different injectors, and different cams as a minimum. What O2 sensor are you running?   When you say it runs extremely rich from idle all the way to redline, is this just free revving it you see that?
    • I seem to the be only person that is using a Haltech 2500 on an NA motor, I've installed a Bosch DBW throttle body to the OEM intake manifold and am having problems maintaining AFR even with the wideband o2.  It will run extremely rich at idle and up to redline, but under load it will go extremely lean in the 20s and i'm essentially having to rev it over 4k and feather the clutch to get it up to speed.  I've read a few other threads of about the butterfly, it seems removing the vacuum to it is supposed to have it remain open, i've noticed no difference under 4k with the vacuum line to it plugged.  I'm hoping someone here has had luck using the NA manifold with Haltech, and if they happen to have a tune for it.  
    • I don't know any details, but I really wouldn't be surprised if they do it as a LHD only version, at least initially.
    • Thanks for the replies everyone. Definitely a coolant push. Oil catch can is empty and always has been. As the engine is out now I'll be having a good look over things. I do have some detonation on the piston tops from a trigger issue back about 5 years ago. I felt it and shut off then bought a new ecu and changed the trigger. Never been an issue since. It never hurt the power, its made almost 80hp more since that incident but I will pull the bearing caps to take a look. If the bearings are damaged I will do a bottom end refresh. Head is being re conditioned at the moment and the block will be cleaned and checked to ensure it's flat. I'll go with a kameari gasket and see how it ends up. The other thing I'm not super keen on is the cylinder colours. I suspect this is from the inlet manifold. The plan will be to put it back together, retune and then stick a plazmaman billet inlet on it and retune. I'm happy with the power, if it makes a little more, then great, but I would rather just make everything more efficient at this stage.
    • Maybe they'll look to do a bunch of presales to help inject some cash fast for their financial issues...
×
×
  • Create New...