

Announcements
-
Similar Content
-
-
Latest Posts
-
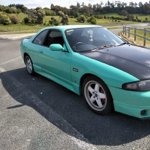
By MissMintyR33 · Posted
Thanks, I'll shim that plug and hopefully it fixes it. Yes still factory turbo for now, still have the misfire it's not as bad but still noticeable -
By MissMintyR33 · Posted
I had someone check the CU, they said it was fine but it could be buggered I was only running around 7-10 PSI on the dual stage controller, but my boost gauge is shit house and needs replacing so I'm not getting a true reading. Then I ran from wastegate pressure as per Turbosmart but still have the same sort of issue -

By Murray_Calavera · Posted
Yeah this is a thing. I've had mine setup like this for a few years now, works fine. If I dredge my memory bank, I think I had to do this after I removed my factory dash. So you've tried it on gate pressure, I'm assuming this is the factory turbo? Did you still have misfire issues with that setup? -
 Power steering is probably because someone has nuked the HICAS CU and you no longer have the variable power asist doing what it is supposed to. How much boost are you running? You are aware that any more than 10 psi on the stock ECU is just asking for it to go to full R&R (that's Rich & Retard, which is effectively Retarded and Retarded!) which kills all the power. Depending on the exact conditions, it can just be runnign on the fat and stupid end of the maps, then the conditions change, you make a little more boost and the ECU goes into panic.
 -
 @BuiltNotBought Just as GTSboy said. If you want driveabilty and more low down torque..keep the stock runners. They are VERY good from a factory. I have them too on my RB25DET NEO and as a GTSboy i have fmic but with stock piping route(i have Blitz intercooler) Iam making around 320 BHP and the car pulls "hard" from like 2,5k all the way to 7k. I have it dyno tuned to mimic N/A power curve and making little less max torque due to the smallbox tranny. But driveability is very great. I had 350Nm below 3k so car feels very quick. EDIT: Not my channel but i saw this and i know that is what i want (and i have exactly this)
-


Recommended Posts
Create an account or sign in to comment
You need to be a member in order to leave a comment
Create an account
Sign up for a new account in our community. It's easy!
Register a new accountSign in
Already have an account? Sign in here.
Sign In Now