Jump to content
SAU Community

Recommended Posts

Yup, went and got her yesterday. Very pleased, few minor issues but nothing unexpected. Steering woble, getting wheels aligned on weekend. HICAS light on, but thats cos boss kit is not HICAS. will get a new one :D

mods:

brass button clutch

nismo suspension

MOMO steering wheel (new on on way from japan)

Blitz dual turbo timer

nismo strut bar

some random jap mags

kakimoto 3 inch cat back (that a good brand ?)

Apexi pod filter (building surround next week )

Brand new respray, 2 pack black

got an Alpine CDA-9855R in my room, get it installed soon hopefully :laugh:

on the way:

ordered already from japan i have new MOMO jet steering wheel

nismo black aluminium gear knob

GReddy oil catch can

HKS fuel pressure regulator

Apexi radiator cap

Got a FMIC sitting in my room right now, when my other stuff arrives ill get it all put on :)

next week:

im sorting out dark ass tinting

gas struts for the bonnet

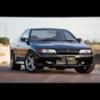
heres some pics, tell me what you think :D

post-22805-1160716859.jpgpost-22805-1160716868.jpgpost-22805-1160716881.jpgpost-22805-1160716890.jpgpost-22805-1160716899.jpgpost-20794-1128054520.jpg

post-22805-1160716907.jpg

Edited by thrtytwo
Link to comment
https://www.sau.com.au/forums/topic/138539-r32-gts-t-type-m/
Share on other sites

looks stragiht and clean man, congrats!

bit Rancho spec tho, needs slamming

haha yeh im gunna dump her at some point :laugh:

gotta get the guards rolled first, it already scrapes at the back whgen i go over a bump at speed :S

Heres some interior/engine pics

can see the door handles need to be painted.

need to get stereo in and off my bedroom floor

air con vents need replaceing, no biggie, going round scrappies next week.

left over tinting needs to be scraped off

had some floor mats in there but i took em out as they were ugly plush grey skyline mats :S (wts :laugh:)

steering wheels for sale as soon as my brand new MOMO jet comes from japan.

new gear/brake boots will be ordered as soon as seller gets back to me :D

im gunna move the turbo timer to beneath the stereo, it keeps falling down (any ideas to make it stick ?)

also need to grab a lighter lol, dont smoke, but it looks daft without it :S

engine bay doesnt look great but once i get oil catch can in, a new aluminium radiator ovwerflow, heat shield for pod and a good degreasing, that should clean it up until i can afford to replace all the lines and get some stuff painted/podered

also i was under the impression that 89 - 90 R32's had blue guage cluster, does that mean sum1 has swapped them round in my car ?

post-22805-1160718573.jpgpost-22805-1160718582.jpgpost-22805-1160718593.jpgpost-22805-1160718605.jpgpost-22805-1160718615.jpgpost-20794-1128054621.jpg

post-22805-1160718627.jpg

also i was under the impression that 89 - 90 R32's had blue guage cluster, does that mean sum1 has swapped them round in my car ?

Its an M-spec...M-spec had black gau.....you know what, I just made that up but possibly :D

haha yeh im gunna dump her at some point :)

gotta get the guards rolled first, it already scrapes at the back whgen i go over a bump at speed :S

Really!, you sure its the guards and not the exhaust?

Could even be your rear suspension setup is too soft and lower = stiffer, that will fix you up shmickington steel :D.....Now that I read it back, it sounds unright! :laugh:

good stuff, cheers for comment :(

NEW PICS ! :(

one of car on street, second is my mate taking photo of paint haha, excuse quality, camera phone, plus dirty black paint :( the nnother car pic. (needs a wash :S )

post-22805-1161099433.jpgpost-22805-1161099471.jpgpost-22805-1161099492.jpg

very nice car, and what do you guys mean by getting your guards rolled ?

if you run your hand around the underside of your wheel arch, at the body line, you will feel that the sheet metal turns 90 degrees and follows the curve, sticks out (in) about an inch.

edit: and thanks ! :D

Edited by thrtytwo

got some of my new bits on. my dad is bringing home brackets for my catch can today aswell, but im still not 100% how to plumb it to an RB20 haha ( any help there ? ) pic of gear knob does it no justice, thats not dust in the "NISMO" bit, just light reflecting back and forth. ill have to get in back seat and get a pic in focus so you can see how nice it actually is. will wait for my new boots to come though. (gear shifter and handbrake boots :) ) steering wheel is mint, im soo happy with it :D and of course the radiator cap, im pretty sure the box says it adds about 3rwkw, but its japanese so i cant be sure :)

will get pics of engine bay once my catch can is mounted and plumbed and ive painted and put back my strut bar. i ordered ne wpassenger side air vent today too, interior will look nice once thats here and i put my head unit in. then off to the trimmers :)

post-22805-1161235956.jpgpost-22805-1161235973.jpgpost-22805-1161235993.jpg

oh now i know cheers dude youv got lots of plans already ! which is good im off to get some wheel spacers for my car now :( i might graba catch can, so later post up a pic for us

cheers sam

yeh will do mate, cheers for comment :)

nice deck bro :(

haha gimme time man :P

i got an alpine 9855R sitting in my room right next to me :)

just gotta pick up some front splits and get it installed.

I've got my old GT-R front/rear brakes (non-Brembo) and factory rims available if you're interested. Not really trying to sell, but a cheap upgrade for you none the less. Drop me a PM if you're keen.

Nice ride BTW - like the 32s in black (although I'm somewhat biased :mellow: )

Create an account or sign in to comment

You need to be a member in order to leave a comment

Create an account

Sign up for a new account in our community. It's easy!

Register a new account

Sign in

Already have an account? Sign in here.

Sign In Now


  • Similar Content

  • Latest Posts

    • Hi, is the HKS  Tower Bar still available ? negotiable ? 🤔
    • From there, it is really just test and assemble. Plug the adapter cables from the unit into the back of the screen, then the other side to the car harness. Don't forget all the other plugs too! Run the cables behind the unit and screw it back into place (4 screws) and you should now have 3 cables to run from the top screen to the android unit. I ran them along the DS of the other AV units in the gap between their backets and the console, and used some corrugated tubing on the sharp edges of the bracket so the wires were safe. Plug the centre console and lower screen in temporarily and turn the car to ACC, the AV should fire up as normal. Hold the back button for 3 sec and Android should appear on the top screen. You need to set the input to Aux for audio (more on that later). I put the unit under the AC duct in the centre console, with the wifi antenna on top of the AC duct near the shifter, the bluetooth antenna on the AC duct under the centre console The GPS unit on top of the DS to AC duct; they all seem to work OK there are are out of the way. Neat cable routing is a pain. For the drive recorder I mounted it near the rear view mirror and run the cable in the headlining, across the a pillar and then down the inside of the a pillar seal to the DS lower dash. From there it goes across and to one USB input for the unit. The second USB input is attached to the ECUtec OBD dongle and the 3rd goes to the USB bulkhead connected I added in the centre console. This is how the centre console looks "tidied" up Note I didn't install the provided speaker, didn't use the 2.5mm IPod in line or the piggyback loom for the Ipod or change any DIP switches; they seem to only be required if you need to use the Ipod input rather than the AUX input. That's it, install done, I'll follow up with a separate post on how the unit works, but in summary it retains all factory functions and inputs (so I still use my phone to the car for calls), reverse still works like factory etc.
    • Place the new daughterboard in the case and mount it using the 3 small black rivets provided, and reconnect the 3 factory ribbon cables to the new board Then, use the 3 piggyback cables from the daughterboard into the factory board on top (there are stand offs in the case to keep them apart. and remember to reconnect the antenna and rear cover fan wires. 1 screw to hold the motherboard in place. Before closing the case, make a hole in the sticker covering a hole in the case and run the cable for the android unit into the plug there. The video forgot this step, so did I, so will you probably. Then redo the 4 screws on back, 2 each top and bottom, 3 each side and put the 2 brackets back on.....all ready to go and not that tricky really.      
    • Onto the android unit. You need to remove the top screen because there is a daughterboard to put inside the case. Each side vent pops out from clips; start at the bottom and carefully remove upwards (use a trim remover tool to avoid breaking anything). Then the lower screen and controls come out, 4 screws, a couple of clips (including 3 flimsy ones at the top) and 3 plugs on the rear. Then the upper screen, 4 screws and a bunch of plugs and she is out. From there, remove the mounting brackets (2 screws each), 4 screws on the rear, 2 screws top and bottom and 3 screws holding in the small plates on each side. When you remove the back cover (tight fit), watch out for the power cable for the fan, I removed it so I could put the back aside. The mainboard is held in by 1 screw in the middle, 1 aerial at the top and 3 ribbon cables. If you've ever done any laptop stuff the ribbon cables are OK to work with, just pop up the retainer and they slide out. If you are not familiar just grab a 12 year old from an iphone factory, they will know how it works The case should now look like this:
    • Switching the console was tricky. First there were 6 screws to remove, and also the little adapter loom and its screws had to come out. Also don't forget to remove the 2 screws holding the central locking receiver. Then there are 4 clips on either side....these were very tight in this case and needed careful persuading with a long flat screw driver....some force required but not enough to break them...this was probably the fiddliest part of the whole job. In my case I needed both the wiring loom and the central locking receiver module to swap across to the new one. That was it for the console, so "assembly is the reverse of disassembly"
×
×
  • Create New...