Jump to content
SAU Community

Recommended Posts

Too late Johno, i picked up a HPI 4inch pod from JustJap this morning.

Car is at the exhaust shop, was talked into fitting a 4inch body Metal Cat,suppose to flow nearly 1000CFM of air!

Going to the tuners tomorrow afternoon, but i wont have the car back until mid next week. Adam is going to spend alot of time on the tune so it is perfect,cold start the lot.

No worries mate,

How much was the 4" metal cat if you dont mind me asking? looking at getting one soon.

OK all,

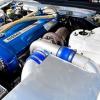
All the piping and dump/screamer has been made. The wastegate pipe is plumbed in at the moment but i can remove a section of it and put a blanking plate over the flange on the dump pipe making it a screamer. Will be only used for race use though.

post-32255-1215762682_thumb.jpg

post-32255-1215762691_thumb.jpg

Johno the cat was $350. And Paul unfortunatley due to Adam being flat out at the moment the car will be started and tuned on Wednesday.

Yes Paul it is.Was put there after they did my cams and a 100,000km service.

I did see some of your Red R Racing stickers on Daves car, wheres mine??

Will pay for a set to be made if you dont have any spare.

The old engine wasnt dead, infact it was very healthy and pumping out 250rwkw all day long.

how much of a pain was the wiring pulling the engine out and putting it back in?

Wasnt that bad surprisingly.Just make sure you label everything and put all your parts,bolts nuts in clearly labeled zip lock bags. Though there were many trips to Bunnings and Pirtek to get bits and pieces.

It also helps when one of your good friends is mechanic and has a nuts RB of his own :D

I have also learned a shit load doing everything myself, working on a motor out of the car is bliss compared to in the car.

ENGINE IS RUNNING :(

After spending all night at JEM the engine is finally running.Hats off to Adam for staying back and getting it started.

I was a bit concerned at first, with a few rounds of engine cranking we were getting no oil pressure, and we had a really weak spark.

We found that an earth was not earthed properly. As for the oil pressure, we took off one end of the turbo oil line and fed it into a plastic bottle

the plan was to let the engine idle for 5 sec to see if any oil was going anywhere. To my relief within 2 oil was gushing into the bottle.

Oil line back on,then first turn of the key with the fuel pump on and she fired right up!

WOOHOO!!

It took about 5 mins for the lifters to bleed up and after that she was puring like a kitten. So quiet for a forged motor,but i put that partially to a 5deg shop and thick oil. HOWEVER we have 2 problems:

1. The clutch is not fully disengaging and was nearly impossible to change gears. The pedal is really slack to about half travel then picks up, i need about 2-3 inches more travel to get it to disengage.

2. A wastegate issue. I asked GCG to put a spring combo of 1 bar in it,but it shot up to 18psi. Adam backed off immediately and said it looked like flattening but he didnt want to find out.

We got the car in third to do a few light runs to 3500rpm to get mixtures,timing and low rpm stuff done for the run in, as we could not go any higher due to the boost problem we called it a night. It was really disappointing not to be able to drive it home because of the clutch, but atleast i know the engine sounds nice and healthy. Bringing it onto boost sounds absolutely horn.Even Adam couldnt wipe the smile off his face.

So tomorrow its back to the shop, and bringing the car home on a truck was not the outcome i wanted. It pains me to think i have to pull the box out again JOY! Im guessing its either the clutch pivot or the pressure plate.Either way the car will be off the road for a while longer.

Wastegate is coming off and straight down to GCG. See what they can make of it.

But to some up im still very chuffed. Its taken a while to get to this point, just to hear the RB again is great. And now with the new manifolds,turbo and cat its sounds better than ever :)

Glad to read all running sweat!

clutch is a bummer, have you checked the adjustment on the pedal, the last pressure plate i put in my r33 needed adjustment, when the peddle is up against the switch the shaft should have a little slop back and forward before it moves in? i know it might sound obvious but i know how heavy those boxes are!

Congrats!!

A few minor issues but nothing major.... and how loud are the lifters on the first start up!! I thought my new engine was going to explode when I heard em on the first start up.... lol :(

Create an account or sign in to comment

You need to be a member in order to leave a comment

Create an account

Sign up for a new account in our community. It's easy!

Register a new account

Sign in

Already have an account? Sign in here.

Sign In Now


  • Similar Content

  • Latest Posts

    • So stock ECU does not like anything above 10 psi?  That Nistune one is just for "try" if it will be any different, I know it need to be tune for that. I know but YOU may know about these problem but i/we dont. They few little Skylines here let alone people who know anything about tham so that is why iam asking here  
    • So now we have a radiator with no attachments whatsoever. It lifts up with a particularly tight spot between the drivers side air box mount and the lower radiator outlet, but if you've got this far you will sort that too. This is the lower mounts with the rad out so you can see where the rubber bushes go, it is a straight shot upwards Done! Assembly is the reverse of disassembly, with blood less likely to be shed.
    • Right, onto the second last trick. The Air Con condenser is mounted to the front of the radiator and stays in the car when the radiator is removed. There are 2x 10mm headed self tappers holding the top of the condenser to the radiator, remove those The bottom of the condenser is attached to the radiator with clips. You need to lift the condenser out of those clips and clear (up, then forward). f**ked if  could work out how to do that last bit with the front bumper on. I hope you can, and you share the trick.  Bumper removal probably deserves its own thread one day once I've recovered the will to live, but basically you need to remove the wheels, front inner guard liners (clips and 10mm headed bolts), the self tapper between the guard and the bumper at the rearmost point of the bumper (same as an R32 that bit), any remaining clips at the top/front of the grill, an absolute bastard design with a plate that holds the top of the bumper above the headlight each side (only 1 bolt which is tricky to get to, but the plate catches 2 places on the bumper and must be removed....carefully!) and push clips between the bumper and guard under the headlight. If you've done all that you will be faced with wiring for the fog lights on both sides and in ADM Q50 RS at least, 4 nasty tight plugs on the driver's side for the ADAS stuff. So, the clips at the bottom look like this on drivers side (looking from the front) And on the passenger side (also from the front), you can see this one is already out Clearance on both of these are super tight; the condenser needs to move up but the upper rad support mount prevents that, and the radiator can't move down far because it is (rubber) mounted. Once you achieve the impossible and drop the condenser off those mounts so it does not stop the rad moving, you are good to go
    • OK, next the shroud needs to come off and there are a couple of tricks. Firstly, there is a loom from near the passenger side headlight to the fans, coolant temp sensor etc and there is no plug to undo.  In my case I was OK to leave the shroud on top of the engine so I just undid the passenger side fan plug and about 10 of the clips which gave enough free wire to put it aside. The fan plugs were super tight, the trick I used was a small falt screwdriver to push down on the release tab, then a larger flat screwdriver to lever the plug out of the fan unit....be careful with how much force you apply! If you need to remove the shroud altogether for some reason you will have to deal with all the plugs (tight) and clips (brittle)....good luck. I removed all of the clips and replaced them with cable ties that I will just cut next time. Also, in the Red Sport / 400R at least, the intake heat exchanger reservoir hose is bolted to the shroud in 2 places with 10mm headed bolts; so remove them (the hose stays in the car; no need to undo it at the t fittings down at the radiator lower mount. Once you've dealt with the HX hose and the wiring loom, there are 3x 10mm headed self tappers holding the top of the shroud to the radiator; remove those.   The shroud then lifts out of the bottom mounts where it sits on the radiator, up and onto the engine out of the way. Simples
    • Ok, disregard my “rate them” comment, sorry for my unrealistic input
×
×
  • Create New...