Jump to content
SAU Community

Recommended Posts

Looks great man I have a r34 gtr stag aswell and I feel your pain so much work goes into it. Goodluck and post photos of mine if you want. Full msas kit blitz carbon bonnet. Matte black

Is yours the old Viva garage one?

Mine hits the booth tomorrow morning at 6.00am

I have an hours drive before hand to get it there. Will be plenty of pic's tomorrow night if all goes well.

Finally got the car painted today

Left home at 4.45am with a good hours drive with the car on the back to the paint shop

Got home by 5.00pm with everything all painted

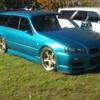
A few pic's of preping the body, a couple coming out of the booth and a few outside in the sun where the colour real shows off

Very happy with the end colour and finish

post-14923-1249814457_thumb.jpg

post-14923-1249814493_thumb.jpg

post-14923-1249814538_thumb.jpg

post-14923-1249814571_thumb.jpg

post-14923-1249814612_thumb.jpg

post-14923-1249814655_thumb.jpg

post-14923-1249814694_thumb.jpg

That looks awesome, I wasn't a big fan of your colour choice but seeing it now I think it looks great. Certainly grabs your attention but without being over the top. Hurry up and get the rest of it finished I want to see more pics.

That looks awesome, I wasn't a big fan of your colour choice but seeing it now I think it looks great. Certainly grabs your attention but without being over the top. Hurry up and get the rest of it finished I want to see more pics.

I was a bit scared of the colour choice too. The pic's do not do it the full justice. In the flesh is the sunlight it really shines.

The painter I used in the was amazing. The car will not need a buff, the finish straight off the gun is fantasic. He has a small collection of trophies in the office, just from one his customers cars. I just won best mustang 2009 in Australia and the owner gave him it to him as he did all the hard work.

The orange car under the plastic is a genuine XY GT falcon phase 3, one family owner. It had recently been fully repainted by another shop for a cost of $30K and already has rust coming thru after 3 months. These 2 guys in the pics have the job of fully redoing it. One of them is my brother-in-law (panel beater). So to only get charged $200 to paint my car I am very lucky. Plus the $2000 in paint materials and my 100+ hours of prep work.

It will be a little while till my car is fully back together and on the road. Starting tonight. the front end will be off to strip the engine bay (leave the bare engine in) to colour match and to remove the apexi turbo and fit the new Gt3076r, along with injectors, nistune, exhaust. As well as doing that, need to fit new rear brakes. sort the new bilsteins out and the change the interior. So hopefully it will be all done in the next 4-5 weeks. I have a few long nights ahead.

hey man that looks amazing. can't wait till the finished product.

if u need a hand with anything (2nd pair of hands for assembly etc) send us a PM i would be all to happy to help a fellow stag owner out.

if u need a hand with anything (2nd pair of hands for assembly etc) send us a PM i would be all to happy to help a fellow stag owner out.

Warning!!!

I am a control freak. That is why I do as much work I can myself.

Looking good Darrin! Tick-Tock, though: Jambo is fast approaching!

That colour looks sooooo good in the flesh!

Yeah lost 2 weeks due to first painter stuffing me around.

Even if I can get it together by them, it will not be tuned.

Looked at the compliance plate on the weekend, have had the car just over 3 years!!

No point rushing the last bit.

Warning!!!

I am a control freak. That is why I do as much work I can myself.

Hahahah true true mate. :D

Don't worry i'm a bit the same. I'de prefer to do it myself.

Still if u need a hand give us a bell.

I think im off to jambo too.

Is it gona b ready?

im flying up for jamboree, do you think it will be ready in time? i'll have to check it out when im up there

R u driving up Andy.

I am nearly there. The car wil be on the road this week end for the QLD SAU cruise on Sunday.

Still have have to finish bolting up the front and rear bars and side skirts, door mirrors and fit the front diffuser and eye lids as well as the autech rear wing.

I have tried painting the roof rails twice with a few problems. Need to strip them back tonight and try and get them painted again on Saturday. These are holding up the interior going back in. Need to finish removing the series 2 auto seats and fit the series 2 manual rear seat and door trims along with the evo 8 recaros. Need to make some brackets for these to suit the bride rails.

Last thing will be adjust the ride height once all the weight is back in.

Plan is to drive the car this week end on the cruise and make an appearance at the Jamboree, but not show it. Since I lost nearly 3 weeks from the my first crappy painter letting me down, the new turbo upgrade will have to stay in the box. Plan is to strip the front end off again, paint the engine bay and fit the new turbo and extra bits and get it tuned. Then it will be finished

Should have some pics of it all back together either Saturday or Sunday.

jesus mate. tick tock. might see u this sunday then.

Pulled another late night last night. Finished at midnight. 3rd night in a row. :)

Still have the roof rails to repaint, hood lining and interior pillar trims, recaro's and momo wheel to go in.

Ordered a pair of 25mm spacers for the front wheels yesterday. Hopefully fit them tonight and the front diffuser.

Apart from fitting the rear wing and eye lids, the exterior is finished.

Nearly there.

Had a guy come over last night to buy a few bits. He wants to buy the car. I need to drive it a bit before I think about selling it.

Create an account or sign in to comment

You need to be a member in order to leave a comment

Create an account

Sign up for a new account in our community. It's easy!

Register a new account

Sign in

Already have an account? Sign in here.

Sign In Now


  • Similar Content

  • Latest Posts

    • Can I suggest you try EBC directly again and link them to as many competitor catalogues as you can to show their listing is incorrect, eg https://dba.com.au/product/front-4000-series-hd-brake-rotor-dba42304/ If you have access to an R33 GTST VIN and your VIN, you could also use a Nissan Parts lookup like Amayama to show them the part number is different between 33 GTST and 34 GTT which may get their attention
    • So i got reply from EBC and they just this site where you can clearly see those 296mm fronts on R34 GTT. I send them photos and "quotes" that 296mm are not for 34 GTT and they are too small. But it will be very hard to return them cuz nobody here knows 100% and they just copy those EBC catalogue :-D https://ebcbrakesdirect.com/automotive/nissan/skyline-r34
    • Hi, is the HKS  Tower Bar still available ? negotiable ? 🤔
    • From there, it is really just test and assemble. Plug the adapter cables from the unit into the back of the screen, then the other side to the car harness. Don't forget all the other plugs too! Run the cables behind the unit and screw it back into place (4 screws) and you should now have 3 cables to run from the top screen to the android unit. I ran them along the DS of the other AV units in the gap between their backets and the console, and used some corrugated tubing on the sharp edges of the bracket so the wires were safe. Plug the centre console and lower screen in temporarily and turn the car to ACC, the AV should fire up as normal. Hold the back button for 3 sec and Android should appear on the top screen. You need to set the input to Aux for audio (more on that later). I put the unit under the AC duct in the centre console, with the wifi antenna on top of the AC duct near the shifter, the bluetooth antenna on the AC duct under the centre console The GPS unit on top of the DS to AC duct; they all seem to work OK there are are out of the way. Neat cable routing is a pain. For the drive recorder I mounted it near the rear view mirror and run the cable in the headlining, across the a pillar and then down the inside of the a pillar seal to the DS lower dash. From there it goes across and to one USB input for the unit. The second USB input is attached to the ECUtec OBD dongle and the 3rd goes to the USB bulkhead connected I added in the centre console. This is how the centre console looks "tidied" up Note I didn't install the provided speaker, didn't use the 2.5mm IPod in line or the piggyback loom for the Ipod or change any DIP switches; they seem to only be required if you need to use the Ipod input rather than the AUX input. That's it, install done, I'll follow up with a separate post on how the unit works, but in summary it retains all factory functions and inputs (so I still use my phone to the car for calls), reverse still works like factory etc.
    • Place the new daughterboard in the case and mount it using the 3 small black rivets provided, and reconnect the 3 factory ribbon cables to the new board Then, use the 3 piggyback cables from the daughterboard into the factory board on top (there are stand offs in the case to keep them apart. and remember to reconnect the antenna and rear cover fan wires. 1 screw to hold the motherboard in place. Before closing the case, make a hole in the sticker covering a hole in the case and run the cable for the android unit into the plug there. The video forgot this step, so did I, so will you probably. Then redo the 4 screws on back, 2 each top and bottom, 3 each side and put the 2 brackets back on.....all ready to go and not that tricky really.      
×
×
  • Create New...