Jump to content
SAU Community

Recommended Posts

hey stageatype S....i was wondering where did you end up buying your front quarter panels on your car from? because i found the masa motorsport R34 conversion, but they dont have your quarter panels.

I order them direct from Masa in Japan.

If you are in OZ, I organised copies to be made. Contact CCubed in Sydney for them, they own the moulds. Aprrox 600-650 pair

Do not buy any of the cheap copies of ebay extra

What other Masa parts have you found, as most of the other bits need are genuine R34 gtr

Since my thread has been bumped, a bit of an update

Currently working on the car every night tring to get it finished for a drag day on the 29th May

I have a list of over 20-25 items still need to be done, some alot bigger then others.

Hopefully get the final engine work done this week, modify exhaust and fmic piping next week and then on the dyno the following week.

Plus supsension and brake work as well.

No pic's, you will have to wait until it is all done

Will you have the FFP installed? I got my batteries yesterday and am fitting them now. Very happy I did not have to move washer bottle.

Plenum is bolted up. vac lines done. Still need to throttle body and cable and fit injectors.

A couple pic's of engine and rebuilt rear calipers went on tonight. Will do the front and bleed as well tonight

sorry crappy iphone pic's

post-14923-1273577249_thumb.jpg

post-14923-1273577365_thumb.jpg

  • 2 weeks later...

All mechanical work is know done with a couple of minor things getting finished off at the tuners. Dropped the car off last Friday after inishing at 2.30am in the morning tring to get it all done, and will be on the rollers tomorrow.

Will be picked up Wednesday arvo if all goes well.

Still have to refit the front guards, bonnet, head lights and front bar before Saturday.

Running it down the strip at Willowbank for a couple of hours to see what it can do.

Can't wait!!!!!!!!!!!

where did you end up taking it to get tuned darrin? hopefully you don't have the same boost creep problem i was having on the gcg dump.

EFI Performance

Not shaw how it will go. I had it at the exhaust shop last Wednesday for 7-8 hours getting the exhuast to fit (it was bent is 3 places) plus intercooler piping changes to suit turbo and inlet plenum.

I ended up with a HKS silent cat back which 3 inch with a canon on the rear and a large centre resinator. The problem with that is the resinator only has approx a 2 1/2 pipe thru the middle, so that may restrict it a little.

Are you free Saturday arvo?

what power level are you hoping for?

i have a HKS system but the 409 not the silent, i think they are the same just one is shinny stainless. i never looked down the centre muffler, i bet its the same to :cheers: . though mine seems to flow good enough. i'm blaming the split dump for the creep, i opened up the wastegate pipe entry at the flange and it helped. still get the occasional spike. think i may mod it to be a bellmouth.

yeah i should be free, i haven't made any plans as of yet. why's that?

Edited by QWK32
what power level are you hoping for?

i have a HKS system but the 409 not the silent, i think they are the same just one is shinny stainless. i never looked down the centre muffler, i bet its the same to :D . though mine seems to flow good enough. i'm blaming the split dump for the creep, i opened up the wastegate pipe entry at the flange and it helped. still get the occasional spike. think i may mod it to be a bellmouth.

yeah i should be free, i haven't made any plans as of yet. why's that?

It has enough bolt on's to get to 300rwkw, as long as there is no issues

Will have to wait and see. Will be limited to stock head gasket, so 18-19psi

Sat arvo QLD SAU drag day. I think I get 1 free passenger entry included. My son is going, under 13 are free. Otherwise $20 to watch.

The car is now running and ready to go on the dyno

Has not been run for over 7-8 months

Very excited :rofl2:

let us know how it goes mate, i'm keen to see the results. i'll let you know if i'm going to head out on saturday, i don't mind paying the spectator fee if i have to. hopefully 2 hours is enough to get a few runs in.

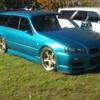
heres the wheels i have used on my stag, dont comment on height lol, i kno it needs to be lower, but its for sale so dont think ill bother

cx7 wheels, need massive spacers to get flush, so didnt bother

15853_179508370016_618585016_2904634_6802008_n.jpg

weds sport wheels, 17x9+18 just sit out of guards

28503_404126370016_618585016_4178075_1634909_n.jpg

28503_404126390016_618585016_4178079_6419441_n.jpg

Edited by sheepus
let us know how it goes mate, i'm keen to see the results. i'll let you know if i'm going to head out on saturday, i don't mind paying the spectator fee if i have to. hopefully 2 hours is enough to get a few runs in.

Should be picking it up this arvo if there are no issues. Not sure if I will get much work done tonight on it, State of Origin is on (Go Queensland)

Will get the full front on Thursday night, drive to it work on Friday, 75km round trip and then race Saturday. Hopefully

Put the new wheels on the other day, 19x9.5 +12 but they are B disk and they clear the r34 calpiers by about 1mm!!!

Grabbed some 3mm spacers yesterday just to be sure.

If it had r33 calipers, they would have not fitted.

Don't use crappy Chinese copy parts!!!!

The hks copy fuel rail is still leaking, now around the fuel entry

They are going to remove it from the car as it is not square on the ends and the screw in fittings are not sealling. Need to mill the end square

First few power runs were seeing over 200rwkw's at 14psi when rail was leaking.

After bagging doggy chinese stuff, I need to kick my own rear end

Due to running out of time getting the piping done, I made a very doggy BOV return line from high pressure PVC pipe to "just get the car going"

The tuner stopped due to worring about it blowing apart on the dyno.

So I will be picking up a new metal pipe from the exhuast shop tonight as well as picking up the car.

Will have to remain as is until next week when I can get it back on the dyno.

Anyway it is making 330rwhp (246rwkw) at only 15psi.

Tuner advised it was still making easy power and should get to the magic 400rwhp figure I want.

Create an account or sign in to comment

You need to be a member in order to leave a comment

Create an account

Sign up for a new account in our community. It's easy!

Register a new account

Sign in

Already have an account? Sign in here.

Sign In Now


  • Similar Content

  • Latest Posts

    • Can I suggest you try EBC directly again and link them to as many competitor catalogues as you can to show their listing is incorrect, eg https://dba.com.au/product/front-4000-series-hd-brake-rotor-dba42304/ If you have access to an R33 GTST VIN and your VIN, you could also use a Nissan Parts lookup like Amayama to show them the part number is different between 33 GTST and 34 GTT which may get their attention
    • So i got reply from EBC and they just this site where you can clearly see those 296mm fronts on R34 GTT. I send them photos and "quotes" that 296mm are not for 34 GTT and they are too small. But it will be very hard to return them cuz nobody here knows 100% and they just copy those EBC catalogue :-D https://ebcbrakesdirect.com/automotive/nissan/skyline-r34
    • Hi, is the HKS  Tower Bar still available ? negotiable ? 🤔
    • From there, it is really just test and assemble. Plug the adapter cables from the unit into the back of the screen, then the other side to the car harness. Don't forget all the other plugs too! Run the cables behind the unit and screw it back into place (4 screws) and you should now have 3 cables to run from the top screen to the android unit. I ran them along the DS of the other AV units in the gap between their backets and the console, and used some corrugated tubing on the sharp edges of the bracket so the wires were safe. Plug the centre console and lower screen in temporarily and turn the car to ACC, the AV should fire up as normal. Hold the back button for 3 sec and Android should appear on the top screen. You need to set the input to Aux for audio (more on that later). I put the unit under the AC duct in the centre console, with the wifi antenna on top of the AC duct near the shifter, the bluetooth antenna on the AC duct under the centre console The GPS unit on top of the DS to AC duct; they all seem to work OK there are are out of the way. Neat cable routing is a pain. For the drive recorder I mounted it near the rear view mirror and run the cable in the headlining, across the a pillar and then down the inside of the a pillar seal to the DS lower dash. From there it goes across and to one USB input for the unit. The second USB input is attached to the ECUtec OBD dongle and the 3rd goes to the USB bulkhead connected I added in the centre console. This is how the centre console looks "tidied" up Note I didn't install the provided speaker, didn't use the 2.5mm IPod in line or the piggyback loom for the Ipod or change any DIP switches; they seem to only be required if you need to use the Ipod input rather than the AUX input. That's it, install done, I'll follow up with a separate post on how the unit works, but in summary it retains all factory functions and inputs (so I still use my phone to the car for calls), reverse still works like factory etc.
    • Place the new daughterboard in the case and mount it using the 3 small black rivets provided, and reconnect the 3 factory ribbon cables to the new board Then, use the 3 piggyback cables from the daughterboard into the factory board on top (there are stand offs in the case to keep them apart. and remember to reconnect the antenna and rear cover fan wires. 1 screw to hold the motherboard in place. Before closing the case, make a hole in the sticker covering a hole in the case and run the cable for the android unit into the plug there. The video forgot this step, so did I, so will you probably. Then redo the 4 screws on back, 2 each top and bottom, 3 each side and put the 2 brackets back on.....all ready to go and not that tricky really.      
×
×
  • Create New...